background image

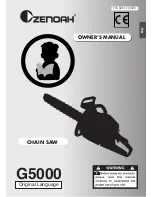
G5000

G

B

GB-13

Place the file on the cutter and push straight forward.
Keep the file position as illustrated.

After each cutter has been filed, check the depth gauge
and file it to the proper level as illustrated.

4. Spark plug

Clean the electrodes with a wire brush and reset the gap to
0.65 mm as necessary.

5. Sprocket

Check for cracks and for excessive wear interfering with the
chain drive. If the wear is considerable, replace it with new
one. Never fit a new chain on a worn sprocket, or a worn chain
on a new sprocket.

6.   Front and Rear dampers

Replace if adhered part is peeled or crack is observed on the
rubber part.

2. Fuel filter

(a) Using a wire hook, take out the filter from the filler port.

(b) Disassemble the filter and wash with gasoline, or replace

with a new one if needed.

 NOTE

• After removing the filter, use a pinch to hold the end

of the suction pipe.

• When assembling the filter, take care not to allow fil-

ter fibers or dust inside the suction pipe.

3.  Oil tank

With a wire hook, take out the oil filter through the filler port and
clean in gasoline. When putting the filter back into the tank,
make sure that it comes to the front right corner. Also clean off
dirt in the tank.

Fuel filter

8. Maintenance of Saw Chain and Guide Bar

Appropriate gauge checker

■ 

Saw Chain


 WARNING

• It is very important for smooth and safe operation

to always keep the cutters sharp.

The cutters need to be sharpened when:
• Sawdust becomes powder-like.
• You need extra force to saw in.
• The cut path does not go straight.
• Vibration increases.
• Fuel consumption increases.

Cutter setting standards:


 WARNING

• Be sure to wear safety gloves.

Before filing:
• Make sure the saw chain is held securely.
• Make sure the engine is stopped.
• Use a round file of proper size for the chain.
Chain type:

21BPX

File size:

3/16 in (4.8 mm)

NGK
BPMR7A

Depth gauge standard

0.025

″″″″″

 (0.64 mm)

Make the shoulder round

Oil filter

0.6 ~ 0.7 mm

Summary of Contents for G5000

Page 1: ...G5000 G B GB 1 G5000 OWNER S MANUAL CHAIN SAW G B 115 32 01 10 001 Original Language...

Page 2: ...s Never touch hot surface 2002 44 EC A 8 SOUND LEVEL VIBRATION LEVEL Rear handle G5000 49 3cm3 100 5 dB A 112 dB A 4 1 m s2 4 9 m s2 2 8 m s2 3 3 m s2 LwA LpA Front handle ISO 22868 ISO 22867 Rear han...

Page 3: ...F THE MACHINERY DIRECTIVE Directive 2006 42 EC AND TO THE NATIONAL REGULATIONS GOVERNING ITS TRANSPOSITION ABROAD AND THAT IT HAS BEEN ISSUED WITH A CE CERTIFICATE NO M3 2992705 01 by TUV Rheinland Gr...

Page 4: ...e 9 Always hold the chain saw firmly with both hands when the engine is run ning Use a firm grip with thumb and fingers encircling the chain saw handles 10 Keep all parts of your body away from the sa...

Page 5: ...rip with thumbs and fin gers encircling the chain saw handles A firm grip will help you re duce kickback and maintain control of the saw 3 Make certain that the area in which you are cutting is free f...

Page 6: ...up chain oil Position Oil cap Setting the switch to the position the engine starts Setting the switch to the O position the engine stops immediately Position Rear left of the unit d Choke will close w...

Page 7: ...ntly as a loose chain can easily derail or cause rapid wear of itself and the guide bar 3 Installing Guide Bar and Saw Chain A standard saw unit package contains the items as illustrated Open the box...

Page 8: ...pping the used mixed oil con tainer scrap it only at an authorized repository site NOTE As for details of quality assurance read the description in the section Limited Warranty carefully Moreover nor...

Page 9: ...usting take the following steps NOTE Be sure to adjust the carburetor with the bar chain at tached WARNING It is very dangerous to run a chainsaw that mounts broken parts or lacks any parts Before sta...

Page 10: ...heck the screen and keep it clean of saw dust NOTE When using the unit at times when it is snowing Zenoah recommends that you also use a snow protector effec tive in preventing the air filter from fre...

Page 11: ...forward The chain should stop immediately with the en gine at full speed If the chain is slow to stop or does not stop replace the brake band and clutch drum before use It is extremely important that...

Page 12: ...one third and finish by sawing down from the top In area B saw down from the top one third and finish by sawing up from the bot tom Cutting the limbs of Fallen Tree First check to which side the limb...

Page 13: ...d of the suction pipe When assembling the filter take care not to allow fil ter fibers or dust inside the suction pipe 3 Oil tank With a wire hook take out the oil filter through the filler port and c...

Page 14: ...ce with a new plug Case 2 Lack of power Poor acceleration Rough idling Case 3 Oil does not come out Check fuel for water or substandard mix ture Check air filter and fuel filter for clog ging Check ca...

Page 15: ...PART WHICH IS SCHEDULED FOR REPLACEMENT AS REQUIRED MAINTENANCE SHALL BE WARRANTED FOR THE PERIOD OF TIME UP TO THE FIRST SCHEDULED REPLACEMENT POINT FOR THE PART ANY REPLACEMENT PART THAT IS EQUIVALE...

Reviews: