background image

25

RECORDING 

NORMAL RECORDING

PREPARATION

Turn on the power of both the VCR and TV.

Tune the TV to the VCR output channel (CH 3 or 4).

If a direct VIDEO/AUDIO connection is made between the
VCR and the TV, set the TV’s source selector to VIDEO.

If you are recording from an external source via audio/video
input jacks (at the Rear or Front panel), select LINE1 or LINE2
using the 

INPUT 

button.

This VCR is not designed to record in LP mode.

Recording will start. (REC will appear)  

If a cassette with no safety tab is loaded, the cassette will be
ejected automatically.

If the tape reaches the end before 

STOP

is pressed, the VCR

will automatically stop, rewind, eject, and turn itself off.

During the RECORDING mode...

RECP will show on the VCR indicator panel.

After 5 minutes in pause mode, the tape will be stopped
automatically to protect the tape and the video heads. 

The VCR indicator disappears.

To record one TV program while watching another

To PAUSE the recording

1.

Insert the video cassette with the safety tab in place.

2.

Select the desired channel by using 

CH/TRK (

/

)

.

3.

Set the desired speed (SP or SLP) using 

SP/SLP

.

4.

Set the MTS mode as desired (See page 15, 33).

5.

Press 

REC/ITR

once.

6.

Press 

STOP

to stop recording.

1.

Press 

PAUSE

to pause the tape.

2.

When you want to continue recording, press 

PAUSE

again

or press 

REC/ITR

.

Always use 

PAUSE 

for

best results when making
changes during recording.
For example: To change
channels during recording,
first press 

PAUSE

to put

the unit in pause mode.
Then select the desired
channel on the VCR, and
press 

PAUSE

again to

resume recording.

1.

Press 

TV/VCR

to select the TV mode during recording.

2.

Using the TV tuner, select the channel to be viewed.
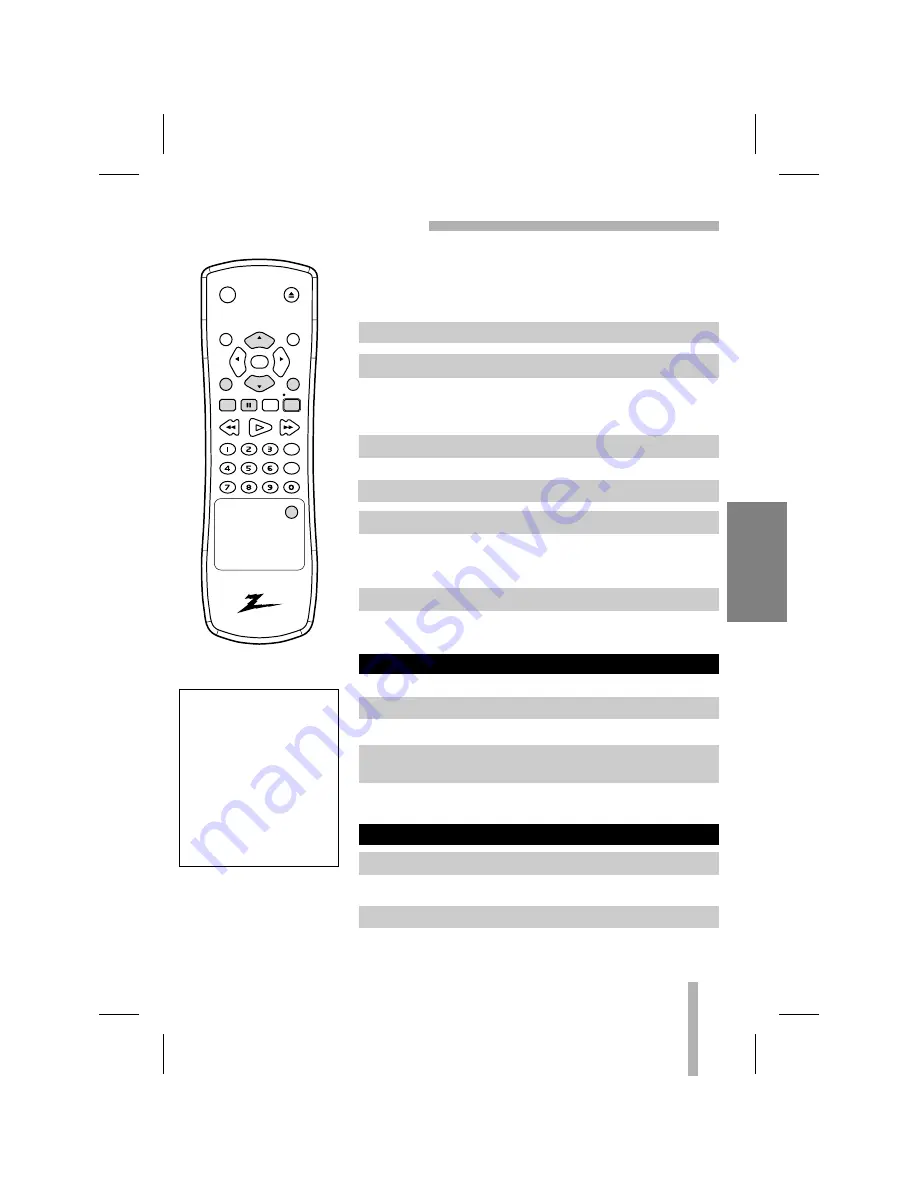
eject

power

menu

clear

sp / slp

tv / vcr

stop

rew

play

ff

cm skip

EZ review

pause

slow

rec / itr

ch/trk

adj

enter

ch/trk

adj

input

Summary of Contents for VCM322

Page 1: ... Copyright 2003 Zenith Electronics Corporation Installation and Operating Guide Warranty Model Numbers VCS342 VCM322 Video Cassette Recorders ...

Page 2: ...an for help FCC WARNING This equipment may generate or use radio frequency energy Changes or modifications to this equipment may cause harmful interference unless the modifications are expressly approved in the instruction manual The user could lose the authority to operate this equipment if an unauthorized change or modification is made FCC COMPLIANCE The responsible party for this product s comp...

Page 3: ...ications 37 Warranty Back Cover Auto Clock Set System Energy Save Function Easy Operations MTS Hi Fi Stereo 1 Year 8 Event Timer with DAILY and WEEKLY Functions Auto Power and Playback Functions Instant Timer Recording Real Time Tape Counter Tape Remaining Time Clean Still Slow Frame Advance Commercial Skip Auto Tracking Function Auto Head Cleaner Onscreen Function Display Trilingual Onscreen Prog...

Page 4: ...ne wider than the other A grounding type plug has two blades and a third grounding prong The wide blade or the third prong are provided for your safety If the provided plug does not fit into your outlet consult an electrician for replacement of the obsolete outlet 10 Protect the power cord from being walked on or pinched particularly at plugs conve nience receptacles and the point where they exit ...

Page 5: ...Manual Digital Tracking Yes Yes Instant Recording Yes Yes Timer Controlled Recording Yes Yes Auto Playback Tape Speed Adjust Yes Yes Slow Motion Video 4 head VCR Yes 1 19 Yes 1 19 Pause Still Video Clear Clear Real Time Tape Counter Yes Yes Visual Search Yes Yes Logic Search Yes Yes CM Skip Yes Yes English Spanish French Menus Yes Yes 1 Year 8 Event Timer Yes Yes Message Center Front Panel Display...

Page 6: ...OUT IN R L AUDIO VIDEO VHF UHF CATV ANT IN AUDIO LINE1 AUX1 R L IN IN OUT OUT ANT IN VIDEO CH 3 4 VHF UHF CATV Back Panel of Typical Cable Box CH3 CH4 CABLE OUT IN Back Panel of Stereo VCR Connection Panel of Typical TV IN IN OUT OUT R L AUDIO VIDEO VHF UHF CATV ANT IN Cable TV Wall Jack This cable is provided with your VCR Turn off power or unplug VCR before making any connections Turn off power ...

Page 7: ...V Back Panel of Stereo VCR OUT IN OUT IN R AUDIO L VIDEO Jack panel of Accessory A V cables are not provided with VCR AUDIO VIDEO A V CONNECTIONS TO TV CONNECTIONS WITHOUT A CABLE BOX Turn off power or unplug VCR before making any connections Turn off power or unplug VCR before making any connections Accessory Component Another VCR Camcorder Video Camera Satellite Receiver Laser Disc Player ...

Page 8: ...frared remote control CHANNEL D D E E To scan up or down through memorized channels page 16 or to manually adjust the tape s picture onscreen page 21 VCR Function Indicator Panel Details are on the next page REC ITR To record normally page 25 or to activate Instant Timer Recording page 29 PAUSE To put playback on still page 23 or to pause recording page 25 FF Fast Forward To advance the tape durin...

Page 9: ...he tape speed As you change channels the channel numbers appear The current time shows even while the VCR is off Playback Messages FF Fast Forward Tape is advancing rapidly CUE Tape is advancing rapidly in playback mode for visual search REV Tape is reversing rapidly in playback mode for visual search PLAY Tape is playing at normal playback speed REW Rewind Tape is rewinding rapidly SLW Tape is pl...

Page 10: ...hannel 3 or 4 VHF UHF CATV ANTENNA OUTPUT CONNECTOR Connect this terminal to the VHF or UHF antenna terminals on the back of a TV WARNING Do not drop the power cord tying band into the unit Doing so might cause a fire or an electrical shock 10 VCR SETUP The CH3 CH4 switch on the VCR s back panel determines which channel the VCR uses to send video signals to your TV The TV must be tuned to the same...

Page 11: ...yback page 24 CM SKIP To fast forward picture search through 30 seconds of recording page 24 EZ REVIEW Replays the specified segment twice INPUT Select the VCR s line input or tuner NUMBER buttons Use these buttons numbered 0 9 to select a channel The remote control is used for most of the operations and features of the VCR Before proceeding put batteries in the remote and become familiar with the...

Page 12: ...l of the VCR The remote control will not operate properly if something comes between the VCR and the remote control If the effective range is short try new batteries An object between the VCR and remote control may block the invisible light beam and operation will be impossible Batteries installed with incorrect polarity may leak and damage your Remote Control Do not mix old and new batteries or c...

Page 13: ... when a cassette is inserted Also the remaining tape length indicator appears after any tape operation NOTES eject power menu clear sp slp tv vcr stop rew play ff cm skip EZ review pause slow rec itr ch trk adj enter ch trk adj PLAY HI FI CH 4 SP STEREO JUL 5 SAT 2 15 PM FUNCTION DISPLAY Indicates the function in progress HI FI DISPLAY Indicates the unit is playing back a tape recorded in HI FI CH...

Page 14: ... MONTH JANUARY DAY 1 WED YEAR 2003 TIME 12 00 AM SELECT TO EXIT PRESS ADJUST AUTO CLOCK SET ON DAYLIGHT SAVING AUTO TIME ZONE AUTO CLOCK PROGRAM TUNING SETUP SELECT TO EXIT PRESS ENTER SELECT TO EXIT PRESS ADJUST PROGRAM 1 MONTH DAY START STOP CHANNEL SPEED REPEAT AUTO CHANNEL SET TUNING BAND TV CH ADD DEL CH 2 ADD SOURCE SELECT TUNER SELECT TO EXIT PRESS ADJUST FUNCTION OSD ON LANGUAGE SELECT ENG...

Page 15: ...ponding receiving mode Stereo or SAP regardless of the selected position For normal operation the display should be in the STEREO posi tion The VCR will then record a STEREO program when available and record a mono program if the program is NOT IN STEREO For weak STEREO and or SAP broadcasts changing the dis play to mono may give clearer sound Used during playback when AUDIO MODE display HI FI NOR...

Page 16: ... TUNER SELECT TO EXIT PRESS ADJUST AUTO CHANNEL SET TUNING BAND TV CH ADD DEL CH 2 ADD SOURCE SELECT TUNER SELECT TO EXIT PRESS ADJUST AUTO CHANNEL SET PROCEEDING CHANNEL 13 TO EXIT PRESS AUTO CHANNEL SET TUNING BAND TV CH ADD DEL CH 2 ADD SOURCE SELECT TUNER SELECT TO EXIT PRESS ADJUST AUTO CHANNEL SET TUNING BAND TV CH ADD DEL CH 2 ADD SOURCE SELECT TUNER SELECT TO EXIT PRESS ADJUST 1 Press MENU...

Page 17: ...terference occurs move the VCR away from the TV NOTES Turn on the TV and tune it to the channel that you wish to watch Set POWER to OFF ADD DELETE AUTO CHANNEL SET TUNING BAND TV CH ADD DEL CH 2 ADD SOURCE SELECT TUNER SELECT TO EXIT PRESS ADJUST This feature allows you to add or erase channels from memory manually Repeat steps 3 and 4 to add or erase channels TO ADD OR ERASE CHANNELS FROM MEMORY ...

Page 18: ...ssette into the unit Make certain that the cassette is inserted correctly If the cassette is not loaded correctly the VCR will eject the cassette automatically after approximately 3 seconds Press STOP EJECT twice or press EJECT on the remote control The cassette will be ejected automatically After the cassette is visible in the tape slot pull it out to remove it Unloading the cassette is possible ...

Page 19: ...setting the clock are on the remote control An illogical date will not be accepted for example February 30 The initial Clock Setting is JANUARY 1 2003 12 00 AM MAIN MENU CLOCK MENU CLOCK PROGRAM TUNING SETUP SELECT TO EXIT PRESS ENTER MONTH JANUARY DAY 1 WED YEAR 2003 TIME 12 00 AM SELECT TO EXIT PRESS ADJUST AUTO CLOCK SET ON DAYLIGHT SAVING AUTO TIME ZONE AUTO 1 Press MENU and the MAIN menu will...

Page 20: ...AVING AUTO TIME ZONE AUTO MONTH JULY DAY 5 SAT YEAR 2003 TIME 2 15 AM SELECT TO EXIT PRESS ADJUST AUTO CLOCK SET OFF DAYLIGHT SAVING AUTO TIME ZONE AUTO 1 Press MENU and the MAIN menu will appear 2 Use D D or E E to choose the CLOCK menu Press ENTER and the CLOCK menu will appear 3 Use F F or G G to choose the month 4 Use E E to choose the DAY option Use F F or G G to choose the day 5 Use E E to c...

Page 21: ...re STOP is pressed the VCR will automatically stop rewind eject and it will turn itself off AUTO TRACKING The automatic tracking function adjusts the picture to remove snow or streaks The AUTO TRACKING function works in the following cases A tape is played back for the first time Tape speed SP LP SLP changes Streaks or snow appear because of scratches on the tape MANUAL TRACKING If noise appears o...

Page 22: ...pecially helpful when you finish watching a tape Press STOP REW and POWER The VCR will rewind the tape and turn itself off automatically 1 Press STOP when you finish watching a tape 2 Press REW to rewind the tape 3 Press POWER during the REWIND mode the VCR will enter the AUTO POWER SHUT OFF mode 4 REW will flash on the VCR indicator panel 5 After tape is rewound VCR will turn off automatically AU...

Page 23: ... mode for more than 3 min utes the VCR will automatically enter the PLAY mode to protect the tape and video heads The VCR must be in the STOP Mode Visual search Cue Review begins so you can check what is on the tape The CUE or REVIEW mode will continue until the FF or REW button is released LOGIC SEARCH FUNCTION VISUAL SEARCH FUNCTION TO WATCH A STILL or Frame Advance PICTURE 1 Press PAUSE 3 To co...

Page 24: ... 19 times slower than the normal speed During slow playback CH TRK D D E E on the Remote Control can be used to minimize noise bands If slow mode continues for more than 3 minutes the VCR will automatically change to PLAYBACK mode This is useful for skipping commercials or short program segments During PLAYBACK mode The tape will fast forward picture search through 30 seconds of recording The skip...

Page 25: ...ed automatically to protect the tape and the video heads The VCR indicator disappears To record one TV program while watching another To PAUSE the recording 1 Insert the video cassette with the safety tab in place 2 Select the desired channel by using CH TRK 3 Set the desired speed SP or SLP using SP SLP 4 Set the MTS mode as desired See page 15 33 5 Press REC ITR once 6 Press STOP to stop recordi...

Page 26: ...e and date before proceeding The display contents will be automatically replaced by TV programs after 3 minutes Make sure a tape is in the VCR and the safety tab is in place or the tape will be automatically ejected CLOCK PROGRAM TUNING SETUP SELECT TO EXIT PRESS ENTER AUTO CHANNEL SET TUNING BAND TV CH ADD DEL CH 2 ADD SOURCE SELECT TUNER SELECT TO EXIT PRESS ADJUST SELECT TO EXIT PRESS ADJUST PR...

Page 27: ...he cable box instead of the VCR Example SP The AUTO mode determines how much tape is left and switches speed from SP to SLP if necessary to complete recording the program There will be some picture and sound distortion at the point of the speed change Example ONCE If the recording data is wrong Use D D to select the data and correct it using F F or G G ONCE event for recording up to 8 programs on ...

Page 28: ...AM 7 00 PM 8 00 PM 9 00 PM 10 00 PM Prog No 1 These portions will not be recorded Prog No 2 Prog No 3 The VCR must be off for Timer Recording to work 1 Press MENU and the MAIN menu will appear 2 Use D D or E E to choose the PROGRAM menu Press ENTER and the PROGRAM menu will appear 3 Use F F or G G to select a program you want to check or erase If you want to erase the program press CLEAR 4 Press M...

Page 29: ... the end of recording the display will read 0H00 the VCR will stop recording and shut off During Instant Timer Recording changing the channel on the VCR will not be possible You can stop the recording by pressing STOP Press REC ITR once to check the recording time The recalled setting will automatically return to the TV screen after 6 seconds The recording time can be extended anytime by pressing ...

Page 30: ...t channel LINE1 Select LINE1 or LINE2 A V input channel using INPUT 3 Play the tape in the camcorder or another VCR If you have a TV connected to your VCR you can see the video playing 4 When you desire recording to begin press VCR s REC ITR once to start Before recording please confirm the recording start position NOTE If you wish to edit or dub your camcorder or another VCR recordings to this VC...

Page 31: ...on the TV screen Program Details Length Indicates the run length of a program Time Remaining Indicates the remaining time of a program Rating Indicates the rating of the current program N A G PG PG 13 R NC 17 X and Not Rated The rating N A means that the motion picture ratings are not applicable to this program EASY INFORMATION EASY REVIEW EASY OPERATION Easy Information Screen Program details Eas...

Page 32: ...ard from the right speaker LEFT POSITION The left channel sound L is heard from both speakers RIGHT POSITION The right channel sound R is heard from both speakers Adjust volume at your stereo system PLAYBACK WITH Hi Fi STEREO AUDIO SOUND 1 Set the AUDIO MODE option to HI FI on the SETUP menu 2 Set the AUDIO OUTPUT option to STEREO position 3 Insert a cassette and press PLAY FUNCTION OSD ON LANGUAG...

Page 33: ...the BROADCAST TYPE option to select the desired record ing mode STEREO or SAP Some stations transmit a Second Audio Program which is used for a second language or additional information When the sta tion broadcasts a Second Audio Program follow the procedure below to record the SAP You are now recording the program you see and hear on the TV SAP Second Audio Program RECORDING MTS Multi Channel TV ...

Page 34: ... TIME COUNTER 1 Begin recording or playing a tape 2 Press ENTER repeatedly to display the real time counter on the TV screen 3 At the point you want to locate later reset the real time counter to 0 00 00 by pressing CLEAR 4 Continue to play or record 5 Press STOP when recording or playback finishes 6 Press REW eject power menu clear sp slp tv vcr stop rew play ff cm skip EZ review pause slow rec i...

Page 35: ... the correct channel you wish to record The channel that is being recorded can always be checked by tuning the television to the VCR channel 3 or 4 and pressing the TV VCR selector to turn the VCR s VCR indicator on Do not attempt to hook up more than one television set to the VCR for either recording or playback 1 Press PLAY and watch the program until you reach the exact point where you want the...

Page 36: ...ake VCR to Service Center for service Weak or dead batteries Remote IR signal to sensor on VCR being blocked Reset time according to instructions Power has been interrupted Set up recording time according to instructions Be sure the AM PM setting on display is correct VCR must be turned off for Timer to work The cassette has had the safety tab removed Stick a piece of cello phane tape over the saf...

Page 37: ...5 ohms VHF 75 ohms VHF Output Signal Channel 3 or 4 Switchable Channel Coverage VHF 2 13 UHF 14 69 CATV 1 125 4A A W W 1 W 84 A 5 A 1 Video Signal System EIA Standard 525 lines 60 fields NTSC type color signal Input 1 0 Vp p 75 ohms unbalanced Output 1 0 Vp p 75 ohms unbalanced Signal to Noise Ratio More than 43 dB SP mode FM audio VCS342 only Frequency Range 20Hz to 20kHz Dynamic Range More than ...

Page 38: ... RA During the Warranty Period Zenith will send you a return shipping label After you obtain RA for return please box your unit with a copy of the sales receipt and enough packing material to ensure undamaged delivery of your product When you receive the label place it on the box and call the 800 in the instruction for pick up When your unit is received Zenith will repair or replace your unit in a...

Reviews: