- 11 -
ADJUSTMENT INSTRUCTIONS
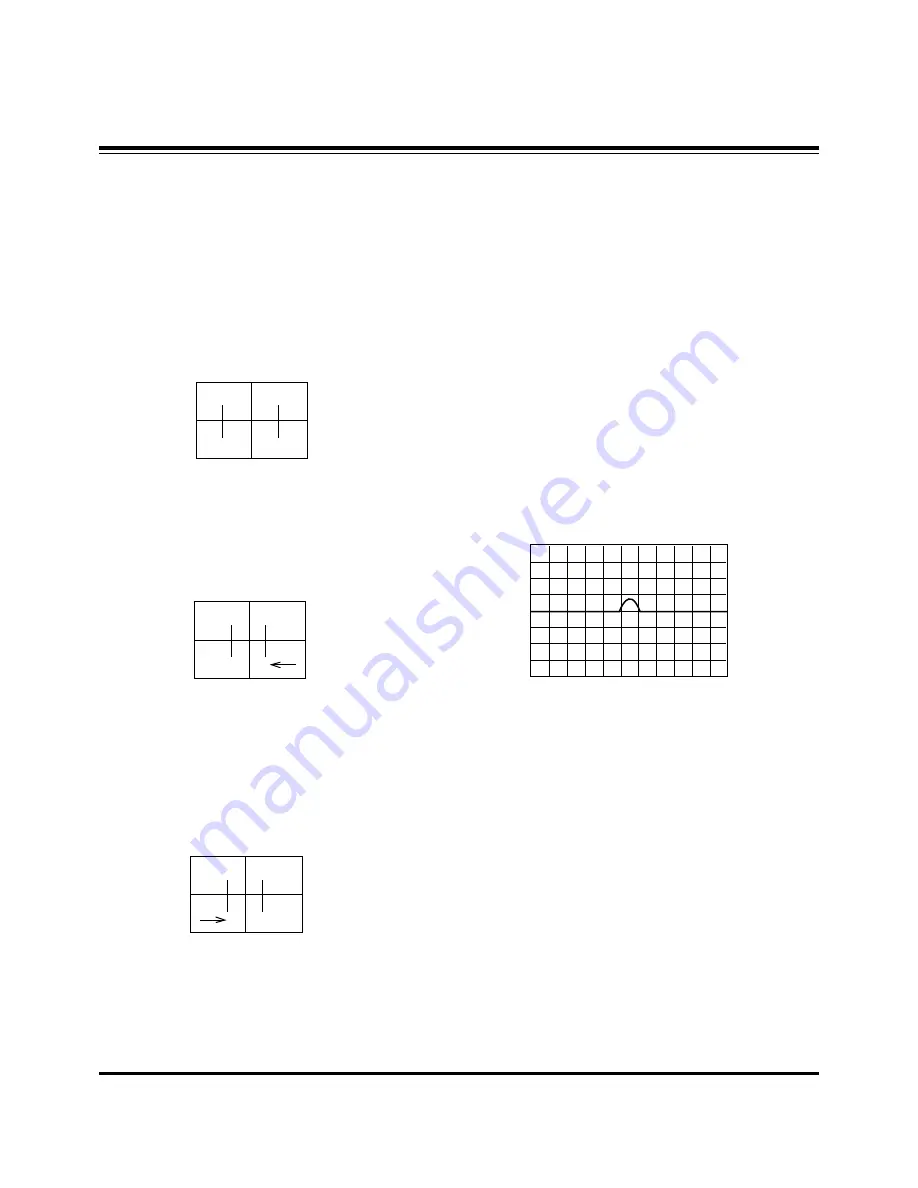
8-2. Green Lens Adjustment
(1) Turn the lens until the chromatic aberration changed Blue
to Red point.
(2) Observing all screen, if the tendency of chromatic
aberration is non-linear, adjust to appear Red chromatic
aberration in 3.5 Cross-Hatch section at center screen.
At this time, in case that the difference of bright line of Red
chromatic aberration is not equal at both sides, adjust to
have more Red chromatic aberration.
(3) Switching the signal to 13CH and operate adjustment
minutely.
(4) Adjust Green focus control volume of focus pack so that
the external big circle's part appeared cleary.
(5) Adjust accurately by repeat the upper control.
(6) Repeat steps 1-4 until this adjustment is correct.
8-3. Red Lens Adjustment
(1) Turn the lens until the chromatic aberration changed
orange to scarlet.
(2) Adjust the chromatic aberration so it is centered correctly.
(3) Use the same method for the Red focus as was used for
the Green focus.
8-4. Blue Lens Adjustment
(1) Rotate the lens until the chromatic abberration of 3.5
Cross-Hatch left from center point changes from Violet to
Green. Adjust the chromatic abberration to be center point
between violet and green.
(2) Adjust the chromatic aberration become center of purple
and green.
(3) Use the same method for the Blue focus as was used for
the Green focus.
8-5.
After adjustment Red, Green & Blue lens, remove lens
cover and receive Cross-Hatch pattern and check the
overall focus. If need, repeat above.
9. Convergence Adjustment
9-1. Preliminary steps
(1) This adjustment should be performed after warming up 60
minutes.
(2) This adjustment should be performed after vertical
/horizontal raster position, beam alignment magnet and
focus adjustment.
(3) Always apply a signal during this adjustment.
(4) Adjust uses the JIG part number screen which is lattice
pattern.
9-2. Adjustment
(1) Select ADJ key on the service remote Control and then
select “3 Convergence” move the cursor or using the key
No.
(2) Horizontal/Vertical phase Adjustment
1) Press the button 9 & 5 to get into the phase adjustment
mode.
2) Horizontal phase Adjustment : Move the convex portion
to the middle of TV screen. Adjust the right and left
height of second lattice into same height.
(Using the
F
,
G
buttons)
(3) Horizontal Pattern Position Adjustment
1) Press the button 9 & 4 to get into the pattern shift mode.
2) Adjust the pattern and image to be pile up by pressing
the MUTE key.
3) Adjust the center of pattern and image to be agree.
(Using the
F
,
G
,
D
,
E
buttons)
4) Use the (ENTER) button to exit this adjustment.
5) To save the adjustment data press 9, 2 then ENTER.
(4) Convergence Automatic Adjustment
Convergence adjust uses the PC and Camera
automatically in basic, after automatic adjusting against the
portion where the Convergence is not right with lower part
manually adjustment with same method.
(5) Green Convergence Adjustment (manually)
1) After the OSD to appears in the screen by pressing key
No. 2, change to green(G) adjustment mode by
pressing TV/AV.
2) Display green color only on the screen by covering the
to red CRT and blue CRT.
3) Adjust to coincide green pattern with screen jig pattern.
(Using the
F
,
G
,
D
,
E
buttons)
At this time, Move cursor from center screen to around
screen and adjust convergence.
Summary of Contents for R45W47
Page 14: ...14 PRINTED CIRCUIT BOARD MAIN TOP...
Page 15: ...15 PRINTED CIRCUIT BOARD MAIN BOTTOM...
Page 16: ...16 PRINTED CIRCUIT BOARD MAIN2...
Page 17: ...17 PRINTED CIRCUIT BOARD CONVERGENCE OUT D CON TOP D CON BOTTOM...
Page 18: ...18 PRINTED CIRCUIT BOARD DIGITAL TOP DIGITAL BOTTOM...
Page 19: ...19 PRINTED CIRCUIT BOARD VM CPT CONTROL...
Page 20: ...20 PRINTED CIRCUIT BOARD POWER SMPS AC INPUT SIDE A V...
Page 21: ...21 PRINTED CIRCUIT BOARD AUTO CVG SENSOR TOP AUTO C G SENSOR BOTTOM 45NZ60...
Page 22: ...22 PRINTED CIRCUIT BOARD AUTO C G SENSOR TOP AUTO C G SENSOR BOTTOM 50 57NZ60...
Page 23: ...23 PRINTED CIRCUIT BOARD INTERFACE PRE AMP POWER S W 45NZ60 POWER S W 50 57NZ60...
Page 24: ...24 BLOCK DIAGRAM...
Page 25: ...25 NOTES...
Page 49: ......
Page 50: ......
Page 51: ......
Page 52: ......
Page 53: ......
Page 54: ......
Page 55: ......


