background image

26

Operation

Lock Menu Setup

Lock Menu Setup

1. Press the menu button and then use 

/

E

button to select the 

Lock

menu.

Then, press the 

G

button.

• If 

Lock

is already set, enter the password requested.

• The TV is set with the initial password “0-0-0-0”.

2. Setting Lock on/off:

Press the

/

E

button to select 

Lock on/off

.

Use the 

G

button to select 

on

or 

off

.

3. Set password:

Press the

/

E

button to select 

Set password

.

Press the 

G

button and then enter a four digit password. 

Enter it again when requested.

4. Press the 

/

E

button to select type of blocking to be set .

5. Press the 

G

button and then use 

/

E

button to select type of ratings to block .

• 

Age block

Content block

, and 

Canadian 

menus, also have sub menus. So,

repeat steps 4 and 5 in the sub menu, to set the types of blocking and ratings.
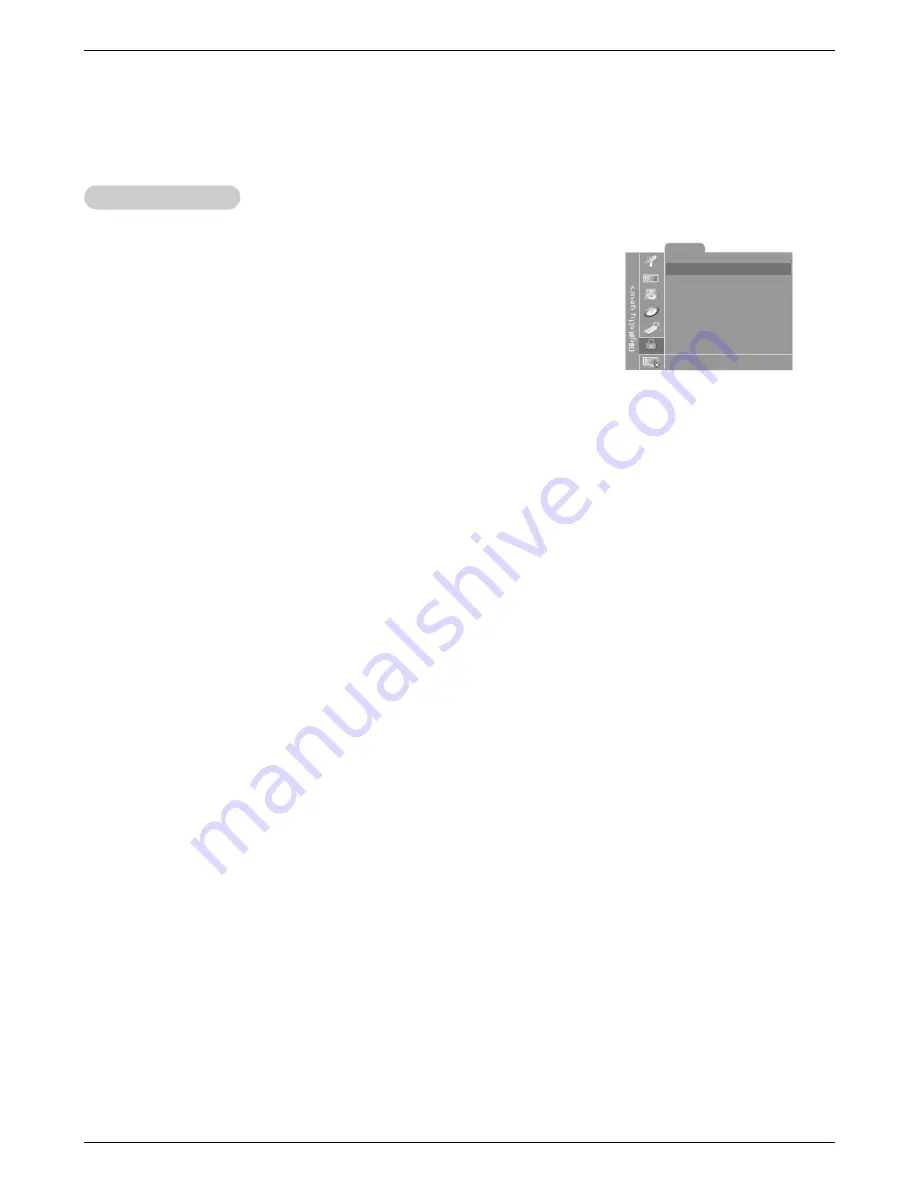
Lock

Lock on/off

Off

Set Password
MPAA
Age block
Content block
Aux. block
Canadian

DE F G 

Â

MENU   EXIT

Lock Menu Options Continued

Lock Menu Options Continued

Summary of Contents for L17W36 Series

Page 1: ... Copyright 2004 LG Electronics USA Inc Operating Guide Warranty Model Numbers L17W36 L23W36 LCD TV Monitor ...

Page 2: ...gainst harmful interference in a residential installation This equipment generates uses and can radiate radio frequency energy and if not installed and used in accordance with the instructions may cause harmful interference to radio communications However there is no guarantee that interference will not occur in a particular installation If this equipment does cause harmful interference to radio o...

Page 3: ...ng of the prod uct should follow the manufacturer s instructions and should use a mounting accessory recommended by the manufac turer 8 Transporting Product A product and cart combination should be moved with care Quick stops excessive force and uneven surfaces may cause the product and cart combination to overturn 9 Attachments Do not use attachments not recommended by the product manufacturer as...

Page 4: ...dangerous voltage points or short out parts that could result in a fire or electric shock Never spill liquid of any kind on the product 19 Servicing Do not attempt to service this product yourself as opening or removing covers may expose you to dangerous voltage or other hazards Refer all servicing to qualified service per sonnel 20 Damage Requiring Service Unplug this product from the wall outlet...

Page 5: ...Color Temperature Control 18 DRP Digital Reality Picture 18 Picture Format Setup 18 Sound Menu Options EZ Audio 19 Equalizer Adjustments 19 Sound Balance 19 AVL Auto Volume Leveler 19 Sound Selection in PC mode 20 Stereo SAP Broadcasts Setup 20 Time Menu Options Auto Clock Setup 21 Manual Clock Setup 21 On Off Timer Setup 22 Sleep Timer Setup 22 Special Menu Options Closed Captions 23 Captions 24 ...

Page 6: ...green when the TV is turned on Stereo Indicator TV Video Button Menu Button Enter Button Volume Button Channel Button R S VIDEO VIDEO L MONO AUDIO IN 2 ANT IN 75 Ω COMPONENT 480i 480p 720p 1080i PC SOUND VIDEO IN DVD DTV IN AUDIO VIDEO PR PB Y AUDIO MONO DC IN 15V L R L R PC INPUT Headphone Jack S Video Input Video Input Audio Input DC 15V Input DVD DTV Input Component 480i 480p 720p 1080i Audio A...

Page 7: ...sor DPM Indicator SAP Indicator Mono Indicator Power Standby Indicator Glows red in Standby mode Glows green when the TV is turned on Stereo Indicator Headphone Jack S Video Input Video Input Audio Input AC Input DVD DTV Input Component 480i 480p 720p 1080i Audio Audio Video Input PC Sound Input PC Input Antenna Input Channel Buttons Volume Buttons ch vol menu enter on off tv video I Enter Button ...

Page 8: ...TS Refer to p 20 EXIT MENU MULTIMEDIA Selects TV Component or RGB PC mode VIDEO Refer to p 17 CC Refer to p 24 FLASHBK Press the FLASHBK button to return to the last channel you were watching SLEEP Refer to p 22 AUDIO Refer to p 19 ARC Refer to p 18 TV VIDEO Selects TV Video 1 Video 2 S Video Component or RGB PC mode FCR Refer to p 16 NUMBER buttons Open the battery compartment cover on the back s...

Page 9: ... when it is turned on This is normal there is nothing wrong with TV b Some minute dot defects may be visible on the screen appearing as tiny red green or blue spots However they have no adverse effect on the monitor s performance c Avoid touching the LCD screen or holding your finger s against it for long periods of time Doing so may produce some temporary distortion effects on the screen K a Powe...

Page 10: ...6 to the left or right to provide the optimum viewing angle An optional wall mount is available for this TV see your dealer For installation follow the instructions provide with the optional wall mount Installation on the W Installation on the Wall all Rear Rear A V Cover A V Cover The connection panel is hidden behind the A V cover a Remove the cover b Install wires as necessary c Reinstall the c...

Page 11: ...on nut If you have a 300Ω flat wire connect the twisted wire to the antenna converter and then connect the converter to the antenna jack on the TV If using 75Ω round cable do not bend the bronze wire It may cause poor picture quality In poor signal areas to get better picture quality install a signal amplifier to the antenna as shown to the right If signal needs to be split for two TVs use an ante...

Page 12: ... Right red 2 Use the tv video button on the remote control to select Video 1 or Video 2 3 Select channels with the cable box remote control Connections Connect the audio video output jacks on the external A V equipment to the corresponding input jacks on the TV When connecting the TV to external A V equipment match the jack colors Video yellow Audio Left white and Audio Right red Viewing Setup 1 T...

Page 13: ...l for the digital set top box 2 Use the tv video or multimedia button on the remote control to select Component DVD ANT IN 75 Ω COMPONENT 480i 480p 720p 1080i PC SOUND VIDEO IN DVD DTV IN AUDIO VIDEO PR PB Y AUDIO MONO L R L R PC INPUT AUDIO Y PB PR L R DTV Receiverr Set top Box ANT IN 75 Ω COMPONENT 480i 480p 720p 1080i PC SOUND VIDEO IN DVD DTV IN AUDIO VIDEO PR PB Y AUDIO MONO L R L R PC INPUT ...

Page 14: ...input Viewing Setup 1 Turn on the PC 2 Use the tv video or multimedia button on the remote control to select RGB PC NOTES a For optimum picture quality use standard XGA 1024x768 computer output at a 60Hz refresh rate Using other formats VGA SVGA etc or refresh rates may result in reduced picture quality To change the computer video output format please refer to the operating manual for the compute...

Page 15: ...e English DE F G Â MENU EXIT 1 First make all equipment connections Plug the AC Adapter into the TV then plug the AC Adapter into a power outlet At this time the TV is switched to standby mode In standby mode press the power ch D E tv video multimedia or number button on the remote con trol or on off ch D E tv video located on the TV to turn the TV on 2 Select the viewing source by pressing tv vid...

Page 16: ...on to select the Channel menu 2 Press the G button and then use D E button to select EZ Scan 3 Press the G button to begin the channel search Wait for auto program to complete the channel search cycle before choosing a channel The TV scans for over the air channels and then channels provided by a cable service Memorizing the Channels with EZ Scan Memorizing the Channels with EZ Scan For EZ scan to...

Page 17: ...epeatedly to select the picture appearance setup option as shown below EZ V EZ Video ideo Manual Picture Control Manual Picture Control User option option To initialize values reset to default settings select the Normal option 1 Press the menu button and then use D E button to select the Picture menu 2 Press the G button and then use D E button to select ACC 3 Use the F G button to select either N...

Page 18: ... Press the menu button and then use D E button to select the Picture menu 2 Press the G button and then use D E button to select ACC 3 Press the enter button and then use D E button to select Red Green or Blue 4 Use the F G button to make appropriate adjustments The adjustment range of Red Green and Blue is 0 100 5 Press the exit button to save and return to TV viewing Manual Color Manual Color T ...

Page 19: ...s function lets you enjoy the best sound without any special adjustment because the TV selects the appro priate sound option based on the program content AVL maintains an equal volume level automatically even if the channel is changed You can also adjust EZ Audio in the Sound menu Manufactured under license from Dolby Laboratories Dolby and the double D symbol are trademarks of Dolby Laboratories ...

Page 20: ...nd right speakers Signal mode is mono Stereo The primary language is heard from left and right speakers Signal mode is stereo SAP The secondary language is heard from left and right speakers Be sure to select the RGB PC source and turn on the PIP before operation 1 Press the menu button and then use D E button to select the Sound menu 2 Press the G button and then use D E button to choose Sound se...

Page 21: ...ending on whether or not your viewing area observes Daylight Savings Time 7 Press the exit button to save and return to TV viewing T Time Menu Options ime Menu Options Timer Auto G Manual G Time zone Auto PBS Ch TV 1 D S T Auto Clock Off timer On timer DE F G Â MENU EXIT Timer Auto G Manual G PM Clock Off timer On timer DE F G Â MENU EXIT The time is set automatically through from a PBS broadcast ...

Page 22: ...o the same time The TV must be in standby mode for the On Timer to work If you don t press any button within 2 hours after turning on the TV with the On Timer function the TV will automatically revert to standby mode On Of On Off f T Timer Setup imer Setup 1 Press the menu button and then use D E button to select the Timer menu 2 Press the G button and then use D E button to select Off timer or On...

Page 23: ... for the hearing impaired and it can also aid in teaching lan guage skills The picture at left shows a typical caption IGNITION Picture may flutter drift suffer from black spots or horizontal streaking Usually caused by inter ference from automobile ignition systems neon lamps electrical drills and other electrical appli ances GHOSTS Ghosts are caused when the TV signal splits and follows two path...

Page 24: ...itches to Standby mode automatically after 10 minutes 1 Press the menu button and then use D E button to select the Special menu 2 Press the G button and then use D E button to select Auto off 3 Use the F G button to select On or Off 4 Press the exit button to save and return to TV viewing Caption T Caption Text ext 1 Press the menu button and then use D E button to select the Special menu 2 Press...

Page 25: ...ult If you set PG 13 and Above G and PG movies will be available PG 13 R NC 17 and X will be blocked For Television programs including made for TV movies General TV Ratings Unblocked TV G and Above general audience individual categories do not apply TV PG and Above parental guidance suggested TV 14 and Above 14 years and older TV MA mature audience Children TV Ratings Unblocked TV Y and Above yout...

Page 26: ...s the D E button to select Set password Press the G button and then enter a four digit password Enter it again when requested 4 Press the D E button to select type of blocking to be set 5 Press the G button and then use D E button to select type of ratings to block Age block Content block and Canadian menus also have sub menus So repeat steps 4 and 5 in the sub menu to set the types of blocking an...

Page 27: ...Clock Phase 1 Press the menu button and then use D E button to select the RGB PC menu 2 Press the G button and then use D E button to select H Position V Position 3 Press the F G button to make adjustments The adjustment range is 0 100 4 Press the exit button to save and return to TV viewing Horizontal V Horizontal Vertical Position ertical Position Adjustments Adjustments Be sure to select the RG...

Page 28: ...g the PIP Press the position button in PIP mode Press the D E F G button repeatedly until desired position is achieved The sub picture moves up down left right TV Program Selection for PIP TV Program Selection for PIP Use the ch D ch E button to select a channel for the sub picture in PIP mode W Watching PIP atching PIP Double W Double Window indow Press the pip button repeatedly to select one of ...

Page 29: ...re using POP mode Swapping the PIP Swapping the PIP Press the pip swap button to switch the main and sub pictures In Component mode this POP mode only operates Selecting an Input Signal Source for PIP Selecting an Input Signal Source for PIP Use the pip input button to select the input source for the sub picture Each press of pip input button changes the PIP source Main Picture Sub Picture Main Pi...

Page 30: ...l does not work Cannot tune desired channel CHECK THESE THINGS Is power cord plugged in Is television turned on Check batteries in remote control Try another channel station trouble Check antenna connectings Check for local interference Adjust the antenna Adjust the picture control Program channel using EZ Scan T Troubleshooting Checklist roubleshooting Checklist ...

Page 31: ...om lightning or power surges Early malfunctions can be prevented Careful and regular cleaning can extend the amount of time you will have your new TV Be sure to turn the power off and unplug the power cord before you begin any cleaning Cleaning the Screen Cleaning the Screen Cleaning the Cabinet Cleaning the Cabinet Extended Extended Absence Absence Maintenance Maintenance MODEL Power Requirement ...

Page 32: ...trols cali bration maintenance or failure to maintain or separate system components and Damages or operating problems that result from normal wear and tear misuse abuse operation outside environmental specifications or contrary to the requirements or precautions in the Operating Guide acci dent lightning strikes or other natural causes unauthorized modification or alteration incorrect electrical c...

Reviews: