background image

PREP

ARA

TION

13

Before Operation 

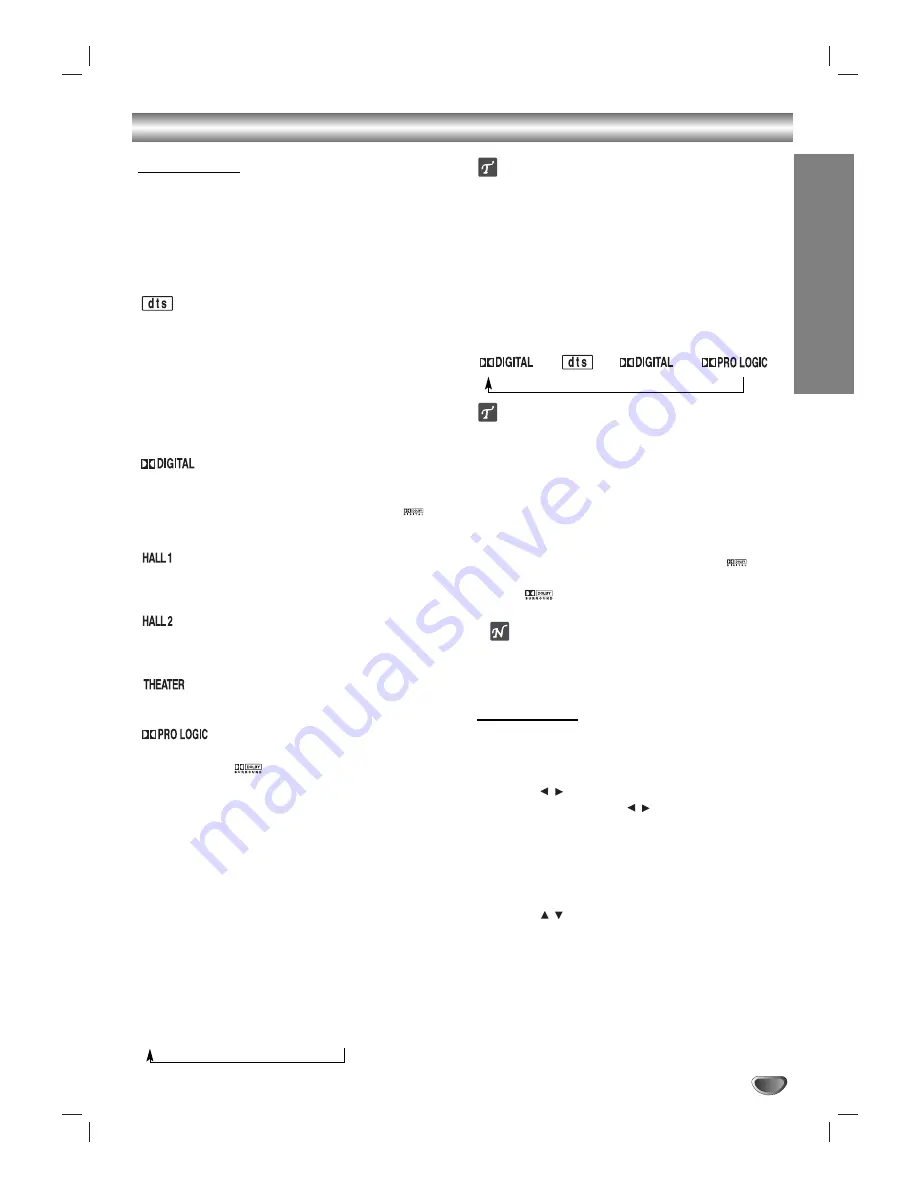
Sound Mode

You can enjoy surround sound simply by selecting one
of the pre-programmed sound fields according to the
program you want to listen to.

Press SOUND MODE repeatedly until the sound
mode you want appears in the display window as
below.

Allows you to enjoy 5.1(or 6) discrete channels of high
quality digital audio from DTS program sources bearing
the trademark such as discs, DVD and compact discs,
etc. DTS Digital Surround delivers up to 6 channels of
transparent audio(which means identical to the original
masters) and results in exceptional clarity throughout a
true 360 degree sound field. The term DTS is a trade-
mark of DTS Technology, LLC. Manufactured under
license from DTS Technology, LLC.

The Dolby Digital surround format lets you enjoy up to
5.1 channels of digital surround sound from a Dolby
Digital program source. If you play DVDs with “

mark, you can enjoy even better sound quality, greater
spatial accuracy, and improved dynamic range.

When playing recordings of live music and classic, this
mode provides a feeling similar to actually being in a
small concert hall.

When playing recordings of live music and classic, this
mode provides a feeling similar to actually being in a large
concert hall.

This mode provides a three dimensional effect similar to
that of movie theater.

Use this mode when playing movie or Dolby Digital 2 channel

which carries the “

” mark. This mode provides the effect

of being in a movie theater or live concert house-an effect with
an intensity which can only be obtained through DOLBY PRO
LOGIC SURROUND. The effect of the front/back/left/right
movement of the sound image, as well as the sense of fixed
position in the sound image, is much clearer and more dynam-
ic than before.

2CH STEREO

Outputs the sound from the front left and right speakers and sub-
woofer. Standard two channel (stereo) sources

completely

bypass the sound field processing. This allows you to play any
source using only the front left and right speakers and sub-
woofer.

You can select 2CH STEREO by pressing BY-PASS

on the remote control.

When PCM indicator is only displayed in the
display window:

Each time you press 

SOUND MODE 

button,  the sound

mode is changed as the following order;

PRO LOGIC 

HALL1 

HALL2 

THEATER

Tip

You can select SURROUND OFF (2CH STEREO) mode by
pressing BY PASS button.

When DVD is inserted.

You can change the sound mode of DVD (Dolby Digital, DTS,
PRO LOGIC, etc) by pressing the 

AUDIO

button on the remote 

during playback.
Although the DVD contents differ from disc to disc, the follow-
ing explains the basic operation when this feature is used.

Each time you press 

AUDIO 

button, the sound mode of DVD is

changed as the following order;

and

Tip

You can set PRO LOGIC mode to Off (2CH STEREO) by
pressing BY PASS button and the PRO LOGIC indicator disap-
pears.

For your reference

• The DVD Receiver memorizes the last mode 

settings for each source individually.

• You can identify the encoding format of program 

software by looking at its packaging.

- Dolby Digital discs are labeled with the 

logo.

- Dolby Surround encoded programs are labeled with

the logo.

- DTS Digital Surround discs are marked with DTS.

Note

When you play sound tracks with 96kHz sampling frequency,
the output signals will be converted to 48kHz (sampling fre-
quency).

Sound Level

You can set the sound level of the desired channel.

11

Press LEVEL.

The level indicator will appear in the display window.

2

2

Press 

/

to select a desired speaker to set.

Each time you press the 

/

button, it is changed as the

following order;

FL (Front Left) 

C (Center) 

FR (Front Right) 

SR (Surround Right) 

SL (Surround Left) 

SW (Subwoofer) 

FL (Front Left)

On the 2 channel stereo mode, you can only select the

SW (Subwoofer).

3

3

Press 

/

to adjust the sound level of the

selected channel. (-6dB ~ +6dB)

4

4

Repeat step 2-3 and adjust the sound level of
the other channels.

5

5

If setting is complete, press LEVEL.

Summary of Contents for DA3630

Page 1: ...DA 3630 ENG D022J Installation and Operating Guide Machine Number DA3630 Main Unit DA 3630A Speakers FE 3620TE FE 3620WE DVD HOME CINEMA SYSTEM ...

Page 2: ...e by one or more of the following measures Reorient or relocate the receiving antenna Increase the separation between the product and receiver Connect the product into an outlet on a circuit different from that to which the receiver is connected Consult the dealer or an experienced radio TV technician for help FCC WARNING This equipment may generate or use radio frequency energy Changes or modific...

Page 3: ...has two blades and a third ground ing prong The wide blade or the third prong are provided for your safety If the provided plug does not fit into your outlet consult an electri cian for replacement of the obsolete outlet 10 Protect the power cord from being walked on or pinched particularly at plugs convenience receptacles and the point where they exit from the apparatus 11 Only use attachments ac...

Page 4: ... Time Search 21 Zoom 22 Marker Search 22 Special DVD Features 22 Title Menu 22 Disc Menu 22 Camera Angle 22 Changing the Audio Language 22 Subtitle 22 Operation with Audio CD and MP3 Disc 23 Playing an Audio CD and MP3 Disc 23 Pause 23 Moving to another Track 23 Repeat Track All Off 23 Search 23 Repeat A B 23 Changing the Audio Channel 23 Programmed Playback 24 Programmed Playback with Audio CD an...

Page 5: ... encoded CD s an excessive audio level may be heard from the analog stereo output To avoid possible damage to the audio system turn down the volume before playing back such discs adjust the volume gradually and keep the volume level low To enjoy DTS Digital SurroundTM playback an external 5 1 channel DTS Digital SurroundTM decoder system must be connected to the digital output of the unit Disc rel...

Page 6: ...o obtain a clear picture The DVD receiver is a high tech precision device If the optical pick up lens and disc drive parts are dirty or worn down the picture quality will be poor Regular inspection and maintenance are recommended after every 1 000 hours of use This depends on the operating environment For details please contact your nearest dealer Notes on Discs Handling discs Do not touch the pla...

Page 7: ... sensor PHONES connector VOLUME controller POWER button and indicator SLEEP indicator TUNED indicator STEREO indicator MUTE indicator MEMORY indicator PROGRAM indicator Repeat playback mode indicators Sound mode indicator Chapter Track number indicator Title number indicator PLAY PAUSE indicator Angle icon indicator Disc indicator Total playing time Elapsed time Frequency Delay time Volume etc ind...

Page 8: ...election on a GUI menu screen TITLE and MENU screen SET UP button SLOW SCAN buttons SEARCH button REPEAT button NUMBER buttons MARKER button OPEN CLOSE button TEST TONE button CD DVD button ENTER button DIMMER button PRESET Q Q R R buttons SUBTITLE S TITLE button STOP button RETURN button TITLE button Use the TITLE button to display the title screen includ ed on DVD video discs POWER button PROGRA...

Page 9: ...propriate system PAL Select when DVD receiver is connected with PAL TV NTSC Select when DVD receiver is connected with NTSC TV AUTO Select when DVD receiver is connected with Multi system TV When the selected System Select switch does not coincide with the system of your TV normal color picture may not be displayed Set System Select switch when the power is turned off S VIDEO OUT Connector FM 300Ω...

Page 10: ...opy protection system Video connection 1 1 Connect the MONITOR OUT jack on the DVD Receiver to the video in jack on the TV using the video cable supplied V 2 2 Connect the Left and Right AUDIO OUT jacks of the DVD Receiver to the audio left right in jacks on the TV A using the supplied audio cables S Video connection 1 1 Connect the S VIDEO OUT jack on the DVD Receiver to the S Video in jack on th...

Page 11: ... VIDEO 1 a video signal is not output at the jack If the audio format of the digital output does not match the capabilities of your receiver the receiver will produce a strong distorted sound or no sound at all FM wire antenna supplied AM loop antenna supplied Antenna Connections Connect the supplied FM AM antennas for listening to the radio Connect the AM loop antenna to the AM antenna connector ...

Page 12: ...case of normal position use the 6 speakers 2 front speakers center speaker 2 rear speakers and subwoofer If you want to play the excellent bass sound DTS digital surround or Dolby Digital surround you should connect a subwoofer Front speakers According to your listening position set up the speakers for equal distance And by hearing position set up the interval between speakers to 45 degree Notes B...

Page 13: ... Standard two channel stereo sources completely bypass the sound field processing This allows you to play any source using only the front left and right speakers and sub woofer You can select 2CH STEREO by pressing BY PASS on the remote control When PCM indicator is only displayed in the display window Each time you press SOUND MODE button the sound mode is changed as the following order PRO LOGIC...

Page 14: ...If the rear delay time is set in Dolby Digital mode in the Dolby Pro Logic mode the delay time will be automatical ly set The delay time is 1 msec per 30 cm If the center and rear speakers are further than the front speakers from the listener the delay time will be at min imum Surround delay time setting If the distance of DS is equal to or longer than the DF in the left figure set the Surround De...

Page 15: ...t provide all of the features on the on screen display example shown below If no button is pressed for 10 seconds the on screen display disappears OFF A B ALL TRACK CHAPT TITLE Items Title Number Chapter Number Time search Audio language and Digital Audio Output mode Subtitle language Angle Function Press to select desired item Shows the current title number and total number of titles and skip to ...

Page 16: ...3 Letterbox Select when a standard 4 3 TV is con nected Displays theatrical images with masking bars above and below the picture 4 3 Panscan Select when a standard 4 3 TV is con nected Displays pictures cropped to fill your TV screen Either sides of the picture are cut off 16 9 Wide Select when a 16 9 wide TV is connected PBC PBC On Off Set Playback Control PBC to On or Off On Video CDs with PBC a...

Page 17: ...e is available on the disc The alternative must have the same rating or a lower one If no suitable alternative is found play back will stop You must enter the 4 digit password or change the rating level in order to play the disc 5 5 Press ENTER to confirm your rating selection then press SETUP to exit the menu Country Code Enter the code of a country area whose standards were used to rate the DVD ...

Page 18: ...ORY again the stations are cleared Note If all stations have already been entered FULL mes sage will appear in the display window for a moment and then a preset number will flash To change the pre set number follow the steps 5 6 as above Listening to the radio Preset radio stations in the DVD receiver s memory first see Presetting radio stations on the left side 1 1 Press FM AM until AM or FM appe...

Page 19: ...our unit You can mute your unit in order for example to answer the telephone MUTE indicator flashes in the display window Using Headphone Jack Connect a stereo headphone plug 3 5mm into the PHONES connector The speakers are automatically disconnected when you plug in the headphones not supplied Selecting input source You can use VCRs or other units connected to the VIDEO1 or VIDEO2 connectors Refe...

Page 20: ... entered and or the disc must be authorized see Parental Control on page 17 DVDs may have a region code Your player will not play discs that have a region code different from your player The region code for this player is 1 one General Features Note Unless stated all operations described are based on remote control use Some operations can be carried out using the setup menu Moving to another TITLE...

Page 21: ...o exit Repeat mode press REPEAT a third time The Repeat Off icon appears on the TV screen Note On a Video CD with PBC you must set PBC to Off on the setup menu to use the Repeat function See page 16 Repeat A B To repeat a sequence in a title 1 Press REPEAT A B at your chosen starting point A appears briefly on the TV screen 2 Press REPEAT A B again at your chosen end point A B appears briefly on t...

Page 22: ...ker number that you want to erase 3 Press CLEAR The Marker number will be erased from the list 4 Repeat steps 2 and 3 to erase additional Marker numbers 5 To remove the MARKER SEARCH menu press SEARCH Special DVD Features Checking the contents of DVD Video discs Menus DVDs may contain menus that allow you to access spe cial features To use the disc menu press MENU Then press the appropriate numeri...

Page 23: ...the unit press REPEAT a second time The Repeat All icon appears on the menu screen 3 To exit Repeat mode press REPEAT a third time The Repeat Off icon appears on the menu screen Search 1 Press and hold SKIP or for about two sec onds during playback The player will now go into SEARCH mode 2 Press and hold SKIP or repeatedly to select the required speed mX2 mX4 mX8 backward or MX2 MX4 MX8 forward 3 ...

Page 24: ... The VCD Program menu will appear Note Press RETURN or PROGRAM to exit the Program menu 3 3 Follow steps 3 7 of Programmed Playback with Audio CD and MP3 Disc on left Repeat Programmed Tracks To repeat the track currently playing press REPEAT The Repeat Track icon appears on the menu screen To repeat all tracks of program list press REPEAT a second time The Repeat All icon appears on the menu scre...

Page 25: ...n not read an MP3 file that has a file extension other than mp3 The player can not read a fake MP3 file that has a file extension mp3 MP3 disc compatible with this player is limited as follows 1 Sampling Frequency only at 44 1kHz 2 Bit rate within 96 192kbps 3 CD R physical format should be ISO 9660 4 If you record MP3 files using the software which cannot create a FILE SYSTEM for example Direct C...

Page 26: ... is dirty The speakers and components are connected poorly The DVD receiver is located with too close to the TV Correction Plug the power cord into the wall outlet securely Insert a disc Check that the DVD or audio CD indicator in the DVD display is lit Select the appropriate video input mode on the TV so the picture from the DVD receiver appears on the TV screen Connect the video cable into the j...

Page 27: ...control is not pointed at the remote sensor of the DVD receiver The remote control is too far from the DVD receiver There is an obstacle in the path of the remote control and the DVD receiver The batteries in the remote control are exhausted Correction Connect the components correctly Select the source with FUNCTION but ton CD DVD VIDEO 1 VIDEO 2 or Tuner Connect the antenna securely Adjust the an...

Page 28: ...579 Korean 7583 Kashmiri 7585 Kurdish 7589 Kirghiz 7665 Latin Code Language 7678 Lingala 7679 Laothian 7684 Lithuanian 7686 Latvian Lettish 7771 Malagasy 7773 Maori 7775 Macedonian 7776 Malayalam 7778 Mongolian 7779 Moldavian 7782 Marathi 7783 Malay 7784 Maltese 7789 Burmese 7865 Nauru 7869 Nepali 7876 Dutch 7879 Norwegian 7982 Oriya 8065 Panjabi 8076 Polish 8083 Pashto Pushto 8084 Portuguese 8185...

Page 29: ... Islands KZ Kazakhstan LA Laos LB Lebanon Code Country LC Saint Lucia LI Liechtenstein LK Sri Lanka LR Liberia LS Lesotho LT Lithuania LU Luxembourg LV Latvia LY Libya MA Morocco MC Monaco MD Moldavia MG Madagascar MH Marshall Islands MK Macedonia ML Mali MM Myanmar MN Mongolia MO Macau MP Northern Mariana Islands MQ Martinique French MR Mauritania MS Montserrat MT Malta MU Mauritius MV Maldives M...

Page 30: ...uning Range 87 5 108 MHz Intermediate Frequency 10 7 MHz Signal to Noise Ratio 60 dB Frequency Response 150 12000 Hz Tuning Range 530 1720 kHz Intermediate Frequency 450 kHz Stereo mode 35W 35W 8 Ω at 1 kHz THD 10 Surround mode Front 35W 35W THD 10 Center 35W Surround 35W 35W 8Ω at 1 kHz THD 10 Subwoofer 35W 8Ω at 30 Hz THD 10 Inputs VIDEO 1 VIDEO 2 Outputs VIDEO 1 AUDIO OUT 2 V WOOFER 2 V PHONES ...

Reviews: