7.0 PRELIMINARY ASSEMBLY OF THE Octo-Z
7.0.1 Ensure that all parts are clean. To determine the identity of each O-ring in the Octo-Z Service Kit,
remove them from the bag and use the O-ring Identification Chart by printing out page 5 of this manual. After
Printing the O-ring Identification page, lay each O-ring over its corresponding picture on the page and read
the description.
IMPORTANT:
Before installing new O-rings into the Octo-Z, lightly lubricate them with LTI Christo-Lube
111®.
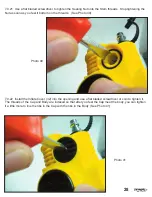
7.0.1 Install a new Seal (13) from the Service Kit into the end of the Poppet (12) that is still in the Lever
Assembly, using a flat probe such as the 1/4” dowel shown in Photo 20 below.
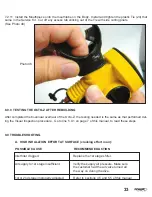
7.0.2 Install a new lubricated O-ring (15) onto the Seat (14) and then use the 3/16” Allen Wrench to install
and screw the Seat into the Lever Assembly until it bottoms gently onto the Seal you just installed into the
Poppet. (See Photo 21)
Photo 20
18
Photo 21


