


•
A computer running Windows 7, Vista, or XP
•
A CAT5 UTP cable of required length
•
One of the following power sources:
-
IEEE 802.3at-compliant Power over Ethernet
(PoE) source
-
Power adapter came with the package
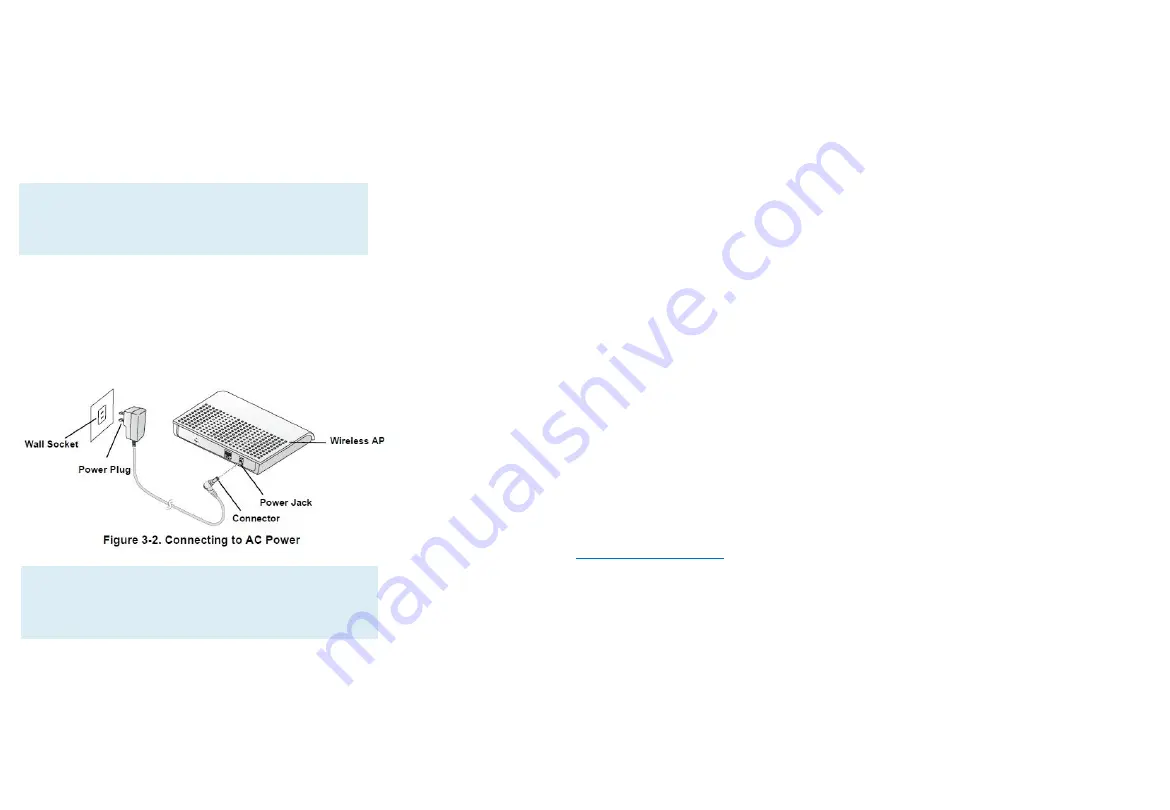
STEP 1: POWER ON THE AP
1.
Using the shipped power adapter to connect to
rear side of the AP. Then connect the power
plug to a wall socket.
Alternatively, you may connect the PoE port to a
PoE switch for power and network connectivity.
2.
After a minute, verify that the PWR LED is a
steady ON.
STEP 2: CONNECT THE AP TO YOUR PC
1.
Using an Ethernet cable to connect your PC’s
Ethernet port to the LAN port on the rear of
the AP.
2.
Start > Settings > Network Connections
Start > Control Panel > Network Connections
3.
When the Network Connections window
appears, right-click the icon for Local Area
Connection, and then click select Properties.
4.
Select Internet Protocol (TCP/IP) from the
scrolling list, and then click Properties.
5.
Select Use the following IP address option (if it
is not already selected), and then make the
following entries:
•
IP address: Any address in the 192.168.1.x
network
• Subnet mask: 255.255.255.0
6.
Click OK to save your changes, and exit the
dialog box.
STEP 3: LOG INTO THE AP
1.
On your PC, open a Web browser window.
2.
In the browser, type
https://192.168.1.1
and
press <Enter> to connect to the AP.
3.
When a security alert dialog box appears, click
OK/Yes to proceed.
4.
When the login page appears, enter the following:
•
Username: admin
•
Password: password
5.
Click Login.
STEP 4: CONFIGURE THE AP
1.
On the Web interface menu, click Basic
Setup.
2.
Select Wireless Mode: FAT AP.
3.
Select
DHCP Client
to obtain an IP address
from the DHCP server automatically, or
select
STATIC
to enter the values manually.
Click Apply to save changes.
4.
Go to RF Configure > Wireless Settings. (For
dual band AP ZN-7100-2DHO 5G setting,
select Card 2 first then go to RF Configure >
Wireless Settings.)
5.
Select a clean channel.
6.
Select your location from Country/Region.
Click Apply to save the changes.
7.
Go to RF Configure > Security Profile
8.
Select a profile (eg. #1) , then click
Edit
.
9.
Type the name of the network in the SSID
field.
10.
Enable authentication and encryption as
needed. Click Apply to save the changes.
11.
Repeat Steps 8-9 for each Profile # interface
that you want to enable.
12.
Click Logout to exit the Web interface.
STEP 5: INSTALL THE AP
1.
Disconnect the AP’s power adapter from
the power outlet (or disconnect the PoE
cable).
2.
Move the AP to its permanent location
(accessible to both power source and
network connections).
Important!
Use only the 48VDC power adapter that came
with the wireless AP.
Note:
If the AP is deployed with a AP controller, please
follow the section
INSTALL THE AP
to proceed.


