CMP-WNROUT10
Wireless Router
Quick Installation Guide
1 System Requirements
Broadband Internet Access Service (DSL/Cable/Ethernet)
One DSL/Cable modem that has an RJ45 connector (you do not need it if you connect the
router to Ethernet)
Each PC on the LAN needs a working Ethernet Adapter and an Ethernet cable with RJ45
connectors
TCP/IP protocol must be installed on each PC
Web browser, such as Microsoft Internet Explorer 5.0 or later, Netscape Navigator 6.0 or
later
1.1 Connecting the Router
Before you install the router, you should connect your PC to the Internet through your broadband
service successfully. If there is any problem, please contact your ISP. After that, please install
the router according to the following steps. Don't forget to pull out the power.
1.
Power off your PC(s), Cable/DSL modem, and the router.
2.
Locate an optimum location for the router. The best place is usually near the center of the
area in which your PC(s) will wirelessly connect.
3.
Adjust the direction of the antenna. Normally, upright is a good direction.
4.
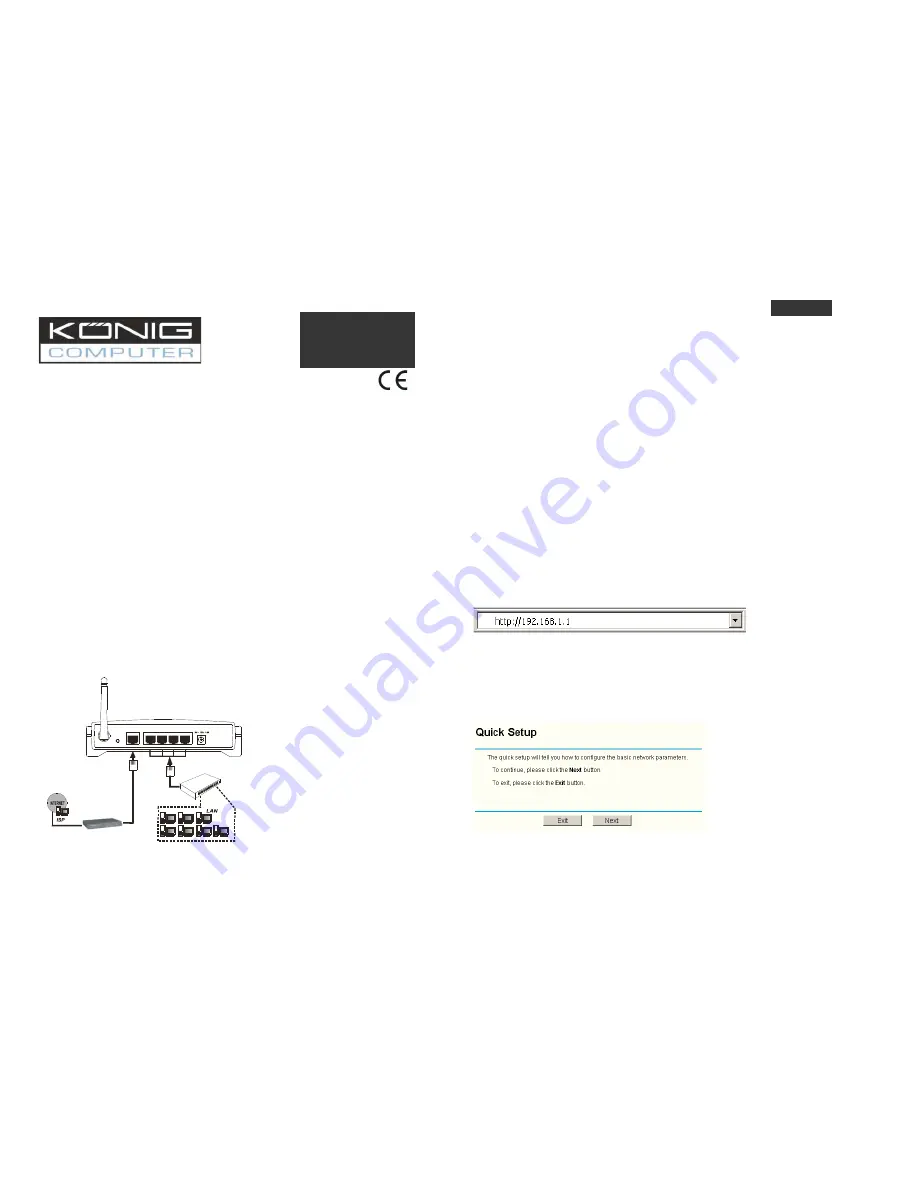
Connect the PC(s) and each Switch/Hub on your LAN to the LAN Ports on the router,
shown in figure 1-1.
5.
Connect the DSL/Cable Modem to the WAN port on the router, shown in figure 1-1.
6.
Connect the AC power adapter to the AC power socket on the router, and the other end
into an electrical outlet. The router will start to work automatically.
7.
Power on your PC(s) and Cable/DSL modem.
To LAN
Switch/Hub
4
3
2
1
WAN
To WAN
RESET
£¨£©
XDSL Cable Ethernet
¡¢¡¢
Figure 1-1: Hardware Installation of the CMP-WNROUT10 54Mbps Wireless Router
After connecting the CMP-WNROUT10 into your network, you should configure it. This chapter
describes how to configure the basic functions of your CMP-WNROUT10. These procedures
only take you a few minutes. You can access the Internet via the router immediately after
successfully configured.
1.3 TCP/IP configuration
The default IP address of the CMP-WNROUT10 is 192.168.1.1, and the default Subnet Mask is
255.255.255.0. These values can be seen from the LAN. They can be changed as you desire, as
an example we use the default values for description in this guide.
Connect the local PCs to the LAN ports on the router. There are then two means to configure the
IP address for your PCs.
Configure the IP address manually
1)
Set up the TCP/IP Protocol for your PC(s). If you need instructions as to how to do
this, please refer to the detailed manual on the enclosed CD.
2)
Configure the network parameters. The IP address is 192.168.1.xxx ("xxx" is from 2
to 254), Subnet Mask is 255.255.255.0, and Gateway is 192.168.1.1 (The router's
default IP address)
Obtain an IP address automatically
1)
Set up the TCP/IP Protocol in "
Obtain an IP address automatically
" mode on your
PC(s). If you need instructions as to how to do this, please refer to the detailed
manual on the enclosed CD. Power off the router and PC(s). Then turn on the router,
and restart the PC(s). The built-in DHCP server will assign IP addresses for the
PC(s).
1.4 Installation Guide
With a Web-based (Internet Explorer or Netscape
®
Navigator) utility, the CMP-WNROUT10 is
easy to configure and manage. The Web-based utility can be used on any Windows, Macintosh
or UNIX OS with a web browser.
Connect to the router by typing
http://192.168.1.1
in the address field of web browser.
Figure 1-2 Login to the router
After a moment, a login window will appear. Enter
admin
for the User Name and Password, both
in lower case letters. Then click the
OK
button or press the
Enter
key.
Note
: If the above mentioned screen does not prompt, it means that your web-browser has been
set to a proxy. Go to Tools menu>Internet Options>Connections>LAN Settings, in the screen
that appears, cancel the Using Proxy checkbox, and click OK to finish it.
If the User Name and Password are correct, you can configure the router using the web browser.
Please click the
Quick Setup
link on the left of the main menu and the Quick Setup screen will
appear.
Figure 1-3 Quick Setup
Click
Next
, the
Choose WAN Connection Type
page will appear, shown in figure 1-4.
ENGLISH
INSTRUCTIONS
EN


