background image

1. After loading laundry and detergent, press the

On/Off button for some seconds to activate the

appliance.

2. Set the Wash and Dry programme by means of

the programme dial. The indicators 

 and 

appear on the display.

3. Touch the Start/Pause 

 button to start the

programme.

Non-automatic wash&dry programmes
In some washing programmes, you can combine

Mode - Wash and Mode - Dry for running a

complete wash&dry programme.
Proceed as follows:
1. Press the On/Off button for some seconds to

activate the appliance.

2. Load the laundry one item at a time.

3. Put the detergent and the additives in the

appropriate compartment.

4. Turn the programme dial to the washing

programme. The appliance defaults to the

washing only mode and the indicator of the

Mode - Wash button is on. The display shows

the default temperature and spin. If necessary,

change them according to your laundry. The

display also shows the maximum recommended

load for washing phase.

5. Set the desired options, if there are available.

6. Tap on the Mode - Dry button to activate also

the drying function. Both indicators of the

Mode - Wash and Mode - Dry buttons are on.
The indicators 

 and   appear on the

display. The display also shows the maximum

recommended load for a washing and drying

programme (e.g. 6 kg for cottons).

WASHING AND DRYING - AUTOMATIC

LEVELS
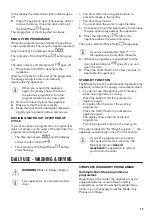
1. 
Tap on the Auto Dry button repeatedly until the

display shows the required dryness level. The

indicators in the display illuminate accordingly:

a.

 Iron dry: for cotton items;

b.

 Cupboard dry: for cotton and

synthetic items;

c.

 Extra dry: for cotton items.

The time value on the display is the duration

of both cycles washing and drying, calculated

on a default load size.

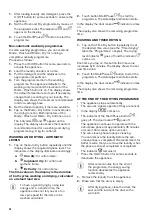
To have a good drying by using less

energy and in a shorter time, the

appliance does not let you set a too

low spin speed for the items to be

washed and dried.

2. Touch button Start/Pause 

 to start the

programme. The AutoAdjust estimation starts.

In the display the door locked 

 indicator comes

on.

The display also shows the remaining programme

time.

WASHING AND TIMED DRYING
1. 
Tap on the Time Dry button repeatedly to set

the desired time value (see the "Timed drying"

table the "Programmes" chapter). The drying
level indicator   goes off and the indicator 

comes on.

Each time you tap on this button the time value

increases by 5 minutes. The display shows the set

new time value.
2. Touch the Start/Pause 

 button to start the

programme. The AutoAdjust estimation starts.

In the display the door locked 

 indicator comes

on.

The display also shows the remaining programme

time.

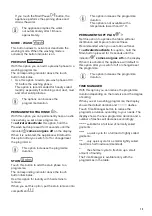
AT THE END OF THE DRYING PROGRAMME
• The appliance stops automatically.

• The acoustic signals operate (if they are active).
• In the display 

 comes on.

• The indicator of the Start/Pause button 

goes off. The door locked 

 goes off.

The appliance continues to operate with the

anti-crease phase for approximately 30 minutes

or more if Anti-crease option was set.

The anti-crease phase reduces creasing.

You can remove the laundry before the anti-

crease phase is completed. We recommend, for

better results, that you remove the laundry when

the phase is almost completed or completed.
The indicator 

 remains lit.

• Press the On/Off button for some seconds to

deactivate the appliance.

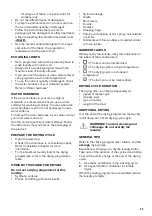
After some minutes from the end of

the programme, the energy saving

function deactivates the appliance

automatically.

1. Remove the laundry from the appliance.

2. Make sure that the drum is empty.

After drying phase, clean the drum, the

seal and the inside of the door with a

wet cloth.

26

Summary of Contents for ZWD11683NS

Page 1: ...GETTING STARTED EASY User Manual ZWD11683NS EN User Manual Washer Dryer ...

Page 2: ...d the hazards involved Children between 3 and 8 years of age and persons with very extensive and complex disabilities shall be kept away from the appliance unless continuously supervised Children of less than 3 years of age should be kept away from the appliance unless continuously supervised Do not let children play with the appliance Keep all packaging away from children and dispose of it approp...

Page 3: ...gularly switched on and off by a utility Ensure good air ventilation in the room where the appliance is installed to avoid the backflow of unwanted gases into the room from appliances burning gas or other fuels including open fires Exhaust air must not be discharged into a flue which is used for exhausting fumes from any appliances burning gas or other fuels The operating water pressure at the wat...

Page 4: ... cycle unless all items are quickly removed and separated so that residual heat can dissipate The final part of the washer dryer cycle takes place without heat cool down cycle to ensure that items reach a temperature that will not cause damage to them Do not use high pressure water sprays and or steam to clean the appliance Clean the appliance with a moist cloth Use only neutral detergents Do not ...

Page 5: ...eaks during and after the first use of the appliance USE WARNING Risk of injury electric shock fire burns or damage to the appliance Do not put flammable products or items that are wet with flammable products in near or on the appliance Do not touch the glass door while a programme operates The glass can get hot Do not dry damaged torn frayed items that contain padding or fillings If laundry has b...

Page 6: ...side 5 Remove the polystyrene protection from the bottom Put the appliance back into an upright position 1 2 6 Remove the power supply cable and the drain hose from the hose holders It is possible to see water flowing from the drain hose This is because the washing machine has been tested at the factory 7 Remove the three transit bolts and pull out the plastic spacers 8 Put the plastic caps that y...

Page 7: ...Connect the water inlet hose to the back of the appliance 20º 20º 45º 45º 2 Position it toward left or right depending on the positon of the water tap Make sure that the inlet hose is not in vertical position 3 If necessary loosen the ring nut to set it in the correct position 4 Connect the water inlet hose to the cold water tap with 3 4 thread Water drainage The drain hose should stay at a height...

Page 8: ...c hose guide to a sink spigot Put the drain hose in the spigot and tighten it with a clamp Refer to the illustration Make sure that the drain hose makes a loop to prevent particles going into the appliance from the sink ø16 1 W011 2 Connect the drain hose to the spigot and tighten it with a clamp Make sure that the drain hose makes a loop to prevent particles going into the appliance from the sink...

Page 9: ...odern requirements for effective treatment of laundry with low water energy and detergent consumption and detergent consumption and proper care of fabric Thanks to the Soft Plus option the fabric softener is uniformly spread out in the laundry and deeply penetrates the fabric fibres favouring a perfect softness The AutoAdjust System detects the laundry load size defining the programme duration in ...

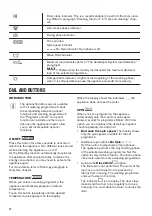
Page 10: ...set by holding pressed the relative button for at least 3 seconds 1 Programme dial 2 Spin touch button 3 Temperature touch button 4 Display 5 Time Dry touch button 6 Auto Dry touch button 7 Start Pause touch button 8 Delay Start touch button 9 Mode Dry touch button and permanent Anti crease option 10 Time Manager touch button and permanent Child Lock option 11 Stain touch button and permanent Soft...

Page 11: ...The digital indicator can show Programme duration e g washing and or drying phase Delay time e g Cycle end Warning code e g Error indicator Time Manager indicator Time Dry indicator Steam phase indicator Auto Dry indicator Iron dry Cupboard dry Extra dry Washing phase indicator Extra Rinse indicator Soft Plus indicator 11 ...

Page 12: ... several minutes to reduce the energy consumption you may need to activate the appliance again For more details refer to Stand by paragraph in Daily Use chapter TEMPERATURE When you select a washing programme the appliance automatically proposes a default temperature Touch this button repeatedly until the desired temperature value appears on the display When the display shows the indicators the ap...

Page 13: ... the touch button illuminates Use this option for laundry with hard stains to remove When you set this option put the stain remover into compartment This option increases the programme duration This option is not available with a temperature lower than 40 C PERMANENT SOFT PLUS Set this option to optimise the fabric softener distribution and improve fabric softness Recommended when you use fabric s...

Page 14: ...l the indicator comes on goes off on the display When it is activated the appliance will default to this option after you switch it off or change reset the programme This option can increase the programme duration TIME DRY Touch this button to set the time that suits the fabrics you have to dry refer to Timed drying table The display shows the set value Each time you touch this button the time val...

Page 15: ...g Synthetic items or mixed fabric items Normal soil Delicate 30 C 40 C Cold 1200 rpm 1200 400 rpm 4 kg Delicate fabrics such as acrylics viscose and mixed fabrics requiring gentler washing Normal soil Wool 40 C 40 C Cold 1200 rpm 1200 400 rpm 1 5 kg Machine washable wool hand washable wool and other fabrics with hand washing care sym bol2 Steam programme Steam programme can be used for reducing wr...

Page 16: ...eed the appliance performs delicate rinses and a short spin Machine Clean 60 C 1200 rpm 1200 400 rpm Maintenance cycle with hot water to clean and freshen the drum and to remove residue that may cause odour For the best result use this cycle once a month Before running this cycle remove all items from the drum In the washing phase compartment of the detergent dis penser put the flap of the compart...

Page 17: ...care label permits tum ble drying Denim 30 C 40 C Cold 1200 rpm 1200 400 rpm 4 kg Special programme for Denim clothing with del icate washing phase to minimize colour fading and marks For better care a reduced load size is recommended Wash and Dry 60min 30 C 40 C 30 C 1200 rpm 1200 400 rpm 1 kg Mixed fabrics cotton and synthetic items Com plete short programme to wash and dry laundry loads up to 1...

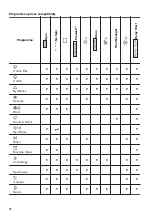
Page 18: ...ns compatibility Programme Spin No Spin Prewash 1 Stains Stain Time Manager Delay Start Cotton Flex Cotton Synthetics Delicate Wool Steam Scent Spin Drain 2 Rinse Machine Clean Anti Allergy Sportswear Outdoor Denim 18 ...

Page 19: ...rment label and those issued by the manufacturer of this washing machine M1230 The wool drying cycle of this machine has been tested and approved by The Woolmark Company The cycle is suitable to dry wool garments which are labelled hand wash provided that the garments are washed in a Woolmark endorsed hand washing cycle and dried according to the instructions issued by the manufacturer M1224 In UK...

Page 20: ...l sport fabrics waterproof and breathable jackets shell jack ets up to 2 kg Denim garments up to 4 kg Sportswear up to 4 kg 2 Iron Dry Suitable for ironing Cottons and Linen sheets tablecloths shirts etc up to 6 kg 1 Selectable in Cotton and Anti Allergy if available programme also 2 Selectable in Anti Allergy programme if available also TIMED DRYING Dryness Level Type of fabric Load kg Spin speed...

Page 21: ...1600 75 85 SETTINGS ACOUSTIC SIGNALS This appliance has different acoustic signals that operate when You activate the appliance special short tune You deactivate the appliance special short tune You touch the buttons click sound You make an invalid selection 3 short sounds The programme is completed sequence of sounds for about 2 minutes The appliance has a malfunction sequence of short sounds for...

Page 22: ...re that no laundry gets caught between the seal and the door to avoid risk of water leakage and damage to the laundry Washing heavily oiled greasy stains could cause damage to rubber parts of the washing machine FILLING THE DETERGENT AND ADDITIVES Compartment for prewash phase soak programme or stain remover Compartment for washing phase Compartment for fabric softener and other liquid treatments ...

Page 23: ...ion changes accordingly If a selection is not possible an acoustic signal sounds and the display shows STARTING A PROGRAMME Touch the Start Pause button to start the programme It is not possible to start the programme when the indicator of the button is off and doesn t flash e g the door is open The related indicator stops flashing and stays on The programme starts the door is locked The display s...

Page 24: ...e best washing results About 20 minutes after the programme start the programme duration could be adjusted again depending on the capacity of water absorption of the fabrics The AutoAdjust detection is carried out with complete washing programmes only and if the programme duration has not been reduced by means of the Time Manager button INTERRUPTING A PROGRAMME AND CHANGING THE OPTIONS When the pr...

Page 25: ... to open the door 1 If necessary touch the Spin button to decrease the spin speed proposed by the appliance 2 Press the Start Pause button the appliance drains the water and spins The option indicator Rinse Hold disappears If you have selected No Spin the appliance will only drain the water 3 When the programme is completed and the door locked indicator goes off you can open the door 4 Press the O...

Page 26: ...ated on a default load size To have a good drying by using less energy and in a shorter time the appliance does not let you set a too low spin speed for the items to be washed and dried 2 Touch button Start Pause to start the programme The AutoAdjust estimation starts In the display the door locked indicator comes on The display also shows the remaining programme time WASHING AND TIMED DRYING 1 Ta...

Page 27: ...isplay also shows the remaining programme time TIMED DRYING 1 Tap on the Time Dry button repeatedly to set the desired time value see the Timed drying table the Programmes chapter The drying level indicator goes off and the indicator comes on Each time you tap on this button the time value increases by 5 minutes The display shows the set new time value 2 Touch the Start Pause to start the programm...

Page 28: ...r the first couple of times Turn multilayered fabrics wool and items with printed illustrations inside out Pre treat tough stains Wash heavy soil stains with a special detergent Be careful with curtains Remove the hooks and put the curtains in a washing bag or pillowcase Do not wash laundry without hems or with cuts Use a washing bag to wash small and or delicate items e g underwired bras belts ti...

Page 29: ...if the drain hose is connected properly Refer to installation chapter for more information For the maximum laundry load of the drying programmes refer to the drying programmes table ITEMS NOT SUITABLE FOR DRYING Do not set a drying programme for this laundry Synthetic curtains Pieces of clothing with metal inserts Nylon stockings Quilts Bed covers Duvets Anoraks Sleeping bags Fabrics with residue ...

Page 30: ...e is no need by the customer to access this area for regular maintenance and cleaning Regularly examine the seal and remove all objects from the inner part Coins buttons other small items forgotten in the pockets of your clothes are deposited during the washing cycle in the special double lip trap in the porthole seal where they can be conveniently recovered at the end of the cycle CLEANING THE DR...

Page 31: ...NING THE DRAIN PUMP WARNING Disconnect the mains plug from the mains socket Regularly check the drain pump filter and make sure that it is clean Clean the drain pump if The appliance does not drain the water The drum does not turn The appliance makes an unusual noise because of the blockage of the drain pump The display shows the alarm code WARNING Do not remove the filter while the appliance oper...

Page 32: ...t 7 Turn the filter anti clockwise to remove it 1 2 8 If it is necessary remove fluff and objects from the filter recess 9 Make sure that the impeller of the pump can rotate If it does not rotate contact the Authorised Service Centre 10 Clean the filter under the water tap 11 Put the filter back into the special guides by turning it clockwise Make sure that you tighten the filter correctly to prev...

Page 33: ...es of water in the main wash compartment of the detergent dispenser 2 Start the programme to drain the water FROST PRECAUTIONS If the appliance is installed in an area where the temperature can reach values around 0 C or drop below remove the remaining water from the inlet hose and the drain pump 1 Disconnect the mains plug from the mains socket 2 Close the water tap 3 Put the two ends of the inle...

Page 34: ... electronic elements of the appliance Switch it off and switch on again The programme was not finished properly or the appliance stopped too early If the alarm code appears again contact the Authorised Service Centre The appliance does not fill with water properly After the proper check start the appliance again by pressing Start Pause button the appliance tries to resume the cycle If the error pe...

Page 35: ...ot clogged Make sure that the drain hose has no kinks or bends Make sure that the drain filter is not clogged Clean the filter if nec essary Refer to Care and cleaning Make sure that the connection of the drain hose is correct Set the drain programme if you set a programme without drain phase Set the drain programme if you set an option which ends with water in the tub The spin phase does not oper...

Page 36: ...es not dry or does not dry correctly Turn the water tap on Make sure the drain filter is not clogged Reduce the laundry load Make sure you have set the correct cycle if necessary set again a short drying time The laundry is full of differ ent colours fluff The fabrics washed in the previous cycle released fluff of a different colour The drying phase helps to eliminate some fluff Clean the clothes ...

Page 37: ...andards Different cau ses can change the data the quantity and type of laundry and ambient temperature Wa ter pressure the supply voltage and the temperature of inlet water may also affect the washing programme duration Technical specifications may be changed without prior notice to improve the quality of product During the washing programme the AutoAdjust technology can vary the wash duration and...

Page 38: ...xcept where the low voltage equipment has no protection against moisture IPX4 Water supply 1 Cold water Water supply pressure Minimum Maximum 0 5 bar 0 05 MPa 8 bar 0 8 MPa Maximum wash load Cotton 10 kg Maximum dry load Cotton Synthetics 6 kg 4 kg Spin Speed Maximum spin speed 1550 rpm 1 Connect the water inlet hose to a water tap with a 3 4 thread ACCESSORIES AVAILABLE IN WWW ELECTROLUX COM SHOP...

Page 39: ...supplied with the accessory ENVIRONMENTAL CONCERNS Recycle materials with the symbol Put the packaging in relevant containers to recycle it Help protect the environment and human health by recycling waste of electrical and electronic appliances Do not dispose of appliances marked with the symbol with the household waste Return the product to your local recycling facility or contact your municipal ...

Page 40: ...WWW ZANUSSI COM SHOP 157027121 A 252019 ...

Reviews: