background image

11

The Oven Door Gasket

The correct operation of the oven is ensured by a gasket

placed round the edge of the oven cavity.
• Periodically 

check

  the  condition  of  this  gasket.  If

necessary, clean it without using abrasive cleaning

products.

• If the gasket shows to be 

damaged

, call you local

Zanussi Service Centre. Do not use the oven until it

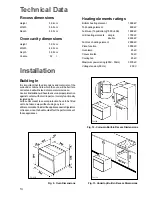
has been repaired.

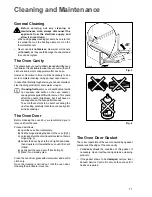
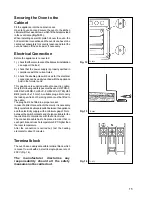
General Cleaning

Before  carrying  out  any  cleaning  or

manteinance  work,  always  disconnect  the

appliance  from  the  electrical  supply,  and

allow it to cool down.

• When using

 spray

 cleaning products, be careful not

to spread them on the heating elements or on the

thermostat sensor.

• Never use harsh 

abrasives

, steel wool or cleaners

with 

bleach

, as they could damage the enamel and

the oven door glass.

The Oven Cavity

The enamelled oven cavity is best cleaned whilst the oven

is still warm. It is advisable to wipe the oven over with a soft

cloth soaked in warm soapy water after each use.
However, from time to time, it will be necessary to do a

more complete cleaning, using a proper oven cleaner.
In case of particularly tough stains, you can use stainless

steel cleaning products or some warm vinegar.

If cooking fruits, 

some over-heated natual acids

can  squeeze  and  settle  on  the  oven  enamel,

causing stains quite difficult to remove. This could

affect the enamel brightness, but it will have no

consequence on the oven performances.

To avoid these stains to be burnt out during the

next cooking, carefully clean the oven cavity after

all fruits cookings.

The Oven Door

Before cleaning the oven door, we recommend you to

remove it from the oven.
Proceed as follows:

a)

open the oven door completely;

b)

find the hinges linking the door to the oven (fig 3);

c)

unlock and turn the small levers located on the two

hinges (fig. 3);

d)

handle the door by its left- and right-hand sides,

then slowly turn it towards the oven until it is half-

closed;

e)

gently pull the oven door off its site (fig. 3);

f)

place it on a steady plan.

Clean the oven door glass with warm water and a softh

cloth only.

Once the cleaning is carried out, refit the oven door,

following the procedure in reverse.

Fig. 3

FO 0288

Cleaning and Maintenance

Fig. 4

Summary of Contents for ZBM973

Page 1: ...ACKOFEN FOURMULTIFONCTIONS MULTIFUNCTIONELE INBOUWOVEN HORNOEMPOTRADO FORNO MULTIFUNÇÕES ZBM 973 INSTRUCTION BOOKLET GEBRAUCHSANWEISUNG NOTICE D UTILISATION GEBRUIKSAANWIJZING MANUAL DE INSTRUCCIONES INSTRUÇÕES DE UTILIZAÇÃO ...

Page 2: ...his appliance has been designed to be operated by adultsandchildrenundersupervision Youngchildren MUST NOT beallowedtotamperwiththecontrolsorplay near or with the oven Accessible parts of this appliance may become hot when it is in use Children should be KEPT AWAY until it has cooled During use Thisappliance hasbeendesignedforcookingedible foodstuff only and MUST NOT be used for any other purposes...

Page 3: ... the text to guide you throughout the Instructions Safety Instructions Step by step instructions for an operation Hints and Tips Environmental information F Guide to Use the instructions For the Installer Important Safety Information 2 Control Panel 4 When the oven is first installed 6 Programming 6 Extra Features 7 Using the Oven 8 Hints and Tips Cooking Tables 9 Cleaning and Maintenance 11 Somet...

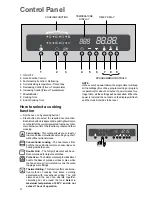
Page 4: ...e required oven function Eachtimebutton2isdepressed apilotlightwillcome ontotheleftofthecurrentlyselectedfunctionsymbol Here below is a list of the function symbols and their meaning Fan cooking This setting allows you to roast or roast and bake simoultaneously using any shelf withoutflavourtransference Conventional cooking The heat comes from both the top and bottom element ensuring even heating ...

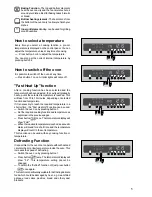
Page 5: ... reached This will take from 10 to 15 minutes depending on selected functionandtemperature If it is necessary to reach the required temperature in a shorter time the Fast Heat Up Function can be used Switch the oven on by pressing button 1 Settherequiredcookingfunctionandtemperatureas explained in the previous pages Pressbutton once Thetemperaturedisplaywill show FHU Whentherequiredtemperatureisre...

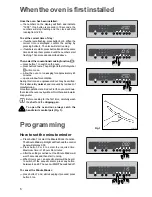
Page 6: ...ately 45 minutes openawindowforventilation During this time an unpleasant odour may be emitted This is absolutely normal and is caused by residues of manufacturing Oncethisoperationiscarriedout let theovencooldown thencleantheovencavitywithasoftclothsoakedinwarm soapy water Before cooking for the first time carefully wash the shelf and the dripping pan When the oven is first installed Programming ...

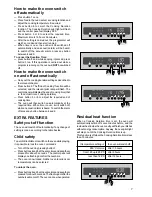
Page 7: ...t the required end of cooking time The oven will then switch on automatically at the required time When time is over it will switch off while an acoustic alarm is heard To switch the alarm off press any button between 4 and 9 EXTRA FEATURES Safety cut off function The oven will switch off automatically if any change of setting is made according to the table beside Child safety Toavoidlittlechildre...

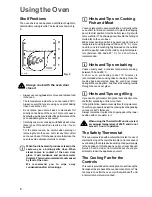
Page 8: ...se White meat poultry and fish in general need a medium temperature cooking between 150 and 175 C If you need to cook red meat slightly browned on the outside andmoregentlycookedintheinside ahighertempera ture between 200 and 250 C for a short time is recommended Hints and Tips on baking Cakes usually need a medium temperature cooking between 150 and 200 C A short oven pre heating about 10 minutes...

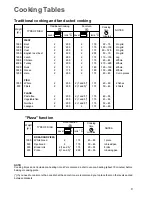
Page 9: ...60 Quiches 2 200 2 1 and 3 175 35 45 Lasagne 2 200 2 175 45 60 Fan Oven Traditional Cooking NOTES Weight gr Cooking time minutes C temp Level 4 3 2 1 Traditional cooking and fan ducted cooking TYPE OF DISH NOTE Cooking times do not include pre heating time We reccomend a short oven pre heating about 10 minutes before baking or cooking pizza Level 4 3 2 1 C If you need to cook more than one dish at...

Page 10: ...0 Chicken breast 4 400 4 max 13 10 Tomatoes 8 500 4 max 12 Fish fillets 4 400 4 max 8 6 Sandwiches 4 4 max 8 Toast 4 4 max 2 3 1 Grilling Upper side C temp Pieces Weight Quantity Cooking time minutes Lower side Grilling TYPE OF DISH Level 4 3 2 1 TYPE OF DISH Quantity gr Shelf level Temperature C Time in minutes from the bottom lower side upper side Pork 1500 2 or 3 170 45 30 Roastbeef 1500 3 200 ...

Page 11: ...be necessary to do a more complete cleaning using a proper oven cleaner Incaseofparticularlytoughstains youcanusestainless steel cleaning products or some warm vinegar If cooking fruits some over heated natual acids can squeeze and settle on the oven enamel causing stains quite difficult to remove This could affect the enamel brightness but it will have no consequence on the oven performances To a...

Page 12: ...ace the bulb proceed as follows fig 7 a push in and turn the glass lid anticlockwise b removethafaultybulb c replace it with a new one d refit the glass lid e switch on the electricity supply Fig 7 FO 0287 The Hinged Grill The oven can be fitted with a hinged grill element to enable you to clean the roof of the oven easily Before proceeding ensure the oven is cool and is isolated from the electric...

Page 13: ...the most important brands of electrical domestic appliances If necessary contact the nearest Centre by consulting the telephone directory under the name Zanussi or the yellow pages in the section Electrical Domestic Applaines Repair SER NO Mod PROD NO SER NO MOD PROD NO TYPE SOLUTION uCheck the oven is switched on and that a cooking function has been selected or uCheck the appliance is wired in pr...

Page 14: ...t the dimensions and materials of the surround or cabinet into which the oven will be built are correct and will withstand a temperature increase Acorrectinstallationwillhavetoensureaproperprotection against contact with electric parts or merely functionally isolated parts All the units meant to ensure protection have to be fitted not to be taken away without using any tool Werecommednottoinstallt...

Page 15: ...check that the power supply is properly earthed in compliance with the current rules 3 check the double pole switch used for the electrical connectioncanbeeasilyreachedwiththeappliance built in the forniture unit This appliance is supplied without connection cable Only the following cable types must be used H07 RN F H05RN F H05RR F H05VV F H05V2V2 F T90 H05 BB F section3x1 5mm2 A suitable plug abl...

Page 16: ...a disfunction occurs due to a defect which cannot be repaired the appliance will be replaced free of charge Extension of the guarantee 7 For motorcompressors of refrigerators freezers excluding the starting device and thermal interrupter a decreasing guarantee of 20 per year for a period of five years from the date of purchase of the appliance indicated on the relative invoice with repairs free of...

Reviews: