


-
Enable
(Open / Close) – activation or deactivation of the device (for „Close” - the device will not detect face, measure temperature
etc.
-
MaskCkEnable
(Open / Close) – switching on/off the mask detection
-
TempCkEnable
(Open / Close) – switching on/off temperature detection
-
StrangerTempCkEnable
(Open / Close) – switching on / off of temperature detection of unknown person (not entered into the sys-
tem)
-
WarnTemp
– temperature set for warning of increased body temperature for entering people
•
EVENTS > List tab
– (Fig.13)
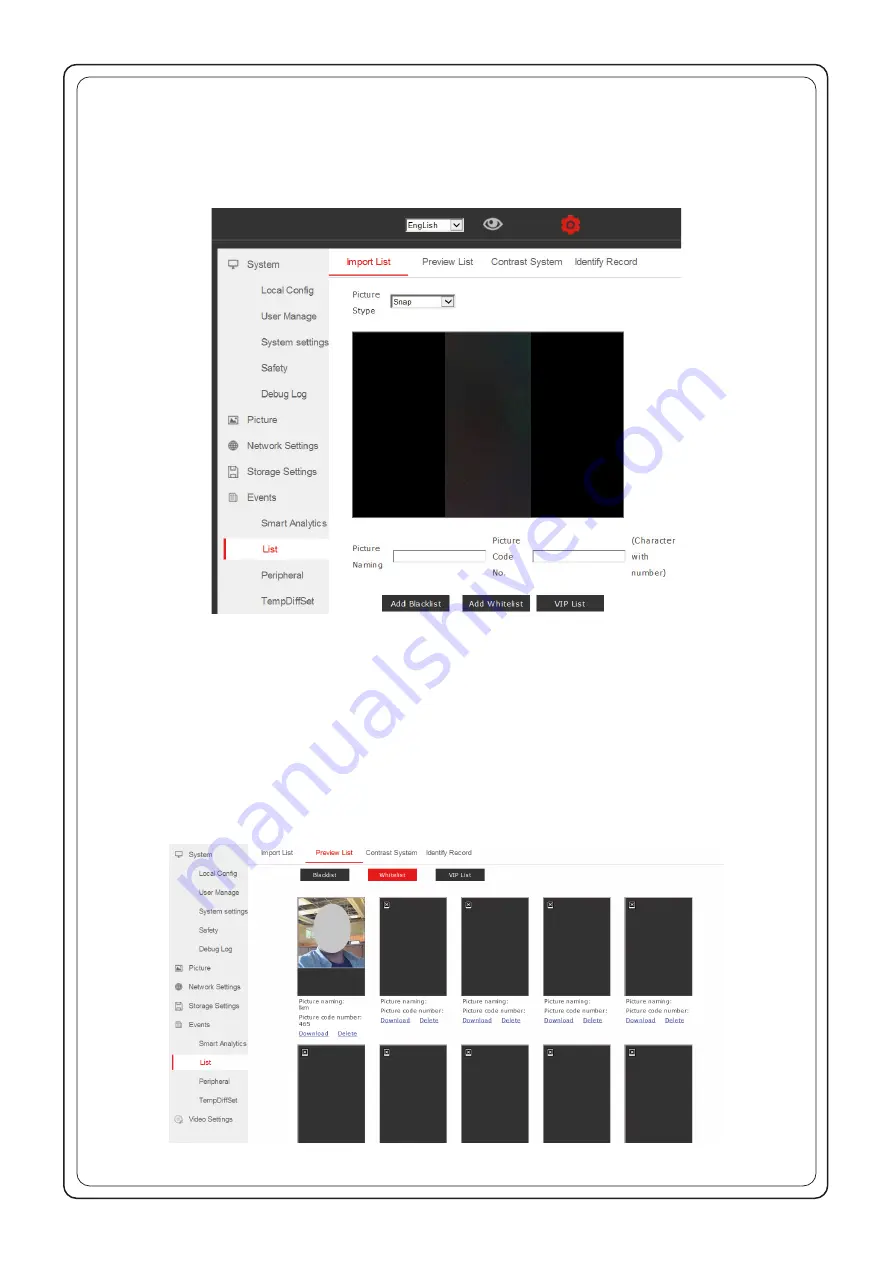
-
Import List
– tab allowing adding images of people, which should be recognized by the device
A picture of a given person can be added in two ways:
- photo file upload - function Picture Stype > Import – enter access path for the photo (maximum size 960 x 960 px) and click „upload”
button. Give a name of the photo after upload (Picture Naming) - any name, e.g. name, surname and number (Picture Code) and click
Add Whitelist to add it to the list of people authorized to enter.
- photo recording by the device - function Picture Stype > Snap - enter the name first (Picture Naming) and number (Picture Code)
under which the picture will be recorded. Then place a person whose image should be recorded in front of the device and press „Add
Whitelist” button. Now, the device will take a photo of recorded person and add its image to the list of persons authorized to enter.
Before registering a new person, make sure that the face recognition function is active. Go to EVENTS > Smart Analitics
tab and set the „FaceMatching” option to OPEN.
-
Preview List
– tab allowing you to preview a whitelist of people saved in the system who are allowed to enter the facility and
remove them from the list (Fig.14)
Fig.13
Fig.14


