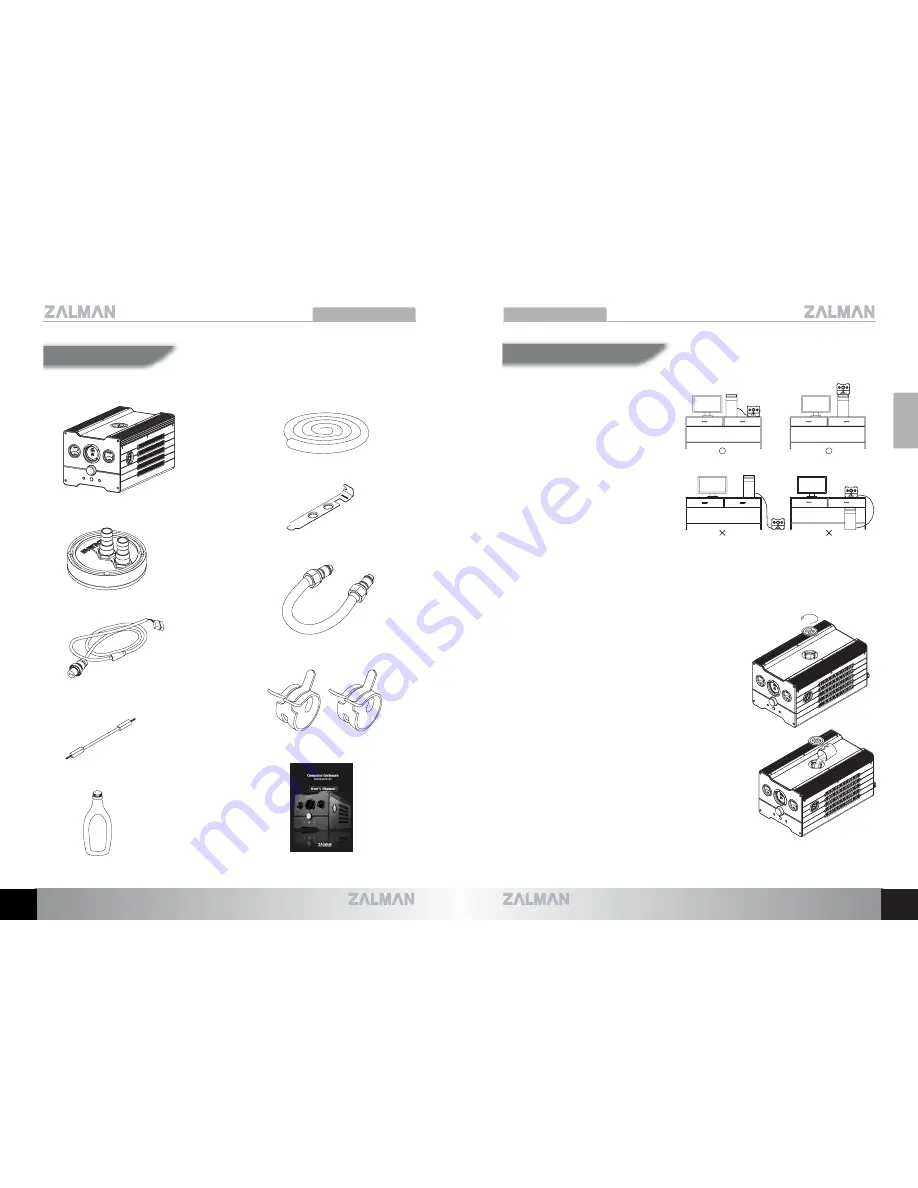
5.1 Reserator Placement
The Reserator
’
s
placement
should be determined in relation
to the position of the PC. Place it
upright, next to or slightly above
the PC. Note that if the Reserator
is placed lower than the PC, the
PVC Tube
’
s internal air pressure
may prevent proper initial
operation.
5.2 Adding Coolant
1) Remove the Reserator XT
’
s Reservoir Cap by
turning it counter-clockwise.
2) Mix the provided coolant with one liter of distilled
water in a bowl.
3) The entry hole is small. Therefore, use the
provided coolant container to fill the Reserator
with mixed coolant (four separate pours for a
sum of 1000
㎖
).
Note 1) Fill by four separate pours to prevent overflowing
of coolant. Once air has been completely
released and the coolant begins to circulate, then
refill the remaining coolant (250
㎖
).
Note 2) The provided coolant is a concentrated liquid.
Therefore, it must be diluted with distilled water in
a 1:4 ratio.
Note 3) Read the warning label on the coolant before
use.
Note 4) Keep this product and its associated system
away from children.
5. Installation Guide
RESERATOR XT
RESERATOR XT
1) Reserator XT- 1 Unit
English
6) PVC Tube - 4m
7) I/O Bracket - 1EA
8) Degassing Tube - 1EA
9) Tube Clamp - 2EA
10) User
’
s Manual - 1EA
2) CPU Water Block (ZM-WB5) - 1SET
3) DC Cable - 1EA
4) Jump Cable - 1EA
5) Coolant (ZM-G300) - 1EA
4. Components
7
•
The specifications of this product and its components may change without prior notice to improve performance.
8
•
The specifications of this product and its components may change without prior notice to improve performance.
Summary of Contents for Reserator XT
Page 1: ...English Version...


