HE2K-DCK-1X User Instructions
DOC-USR-0122-05
______________________________________________________________________________________
Z3 Technology, LLC
♦
100 N 8
th
ST, STE 250
♦
Lincoln, NE 68508-1369 USA
♦
+1.402.323.0702
36
Note:
By default a limited selection of video encoding settings are available in the user interface. See Section
8.2, “Advanced Settings Mode”, for more information on accessing additional settings.
(8)
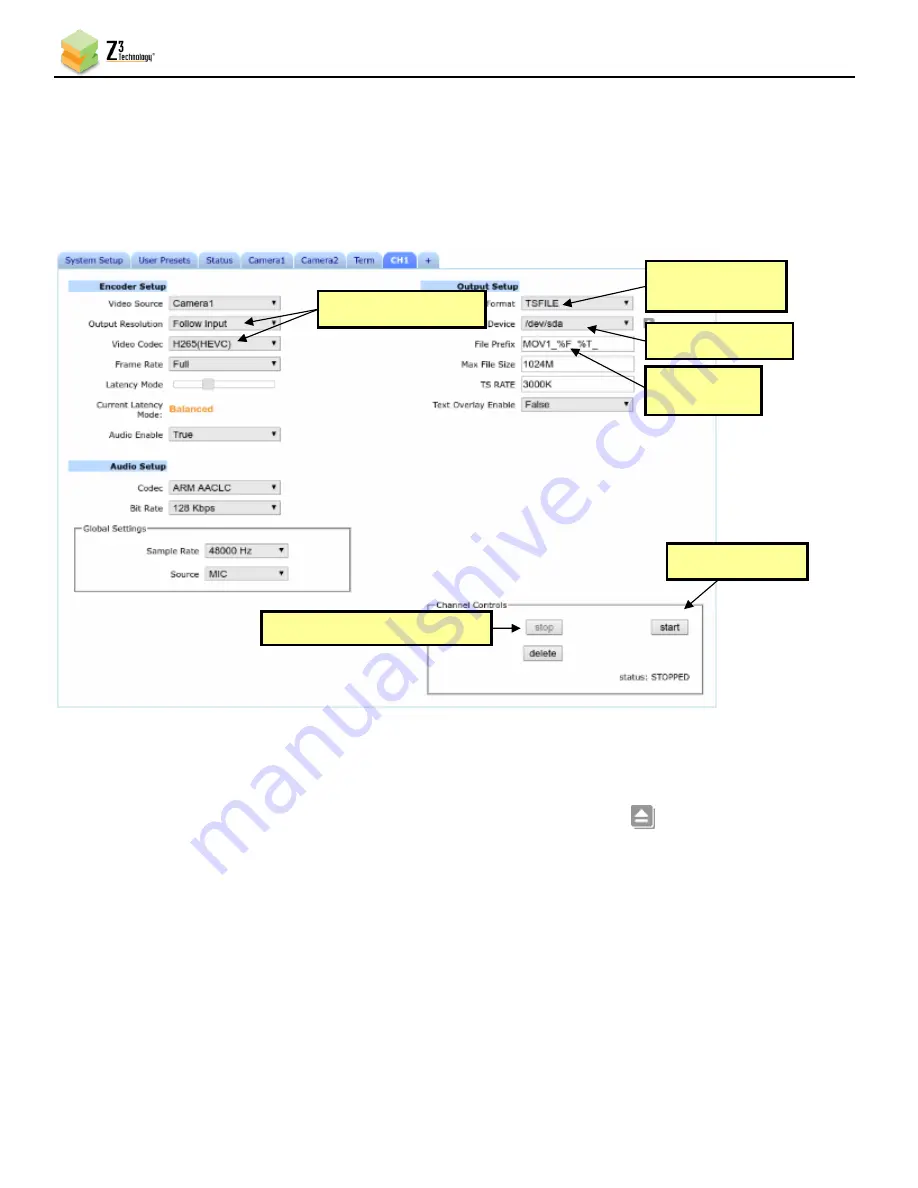
Click on the
Start
button. After a moment, the encoder status will change to
RUNNING
and the fields
above will appear in dark grey. The status LED on the unit will blink green when streaming.
(9)
When your desired recording length has been reached, click on the
Stop
button.
Verify the status light has stopped blinking green. Click the eject icon
and wait for the
notification before disconnecting the storage device to ensure that all buffered data is completely
transferred.
Note:
If less space is available on the storage device than the
Max File Size
specified in the user interface, the
oldest files will be removed until there is sufficient space or no files remain. This check for available space
is performed when
start
is clicked and every time a new file is created.
(10)
You can verify your recording by connecting the storage device to your PC and opening the newly
created .ts file in VLC media player.
Figure 33
CH1 Tab Configuration – TSFILE
(3) Change
to “TSFILE”
(1) If necessary, click “Stop”
(6) Click “Start”
(4) Select device
(2) Verify settings
(5) Enter file
prefix


