background image

12

Exercising with your rower

Rowing is an extremely effective form of exercise. It strengthens the heart, improves circulation, as well as exercising all the 

major muscle groups - back, waist, arms, shoulders, hips & legs.
ALWAYS CONSULT YOUR DOCTOR bEFORE UNDERTAKING A NEW EXERCISE REGIME.
IF YOU EXPERIENCE NAUSEA, DIZZINESS OR OThER AbNORMAL SYMPTOMS DURING EXERCISE, STOP AT ONCE AND 

CONSULT YOUR DOCTOR.

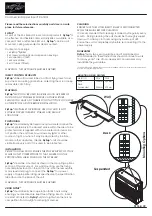
How to row:

T

1. 

ake up the initial position leaning forward, knee bent and arms straight.

P

2. 

ush yourself backwards, straightening your back and legs at the same time.

C

3. 

ontinue movement until you are leaning slightly backwards, bending return to Step 1 and repeat.

ThIS PRODUCT IS COMPLIANT WITh EUROPEAN STANDARDS (EN957). ThE USER MUST REMAIN AWARE ThAT IF ThIS 

PRODUCT IS NOT USED CORRECTLY ThE POTENTIAL FOR INJURY REMAINS. ThERE ARE MANY MOVING PARTS ON ThIS 

PRODUCT, WhICh ThE USER MUST bE AWARE OF. WhEN MOVING ThE ROWER OR ADJUSTING POSITION, ThE USER 

ShOULD PAY PARTICULAR ATTENTION ThE SEAT & RUNNER ASSEMbLY.

P

• 

lease ensure that fingers are not placed inside of the runner assembly when moving the product.

W

• 

hen adjusting your exercise position and you need to steady yourself by holding onto the rower, ensure that it is the 

underside of the seat upholstery that you are grasping.

Alternative exercise - leg only rowing:

This exercise will help tone and strengthen the muscles in your legs and back. With your back straight and arms outstretched, 

bend your legs until the row arms are in the starting position. Use your legs to push your body back whilst keeping your arms 

and back straight, slowly return to start position and repeat.

fitness guide

1.

1.

2.

2.

3.

3.

Summary of Contents for 56011

Page 1: ...owner s manual 19 05 2009 Inspiration Rower ...

Page 2: ...on them when they are not in use R egularly check to see that all nuts bolts and fittings are securely tightened Periodically checking all moving parts for obvious signs of wear or damage C lean only with a damp cloth do not use solvent cleaners If you are in any doubt do not use your product Contact CUSTOMER SUPPORT B efore use always ensure that your product is positioned on a solid flat surface...

Page 3: ... below O riginal purchase date P lace of purchase I nformation about the place and conditions of use P recise description of the issue defect Serial No Disclaimer While every effort has been made to ensure that the information contained in this guide is accurate and complete no liability can be accepted for any errors or omissions York Fitness reserves the right to change the specifications of the...

Page 4: ...hat you understand them before proceeding to other sections of this guide Table of contents Read This First 02 03 Safety Precautions 02 Disclaimer Customer Support 03 Table Of Contents 04 Introduction 05 Assembly Instructions 06 09 Getting Started 06 Hardware Identification Chart 06 Assembly Instructions 07 09 Final Checks 09 Operational Instructions 10 11 Quick Start 10 Console Display and Feedba...

Page 5: ...5 12 levels of hydraulic resistance Comfortable roller mounted seat and pivoting footrests Computer displays strokes time distance calorie strokes min 4 target programs introduction ...

Page 6: ...eter Use the small scale to check the length of the bolts and screws NOTE The length of all bolts and screws except those with flat heads is measured from below the head to the end of the bolt or screw Flat head bolts and screws are measured from the top of the head to the end of the bolt or screw Part No 15 x 4 CARRIAGE M10 X 88MM Part No 29 x 4 FLAT WASHER ID10 5 X OD23 X T1 5MM Part No 27 x 1 F...

Page 7: ...hrough the top of the nut STEP 1 Part No 29 x 4 FLAT WASHER ID10 5 X OD23 X T1 5MM Part No 15 x 4 CARRIAGE M10 X 88MM STEP 2 Part No 27 x 2 FLAT WASHER ID8 5 X OD13 X T1 5MM Part No 17 x 2 HEX HEAD BOLT M8 X 16MM ENSURE THICKER EDGE OF SEAT ARE ON THE SAME SIDE AS SEAT STOP assembly instruction 15 29 43 24 15 29 24 43 17 27 14 seat stop seat carriage seat ...

Page 8: ...E LAST HOLE AT THE END OF THE MAIN FRAME STEP 4 I 1 nsert two batteries AA size 1 5V into the compartment in the back of the computer A 2 ttach the bottom console to the main frame and secure using 2 x machine screws as shown screws are located on the back side of computer console C 3 onnect the sensor wire sockets that come out of the main frame to the computer wire plug on the back of computer c...

Page 9: ...X 38MM STEP 3 THE STRAP LOOPS SHOULD BE FITTED TO THE INSIDE EDGE OF THE PEDAL FOR EASY ADJUSTMENT OF THE STRAP Final Checks Your rower is now assembled Please make the following final checks before you use it for the first time M ake sure all screws bolts are tightened M ake sure you have positioned it on a flat level surface assembly instruction ...

Page 10: ...tion of total strokes since the last time the reset button was pressed Button Functions FUNCTIONS PRE WORKOUT DURING WORKOUT MODE S witches between the modes for target setting S witches between the feedback modes as described above SET A ctivates the console and sets target values RESET R eset all of the target values and total count data Using Workout Programs WORKOUT PROGRAMS DESCRIPTIONS MANUA...

Page 11: ...t section on page 5 IF YOU HAVE A PROBLEM WITH YOUR EQUIPMENT BEFORE YOU DO ANYTHING ELSE PLEASE CHECK THAT ALL THE CABLE HAVE BEEN CONNECTED CORRECTLY LOOSE CABLES ARE VERY COMMON AND MANY PROBLEMS CAN BE SOLVED BY MAKING SURE THE CABLES ARE PROPERLY CONNECTED continued from previous page WORKOUT PROGRAMS DESCRIPTIONS TARGET DISTANCE P 1 ress MODE until 00 00 is flashing in the DIST window U 2 se...

Page 12: ...MUST REMAIN AWARE THAT IF THIS PRODUCT IS NOT USED CORRECTLY THE POTENTIAL FOR INJURY REMAINS THERE ARE MANY MOVING PARTS ON THIS PRODUCT WHICH THE USER MUST BE AWARE OF WHEN MOVING THE ROWER OR ADJUSTING POSITION THE USER SHOULD PAY PARTICULAR ATTENTION THE SEAT RUNNER ASSEMBLY P lease ensure that fingers are not placed inside of the runner assembly when moving the product W hen adjusting your ex...

Page 13: ...te zone As your aerobic capacity improves gradually increase the intensity of your workout by increasing your heart rate Measure your heart rate periodically during your workout by stopping the exercise but continuingly to move your legs or walk around Place two or three fingers on your wrist and take a six second heartbeat count Multiply the results by ten to find your heart rate For example if y...

Page 14: ...ion if it becomes defective malfunctions or otherwise fails to conform with this warranty under normal non commercial personal family or household use In repairing the product York Fitness may replace defective parts or at the option of York Fitness use serviceable used parts that are equivalent to new parts in performance All exchanged parts and products replaced under this warranty will become t...

Page 15: ...15 exploded drawing ...

Page 16: ...LAT WASHER ID8 5 X OD13 X T2MM 27 56011 27 FLAT WASHER ID8 5 X OD13 X T1 5MM 28 56011 28 FLAT WASHER ID8 5 X OD28 X T2MM 29 56011 29 FLAT WASHER ID10 5 X OD23 X T1 5MM 30 56011 30 PLASTIC SPACER ID12 8 X OD19 X 38MM 31 56011 31 PULLEY WHEEL SINGLE STRAP Ø12 7 X Ø31 X 49MM 32 56011 32 PULLEY WHEEL TWIN STRAP Ø12 7 X Ø29 5 X 49MM 33 56011 33 PULLEY WHEEL TWIN STRAP Ø12 7 X Ø28 X 49MM 34 56011 34 PLA...

Reviews: