background image

Camera Viewer

Viewing your Camera

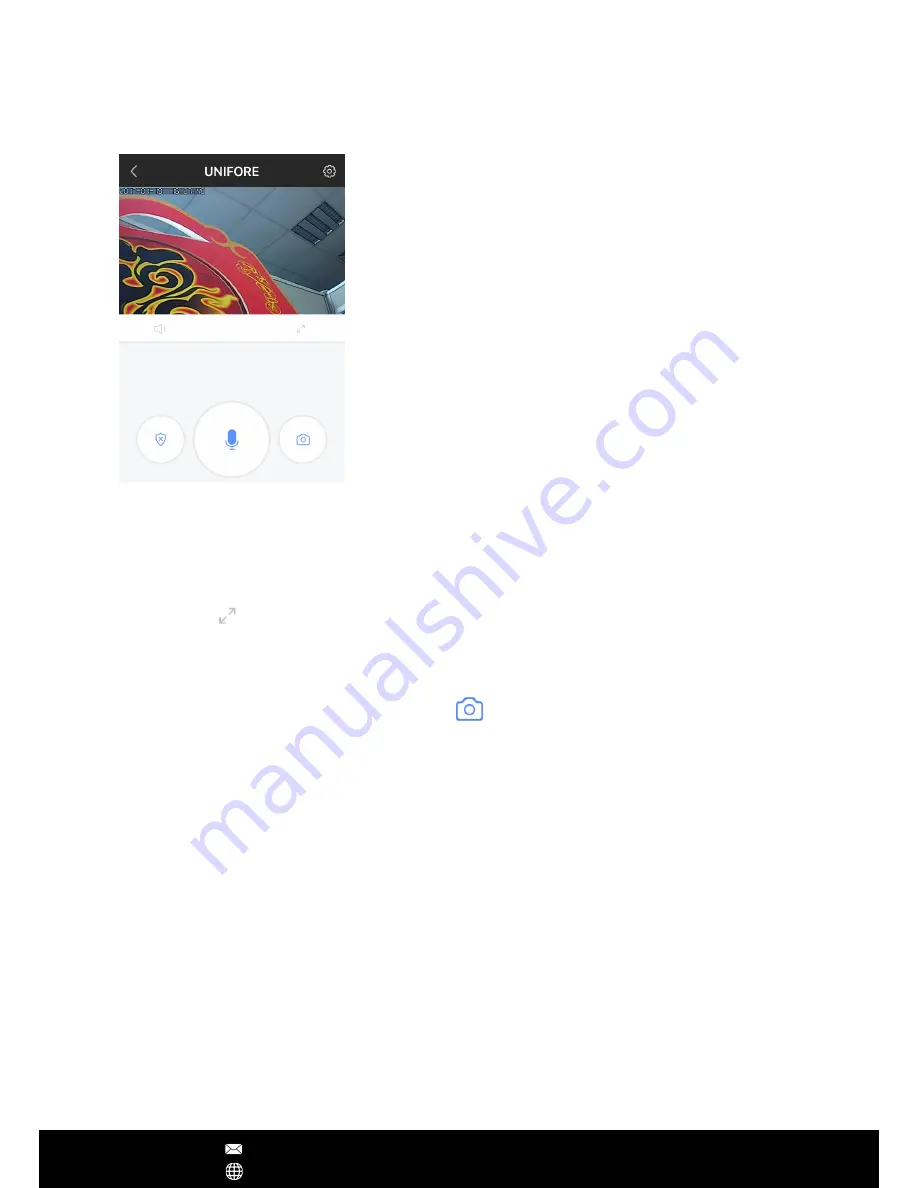
1. From the ‘Device list’ menu, ensure that the camera’s status is on-line. Press the large 

camera image icon to launch the camera viewer

2. After a link has been established, the camera feed will be shown in the window

3. Press the ‘SD’ symbol to change between low, standard and high definitions

4. Press the 

 symbol to launch into full screen landscape mode

5. Using two fingers, pinch or expand to zoom in and out of the camera feed

Taking a Snapshot

While viewing your camera feed, press the 

 button to take a snapshot. Quickly view 

past snapshots below the camera feed display.

Setting up Alarm Notifications

1. From the ‘Device list' menu, press the camera settings button

2. Press ‘Alarm Settings’ and ensure that ‘Motion Detection’ is turned on

3. To receive alarm email notification, turn on ‘receive alarm message’

4. Press back until you return to the ‘Device list’ menu, and then ensure that the camera

lock button is set to ‘locked’

Pair with Security Detectors

Depending on your camera, it may support 'Add sensor/Defence area' function to 

work with up to 64 wireless security detectors. The wireless specification for wireless 

detectors is 433.92MHz (regular) or 868MHz (newest). Pairing with security detectors to 

the camera only takes two simple steps.

1. From camera's setting, click ‘Add sensor', then 'Sensor' to make ready to add the 

sensor.

2.Trigger the sensor twice to emit wireless radio signal, once App pop-ups 'Success', then 

it's done.

App Operations

After Sales Support      [email protected]

                                          www.yooseecamera.com

Number of Viewers: 

A maximum of 5 viewers can view 

the same camera feed

Expand View:

 Change from portrait to full screen 

landscape viewing mode

Previous Snapshots:

 Scroll through and quickly access 

your previous snapshots

Speaker:

 Sound or Mute

Intercom:

 Touch intercom icon to speak with your 

camera

Snapshot:

 Press to capture a screenshot and save it 

directly onto your smartphone

Summary of Contents for SMART 1080P

Page 1: ...SMART 720P 1080P WIRELESS IP CAMERAS Instruction Manual After Sales Support techsupport 123anfang com www yooseecamera com V 1 2...

Page 2: ...ndoor cameras usually use DC5V 2A power supply and outdoor cameras use DC12V 1 5A power supply 2 Connect the Ethernet cable It s recommended to use the Ethernet wired connection when firstly setup the...

Page 3: ...login screen and follow the steps to create a new account Note If you forget the account number or password you may simply register another account Invalid email address can be used in account regist...

Page 4: ...tors to the camera AP mode Switch to AP mode so camera can directly connect with smartphone without Internet connection Device Update Check for the latest camera firmware App Operations After Sales Su...

Page 5: ...u return to the Device list menu and then ensure that the camera lock button is set to locked Pair with Security Detectors Depending on your camera it may support Add sensor Defence area function to w...

Page 6: ...the large image icon to launch the camera viewer 4 From camera s settings choose Switch to networking mode to switch to normal Internet mode the camera will reboot Note For Android Smartphones the Ap...

Page 7: ...ceiver s email address Addresser sender s email address receiver s email and sender s email can be same SMTP address SMTP server s url e g smtp gmail com Port select the right port number according to...

Page 8: ...on Windows 1 Download link http dl1 cloudlinks cn 8765 dl rar CMS rar 2 Extract RAR rar click CMSSetup exe and install 3 Once installation is complete right click on the CMSClient icon and select Prop...

Page 9: ...ate network Follow these steps to log in and view your camera If you do not have a Yoosee account follow the steps in the Yoosee section to create one Select Remote login from the login type dropdown...

Page 10: ...Support techsupport 123anfang com www yooseecamera com As default IP camera abtains local IP address automatically However intend to get a static IP address you can manually assign an local IP addres...

Page 11: ...device menu 3 Change the begin and end time to your desired search range then press Search 4 Your record files will be shown on the left Double click a file to commence playback Log Menu To check even...

Page 12: ...Adding a New Camera If your camera is not automatically detected by CMS on start up follow these steps 1 Ensure your computer has an active network connection 2 On the preview screen select the butto...

Page 13: ...and change the Wifi channel to get better signal strength 2 Camera only supports Wifi 2 4 GHz recommended wireless encryption is WPA AES WPA2 AES do not use TKIP Wifi SSID should not have special sym...

Reviews: