12
IM 04L51B11-01EN
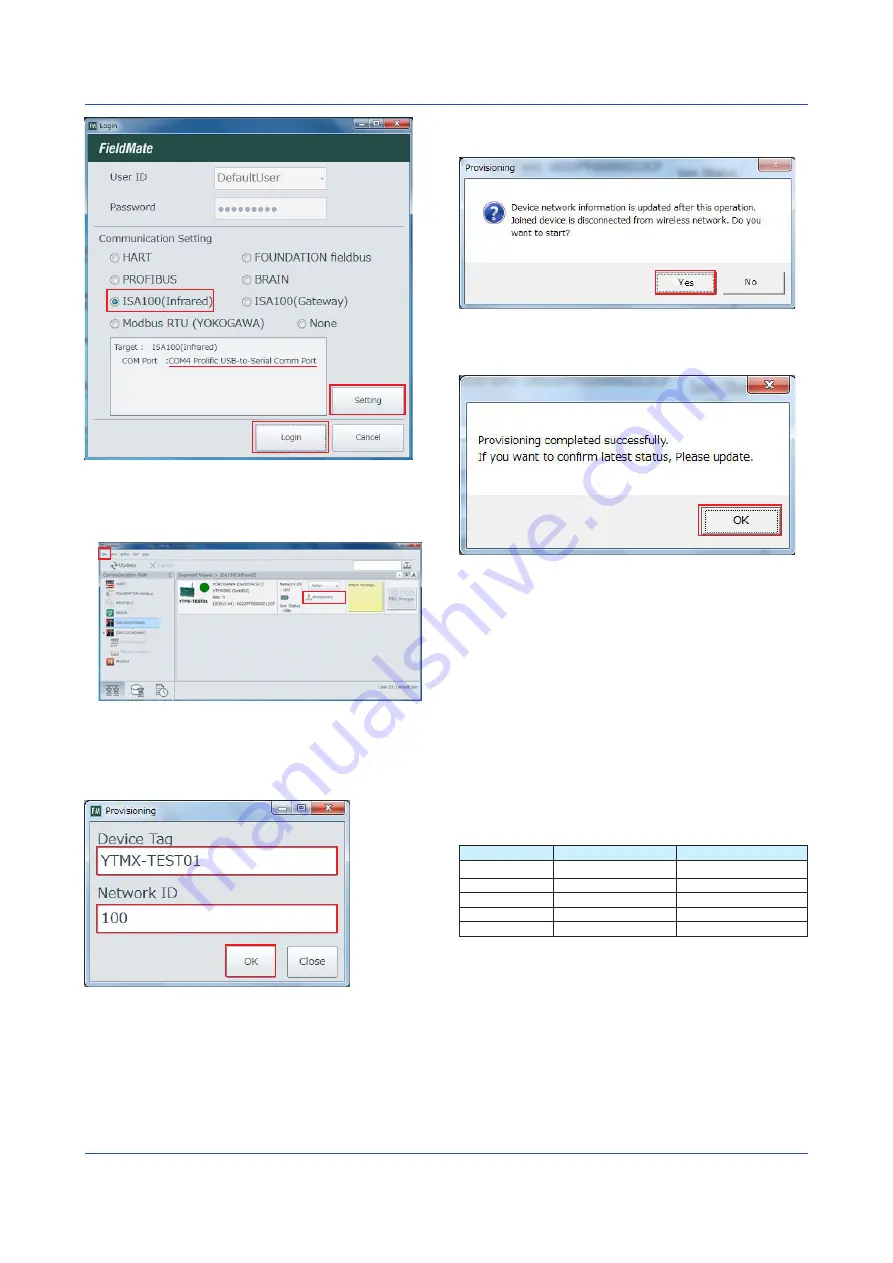
Figure 4
As shown in figure 5, the icon of the detected YTMX
appears in the Segment Viewer. Click Provisioning to
open a Provisioning dialog box shown in figure 6.
(3)
Figure 5
Set the device tag to a name of your choice (e.g.,
YTMX-TEST01) and the network ID to 100 as shown
in figure 6. Point the infrared adapter to the YTMX580
infrared port, and click OK.
Figure 6
The dialog box shown in figure 7 appears. Click Yes to
begin provisioning.
Figure 7
When provisioning is finished, the dialog box shown in
figure 8 appears. Click OK to finish.
Figure 8
(3) Creating a Provisioning Information File
After provisioning, save the results to YTMX-TEST01.ypif
(example). (The provisioning data will be used later.)
To save the results, click Export Provisioning Device
Information File on the File menu (see figure 5), and
specify the file name.
(4) Changing Device Parameters
Set the device parameters according to table 5 using DTM
Works of FieldMate.
The steps are
to
. If you are continuing from step (3),
begin from step
.
For details on the parameters, see section 7.3.2 and
chapter 9 in the YTMX580 Multi-input Temperature
Transmitter User’s Manual (IM 04R01B01-01EN).
Item
Parameter
AI1 Temp to AI8 Temp
Scale Upper
Scale.EU at 100%
100.0
Scale Lower
Scale.EU at 0%
0.0
Unit
Scale Unit Index
°C (deg C)
Input type
Lin Type
Type T
Data type
Process Value Type
Direct
Table 5 Device parameter setting example


