


Tech
Note:
TNA1403
Date:
February
5,
2014
13.)
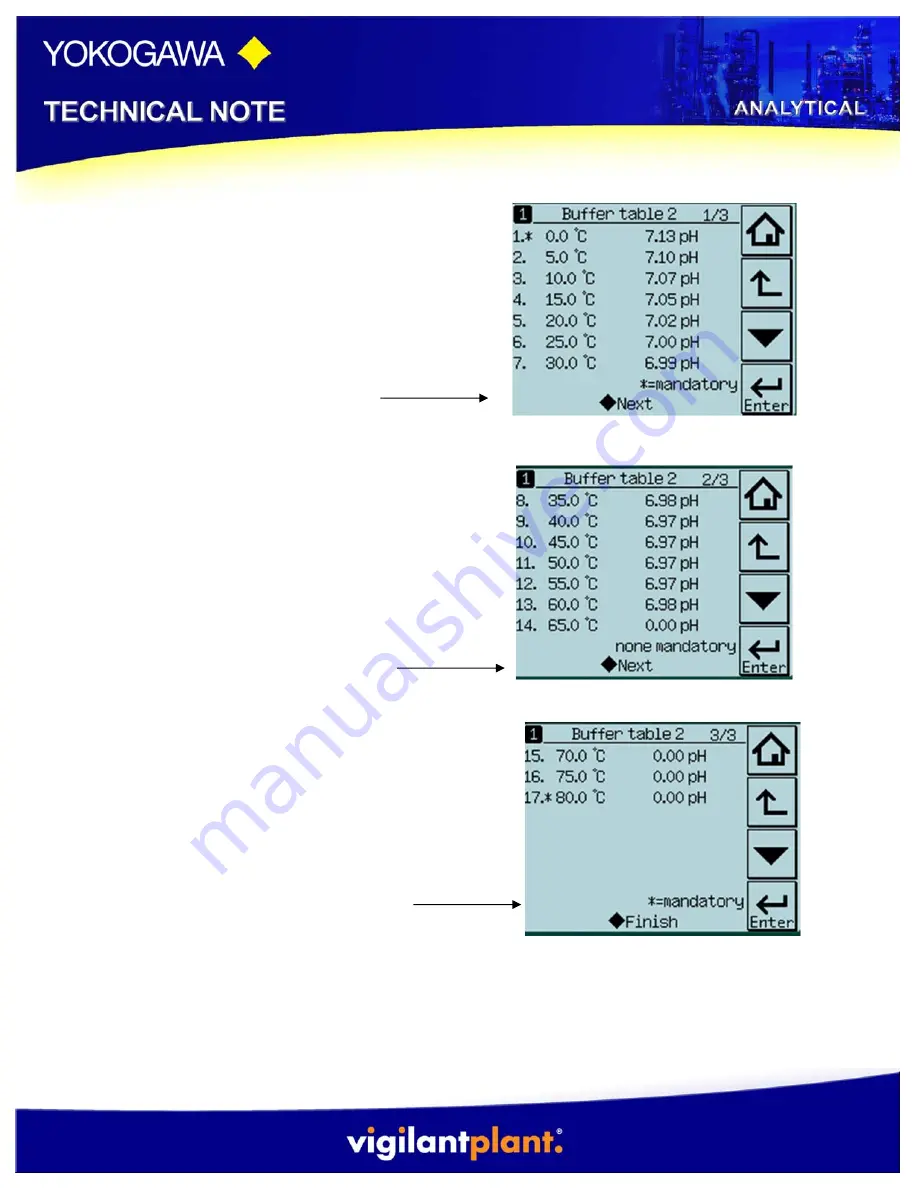
Once the pH values for the
temperatures 0ºC-30ºC have been
changed, click on the diamon next the
the Next to precede to the next page
of the table. Note: You do not have to
change all of the values, only the ones
that are stated mandatory.
14.)
If you choose to fill out the pH
values for 35ºC-65ºC do so in the
same manner as described above in
step #11. Once the pH values for the
temperatures 35ºC-65ºC that you wish
to change have been changed, click on
the diamond next the the Next to
precede to the next page of the table.
15.)
If you choose to fill out the pH
values for 70ºC-80ºC do so in the same
manner as described above in step #11.
Once the pH values for the temperatures
70ºC-80ºC that you wish to change have
been changed, click on the diamond next
the the Finish to return to the original
User definded 2 Buffer screen.