background image


Yeastar  S412  Installation  Guide 


  10/12 

Desktop Installation 

WARNING 


Please set 5~10cm gaps around the device for air circulation. 


Please avoid any heavy thing placed on the device. 


STEP 1   

Place the IP PBX on a steady platform. 

STEP 2   

Remove the adhesive backing paper from the rubber feet. 
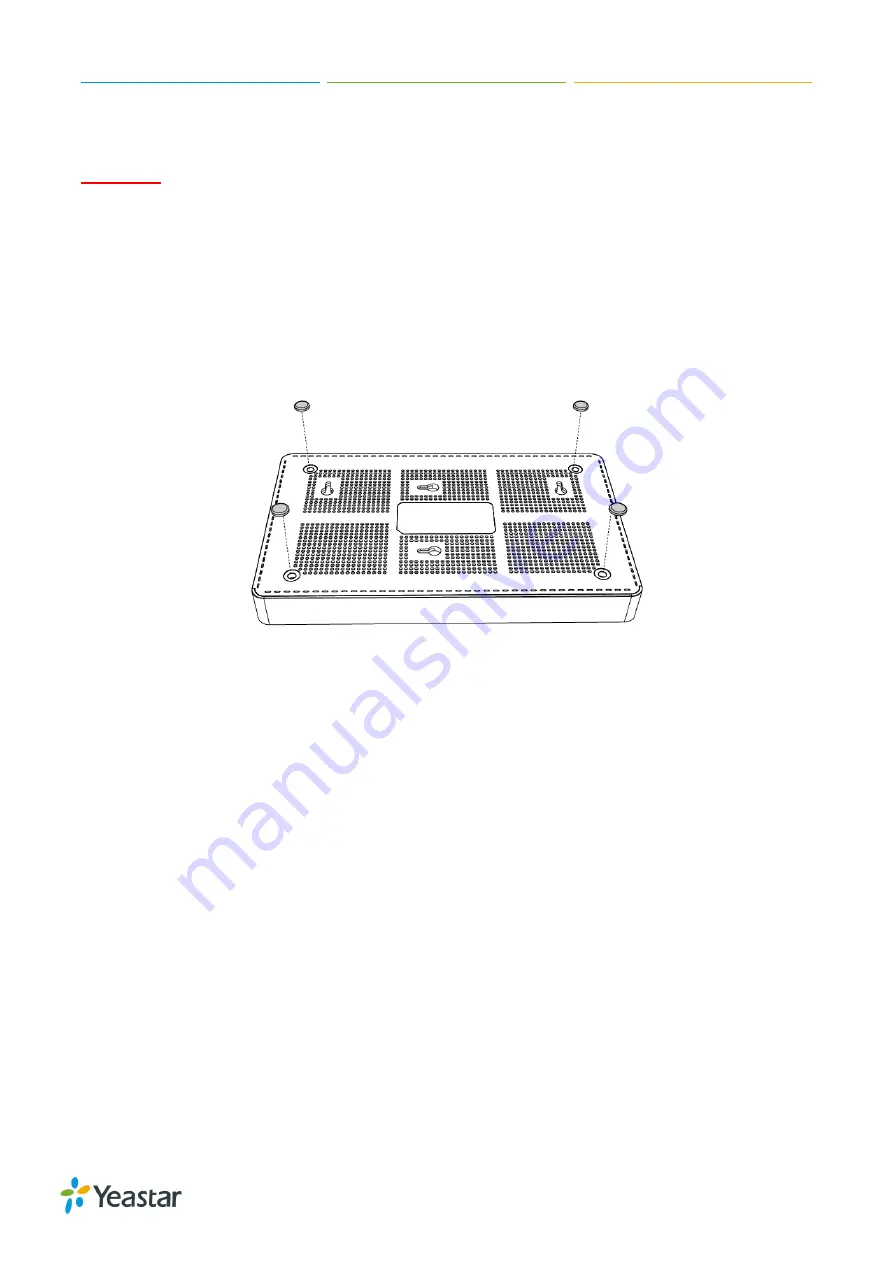
STEP  3   

Turn  over  the  device  and  attach  the  supplied  rubber  feet  to  the  recessed  areas  on  the 

bottom at each corner of the device. 


Summary of Contents for S412

Page 1: ...Yeastar S412 VoIP PBX Installation Guide Version 1 3 Date 2017 10 10...

Page 2: ...BEFORE YOU START 4 Package Contents 4 Hardware Overview 4 LED Indicators and Ports 5 INSTALLATION 7 Safety Disclaimers and Installation Warnings 7 Module Installation 7 Desktop Installation 10 CONNEC...

Page 3: ...to perform configurations on the system Related Documents This Installation Guide only explains the installation of Yeastar S412 IPPBX For more functionality and advanced settings please refer to the...

Page 4: ...ived the items below If there is any problem please contact your provider Package Contents 1 S412 PBX 1 Power Adapter 1 Network Cable 4 Rubber Feet 1 Warranty Card 1 Quick Installation Guide Hardware...

Page 5: ...slowly there is no SIM card inserted Blinking rapidly the trunk is in use BRI Orange light Blinking slowly the BRI line is disconnected Static the BRI line is connected or in use FXO Red light Blinkin...

Page 6: ...is Single Single LAN port interface will be used for uplink connection WAN port is disabled Bridge LAN port interface will be used for uplink connection WAN port interface will be used as bridge for P...

Page 7: ...IP PBX in a location that is clean free from vibration electric shock and temperature humidity extremes The operating temperature should be kept below 104 F 40 C Module Installation Yeastar S412 is de...

Page 8: ...Yeastar S412 Installation Guide 8 12 STEP 1 Loosen the screws on the bottom of the device and remove the upper cover STEP 2 Insert the module to the Module Slot S412 Main Board...

Page 9: ...a SIM card on the GSM 3G 4G module following the instructions Skip this step if no GSM 3G 4G module installed STEP 4 Close the cover and fix the screws STEP 5 Rotate the antenna into the Antenna Sock...

Page 10: ...for air circulation Please avoid any heavy thing placed on the device STEP 1 Place the IP PBX on a steady platform STEP 2 Remove the adhesive backing paper from the rubber feet STEP 3 Turn over the d...

Page 11: ...SYSTEM LED starts to blink STEP 3 Connect the telephony line to the RJ11 port of the IP PBX RJ11 Port Description FXS Connect one end of a RJ11 phone cable to the port Connect the other end to the ana...

Page 12: ...sword password STEP 1 Connect your PC to the same network as Yeastar S412 STEP 2 Start the browser on PC In the address bar enter the IP address click Enter key and then you can see the web GUI login...

Reviews: