MyPBX SOHO V4/V5 Administrator's Guide
www.yeastar.com
Page 34
Step 2
: Create a folder
Step 3
: Create a text file named "status.txt" in the folder
Step 4
: Share this folder
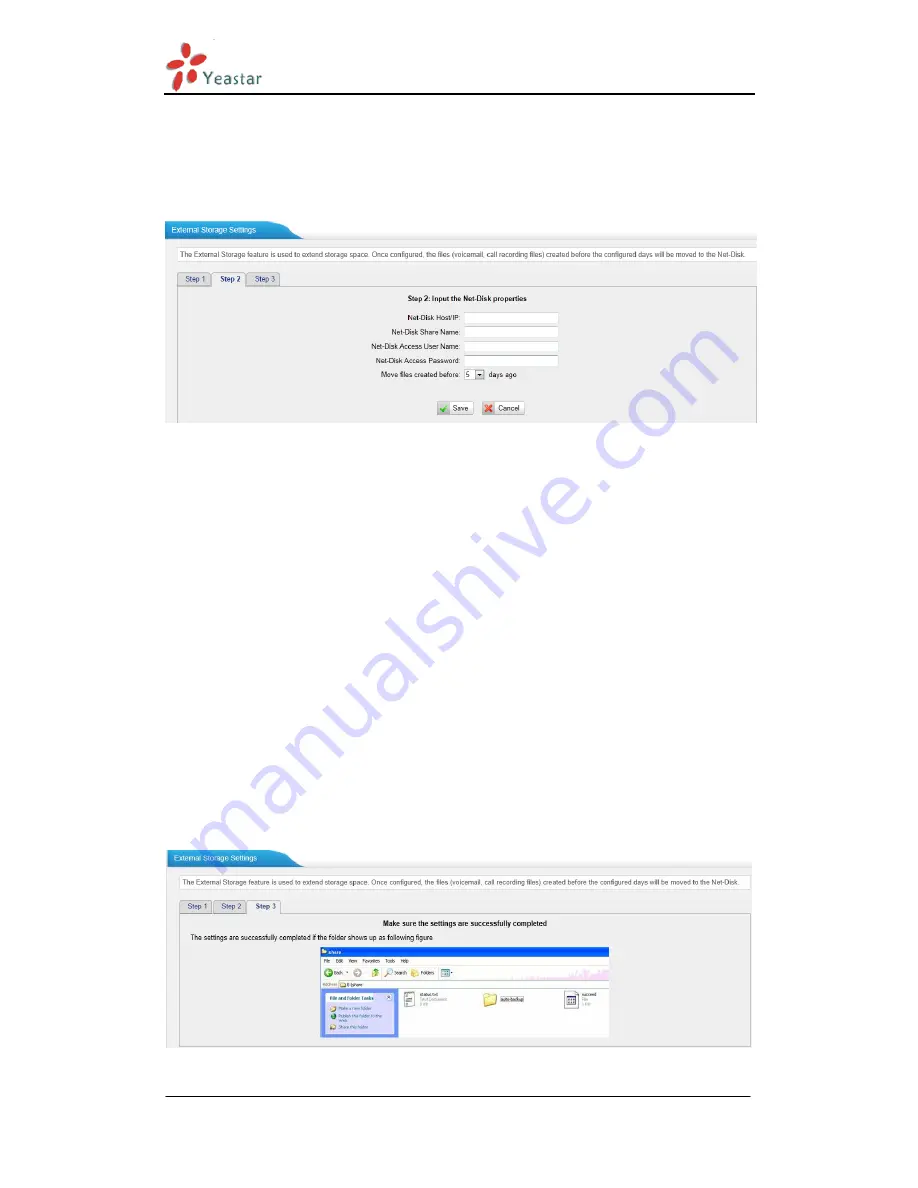
Then we need input the Net-Disk information in step2 page.
Figure 5-24
Net-Disk Host/IP
: Change this to the IP address of the computer where
backup files will be stored.
Net-Disk Share Name
: Change this to the name of the shared folder where
backups will be stored.
Net-Disk Share Username
: The user name used to log into the network share.
Leave this blank if it is not required
Net-Disk Share Password
: The password used to log into the network share.
Leave this blank if it is not required
I
f
the configuration is
correct, open the Windows share folder you will see the
MyPBX backup files and folders has been created. If the contents of the backup
folder look similar to step3 page, then you have successfully configured external
storage on the MyPBX unit.
Figure 5-25
Summary of Contents for MyPBX SOHO V4
Page 1: ...SOHO V4 V5 Administrator s Guide Version 70 19 0 23 Yeastar Technology Co Ltd ...
Page 12: ...MyPBX SOHO V4 V5 Administrator s Guide www yeastar com Page 12 Figure 3 4 Figure 3 5 ...
Page 135: ...MyPBX SOHO V4 V5 Administrator s Guide www yeastar com Page 135 Figure 9 5 ...
Page 144: ...MyPBX SOHO V4 V5 Administrator s Guide www yeastar com Page 144 Figure D 5 Step5 Finish ...
Page 146: ...MyPBX SOHO V4 V5 Administrator s Guide www yeastar com Page 146 Figure E 2 Step3 Finish ...
Page 150: ...MyPBX SOHO V4 V5 Administrator s Guide www yeastar com Page 150 Figure F 3 ...
Page 183: ...MyPBX SOHO V4 V5 Administrator s Guide www yeastar com Page 183 Figure I 5 ...
Page 192: ...MyPBX SOHO V4 V5 Administrator s Guide www yeastar com Page 192 Figure I 17 ...
Page 202: ...MyPBX SOHO V4 V5 Administrator s Guide www yeastar com Page 202 Figure I 34 ...


