Yealink IP Phone Configuration Guides
www.yeastar.com
Page 8
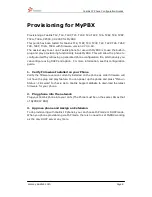
Provisioning for MyPBX
Provisioning a Yealink T12, T18, T18P, T20, T20P, T22, T22P, T26, T26P, T28, T28P,
T32G, T38G, VP530, VP-2009 for MyPBX
This guide has been tested for Yealink T18, T18P, T20, T20P, T22, T22P, T26, T26P,
T28, T28P, T32G, T38G with firmware version X.70.0.60.
The easiest way to set up a Yealink phone for use with MyPBX is to use the built-in
plug and play provisioning functionality inside MyPBX. This will allow the phone to
configure itself by retrieving a generated phone configuration file. Alternatively you
can configure using DHCP and option. For more information, see this configuration
guide.
1.
Verify Firmware Installed on your Phone
Verify the firmware version currently installed on the phone as older firmware will
not have the plug and play feature. You can power up the phone and press ―Menu >
Status > Firmware‖ to check. Go to Yealink Support Website to download the latest
firmware for your phone.
2.
Plug phone into the network
Plug your Yealink phone into your LAN. (The Phone must be on the same LAN as that
of MyPBX IP PBX).
3.
Approve phone and Assign an Extension
To do provisioning with Yealink IP phones, you can choose PnP mode or DHCP mode.
When you phone provisioning via PnP mode, there is no need to set MyPBX working
as the only DHCP server any more.


