


Yealink EXP40 User Guide
20
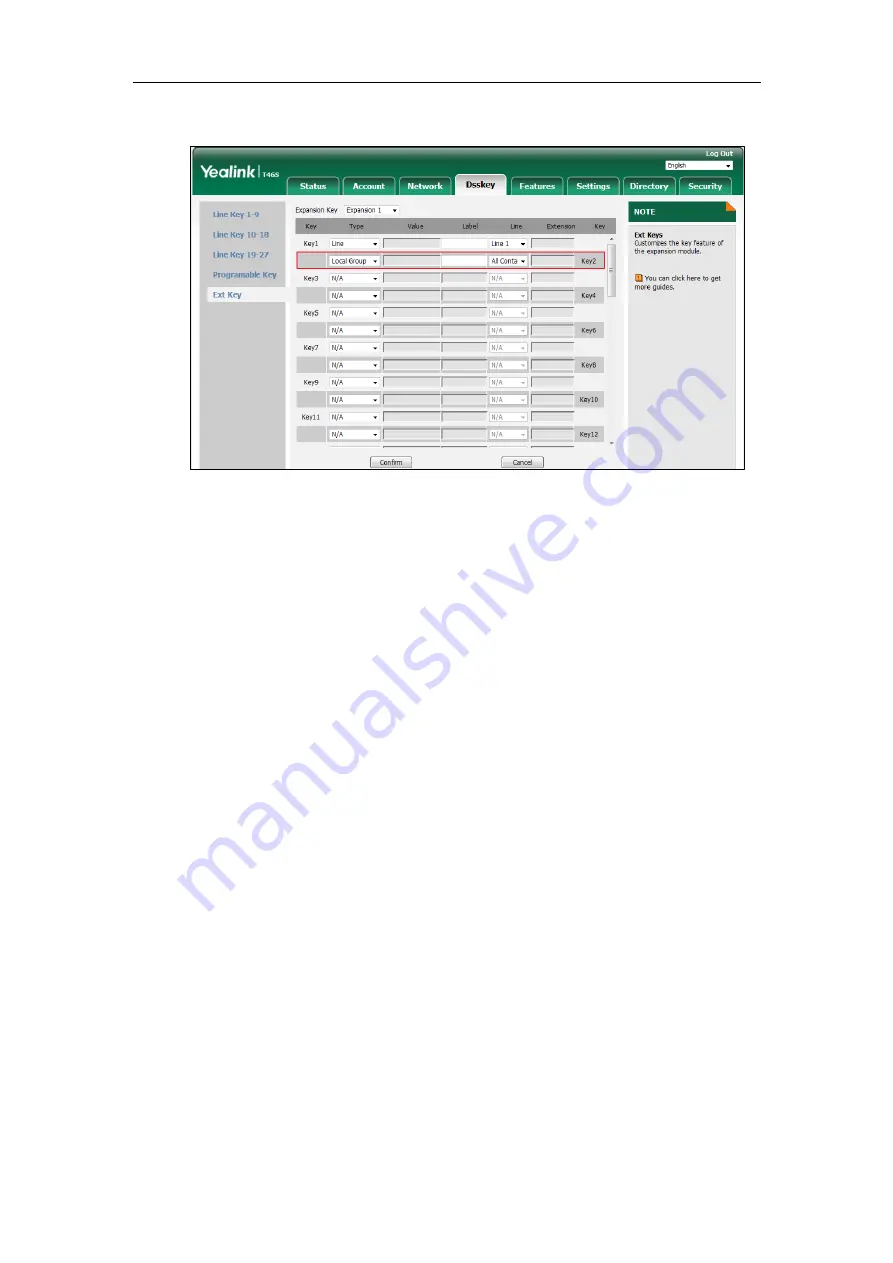
4.
Select the desired contact group name from the pull-down list of
Line
.
5.
Click
Confirm
to accept the change.
XML Group
You can configure an Ext key as the XML group key. If you press the XML phonebook key when
the phone is idle, the phone will automatically download the corresponding phone book from
the server and display the entries of the phone book on the LCD screen of the phone. To use this
key feature, you need to configure remote phonebook on the phone in advance.
To configure an Ext key as the XML group key:
1.
Click on
Dsskey
->
Ext Key
.
2.
In the desired Ext key field, select
XML Group
from the pull-down list of
Type
.
3.
Enter the desired value in the
Label
field or leave it blank.
If you leave this field blank, the LCD screen of the EXP40 expansion module will display the
selected XML group name.
Summary of Contents for EXP40
Page 1: ......
Page 4: ......
Page 11: ...Getting Started 3 ...
Page 51: ...Configuring the Yealink EXP40 Expansion Module 43 ...