42
EN
SAFETY INSTRUCTIONS
Intended use
1. This electric lawn mower YT5139
is designated with a rated power
input of 1000W.
2. This tool must be only for cutting
grass in your garden. Do not use
it in public parks, stadiums, or
forests.
3. This product is intended for private
domestic use only, not for any
commercial trade use. Do not use
the product for any purposes other
than those described.
Safety instructions
PLEASE READ THESE
INSTRUCTIONS CAREFULLY
BEFORE ASSEMBLING AND USING THE
ELECTRIC LAWMMOWER
• Read the instructions carefully.
Familiarise yourself with the
controls and the proper use of the
appliance.
• Never allow children or people
unfamiliar with these instructions
to use the appliance. Local
regulations may restrict the age of
the operator.
• Never mow while people,
especially children, or pets are
nearby.
• The operator or user is responsible
for accidents or hazards occurring
to other people or their property.
• This tool must be only for cutting
grass in your garden. Do not use
it in public parks, stadiums, or
forests.
• Any use contrary to this instructions
manual shall not engage the
responsibility of the manufacturer.
• This tool can be used by persons
with reduced physical, sensory,
or mental capacities or lack of
experience and knowledge if
they have been given supervision
or instruction concerning use of
the appliance in a safe way and
understand the hazards involved.
Children shall not play with the
appliance.
• This appliance shall not be used
by children. Keep the appliance
and its cord (if any) out of reach of
children.
• No person, child or animal must
stand close while the tool is in
used.
• There is a risk of injury due to
ejected stones or others objects.
• Do not use the tool when you are
tired or under the influence of
alcohol or medication.
• If the collection bag is empty or
is not full of grass, the grass full
indicator will open.
• If the collection bag is fill, the grass
full indicator will closing.
Summary of Contents for YT5139
Page 3: ......
Page 4: ...3 A x1 B x1 C x1 D x1 E x2 F x2 G x2 H x2 I x1 30 PH 3 EN Assembly IT Montaggio EL...
Page 6: ...5 E x2 G x2 I 1 2 5 EN Assembly IT Montaggio EL...
Page 7: ...6 F 3 4 6 EN Assembly IT Montaggio EL...
Page 8: ...7 H x2 PH 1 2 Click Click B C 5 6 7 EN Assembly IT Montaggio EL...
Page 9: ...8 2 3 1 Click Click D 1 2 3 7 8 8 EN Assembly IT Montaggio EL...
Page 10: ...9 3 2 1 20mm 40mm 60mm A 1 B 1 A 2 B 2 A 3 B 3 A B 1 2 3 1 2 3 1 2 9 IT EL EN Uso Use...
Page 11: ...10 3 1 2 2 1 3 4 10 IT EL EN Uso Use...
Page 12: ...11 1 2 3 1 2 5 6 11 IT EL EN Uso Use...
Page 13: ...12 1 2 7 8 12 IT EL EN Uso Use...
Page 14: ...13 1 3 2 1 2 13 IT EL EN Manutenzione Maintenance...
Page 15: ...14 3 4 14 IT EL EN Manutenzione Maintenance...
Page 16: ...15 BYT5139 8231 513901 25 30N m 5 6 15 IT EL EN Manutenzione Maintenance...
Page 17: ...16 1 2 16 IT Rimessaggio EL EN Winter storage...
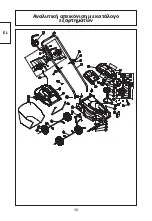
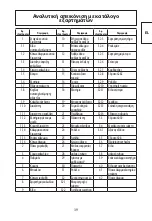
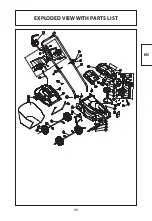
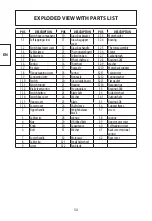
Page 27: ...26 IT VISTA ESPLOS A ED ELENCO DELEPARTI...
Page 30: ...29 EL II 96dB A WEEE...
Page 31: ...30 EL 1 YT5139 1000W 2 3...
Page 32: ...31 EL ISTRUZIONI DI SICUREZZA ON...
Page 33: ...32 EL ISTRUZIONI DI SICUREZZA 30 mA...
Page 34: ...33 EL ISTRUZIONI DI SICUREZZA...
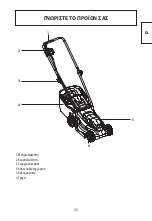
Page 36: ...35 EL 1 6 5 2 3 4 1 2 3 4 5 6...
Page 38: ...37 EL 2012 19 Soluci n...
Page 39: ...38 EL...

