background image

Operator’s Manual

2-Cycle Gasoline

Trimmer/Brushcutter

Y780

SAVE THESE INSTRUCTIONS

For service call 

1-800-345-8746

in the United States, or

1-800-668-1238

in Canada to obtain a list of authorized service

dealers near you.  For more details about your unit, visit our
website at 

www.mtdproducts.com

.

DO NOT RETURN THE UNIT TO THE RETAILER.  PROOF OF
PURCHASE WILL BE REQUIRED FOR WARRANTY
SERVICE.

THIS PRODUCT IS COVERED BY ONE OR MORE U.S.
PATENTS. OTHER PATENTS PENDING. 

Service on this unit both within and after the warranty period
should be performed only by an authorized and approved
service dealer. 

All information, illustrations, and specifications in this manual
are based on the latest product information available at the
time of printing. We reserve the right to make changes at any
time without notice.

Copyright © 2005 MTD SOUTHWEST INC, All Rights Reserved.

WARNING: 

When using the unit, you must follow

the safety rules. Please read these instructions
before operating the unit in order to ensure the
safety of the operator and any bystanders. Please
keep these instructions for later use.

SPARK ARRESTOR NOTE

NOTE: For users on U.S. Forest Land and in the states of
California, Maine, Oregon and Washington. 

All U.S. Forest

Land and the state of California (Public Resources Codes 4442
and 4443), Oregon and Washington require, by law that certain
internal combustion engines operated on forest brush and/or
grass-covered areas be equipped with a spark arrestor,
maintained in effective working order, or the engine be
constructed, equipped and maintained for the prevention of
fire. Check with your state or local authorities for regulations
pertaining to these requirements. Failure to follow these
requirements could subject you to liability or a fine. 

This unit is

factory equipped with a spark arrestor

. If it requires

replacement, ask your LOCAL SERVICE DEALER to install the

Accessory Muffler Assembly, Part #753-05169

.

CALIFORNIA PROPOSITION 65 WARNING

P/N 769-02279

(12/05)

TABLE OF CONTENTS

Service Information  . . . . . . . . . . . . . . . . . . . . . . . . . . . . . .1
Rules for Safe Operation  . . . . . . . . . . . . . . . . . . . . . . . . . .2
Oil and Fuel Information . . . . . . . . . . . . . . . . . . . . . . . . . . .3
Assembly Instructions  . . . . . . . . . . . . . . . . . . . . . . . . . . . .4
Know Your Unit  . . . . . . . . . . . . . . . . . . . . . . . . . . . . . . . . .4
Starting/Stopping Instructions . . . . . . . . . . . . . . . . . . . . . .7
Operating Instructions  . . . . . . . . . . . . . . . . . . . . . . . . . . . .8
Maintenance and Repair Instructions  . . . . . . . . . . . . . . . .9
Cleaning and Storage  . . . . . . . . . . . . . . . . . . . . . . . . . . .13
Troubleshooting Chart  . . . . . . . . . . . . . . . . . . . . . . . . . . .14
Specifications  . . . . . . . . . . . . . . . . . . . . . . . . . . . . . . . . .15
Warranty Information  . . . . . . . . . . . . . . . . . . . . . . . . .17, 18
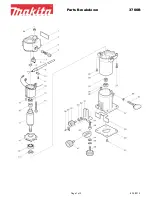
Parts List  . . . . . . . . . . . . . . . . . . . . . . . . . . . . . . . . . . . .E18

WARNING

THE ENGINE EXHAUST FROM THIS PRODUCT CONTAINS

CHEMICALS KNOWN TO THE STATE OF CALIFORNIA TO

CAUSE CANCER, BIRTH DEFECTS OR OTHER

REPRODUCTIVE HARM.

Summary of Contents for Y780

Page 1: ...Forest Land and in the states of California Maine Oregon and Washington All U S Forest Land and the state of California Public Resources Codes 4442 and 4443 Oregon and Washington require by law that...

Page 2: ...he operator and unit must be in a stable posi tion while starting Refer to the Starting Stopping Instructions Use the right tool Only use this tool for its intended purpose Do not overreach Always kee...

Page 3: ...building where fumes may reach an open flame or spark Allow the engine to cool before storing or transporting Be sure to secure the unit while transporting Store the unit in a dry area locked up or u...

Page 4: ...zer or an equivalent Add 0 8 oz 23 ml of fuel additive per gallon of fuel according to the instructions on the container NEVER add fuel additives directly to the unit s fuel tank NOTE Dispose of the o...

Page 5: ...ment Shield Remove the Cutting Attachment 1 Align the shaft bushing hole with the locking rod slot and insert the locking rod into the shaft bushing hole Fig 7 2 Hold the locking rod in place by grasp...

Page 6: ...h Fig 13 4 Remove the nut blade retainer and blade Store the nut and blade together for future use in a secure place Store out of children s reach Install the Cutting Attachment 5 Align the shaft bush...

Page 7: ...ing the throttle lock out and the throttle control for 15 to 30 seconds to warm up the engine NOTE Engine may take longer to warm up and reach maximum operating speed at colder temperatures NOTE Unit...

Page 8: ...allel to the ground Do not force the cutting attachment Allow the tip of the line to do the cutting especially along walls Cutting with more than the tip will reduce cutting efficiency and may overloa...

Page 9: ...hile in use This can result in severe personal injury to yourself or others Replace the blade Fig 22 MAINTENANCE AND REPAIR INSTRUCTIONS MAINTENANCE SCHEDULE Perform these required maintenance procedu...

Page 10: ...o long Single Line Installation Go To Step 8 for SplitLine Installation 6 Take approximately 5 m 16 feet of new trimming line loop it into two equal lengths Insert each end of the line through one of...

Page 11: ...the line in the direction indicated will cause the cutting attachment to operate incorrectly 12 Insert the ends of the line into the two holding slots Fig 30 13 Insert the ends of the line through th...

Page 12: ...talls on acceleration there is a loss of engine power Have the carburetor adjusted by an authorized service dealer 12 4 Apply enough clean SAE 30 oil to lightly coat the filter Fig 35 5 Squeeze the fi...

Page 13: ...n a dry well ventilated area Store the unit out of the reach of children LONG TERM STORAGE If you plan on storing the unit for an extended time use the following storage procedure 1 Drain all fuel fro...

Page 14: ...asn t pressed enough Press primer bulb fully and slowly 10 times Engine is flooded Use starting procedure with choke lever in position 3 Old or improperly mixed fuel Drain fuel tank and add fresh fuel...

Page 15: ...e Throttle Control Finger Tip Trigger with Lock Out Approximate Unit Weight No gas with cutting attachment shield and handle 7 kg 15 lbs Cutting Mechanism 4 Tooth Cutting Blade Dual String Cutting Hea...

Page 16: ...16 NOTES...

Page 17: ...345 8746 Manufacturer s Warranty Coverage The warranty period begins on the date the engine or equipment is delivered to the retail purchaser The manufacturer warrants to the initial owner and each s...

Page 18: ...s given by MTD LLC MTD with respect with new merchandise purchased and used in the United States its possessions and territories MTD warrants this product against defects in material and workmanship f...

Page 19: ...e amende ou tre tenu responsable si vous ne respectez pas cette r glementation Cet appareil est quip d un pare tincelles en usine Si l cran pare tincelles r f 753 05169 doit tre remplac communiquez av...

Page 20: ...anches longues Ne marchez pas pieds nus et vitez les v tements l ches bijoux pantalons courts et sandales Relevez les cheveux au dessus des paules Le protecteur d accessoire de coupe doit toujours tre...

Page 21: ...u un cylindre chaud Vous pourriez vous br ler Ces pi ces deviennent tr s chaudes l utilisation Elles restes chaudes bri vement apr s l arr t CARBURANT SANS PLOMB Utilisez toujours du carburant sans pl...

Page 22: ...ct attention to the oil and fuel mixing instructions on the 2 cycle oil container Using improperly mixed fuel can severely damage the engine FAMILIARISEZ VOUS AVEC L APPAREIL NOTE Les trous des brides...

Page 23: ...ig 4 4 R glez la longueur en fonction de la taille de l op rateur Tirez la languette pour rallonger ou tirez la bande pour raccourcir Fig 5 RETRAIT ET INSTALLATION DU PROTECTEUR D ACCESSOIRE DE COUPE...

Page 24: ...4 Retirez l crou la retenue de lame et la lame Rangez l crou et la lame ensemble en lieu s r pour un usage ult rieur Gardez hors de port e des enfants Installer l accessoire de coupe 5 Alignez le trou...

Page 25: ...leu en position 1 Fig 16 5 Avec la machine au sol placez un pied sur la plaque m tallique pr vue pour que la machine reste en place Fig 17 Appuyez sur le verrouillage des gaz tandis que vous appuyez s...

Page 26: ...eur porte une visi re et des v tements appropri s Le bras droit est droit et la main tient l arbre par sa prise Le bras gauche est l g rement pli et la main tient la poign e L appareil est au dessous...

Page 27: ...s le moteur teint et peut vous blesser s rieusement si vous la touchez accidentellement AVERTISSEMENT n aiguisez pas la lame de coupe car son extr mit risquerait de casser l usage et causer des blessu...

Page 28: ...eux sur une longueur d environ 15 cm 6 po INSTALLATION DU FIL Cette section couvre l installation de fil SplitLineMC et l installation de fil simple standard Utilisez toujours un fil de remplacement q...

Page 29: ...2 Retournez le couvercle et inspectez l int rieur pour rep rer le filtre air Retirez le filtre air de l int rieur du couvercle du filtre air silencieux Fig 33 11 Enroulez le fil en couches uniformes s...

Page 30: ...arrivez pas le nettoyer compl tement 5 R installez l cran du pare tincelles dans la couverture du pare tincelles de fa on ce qu il soit bien encastr 6 R installez les deux pattes de la couverture dans...

Page 31: ...l appareil plein de carburant dans un lieu o les vapeurs peuvent atteindre une flamme vive ou des tincelles Laissez le moteur se refroidir avant de l entreposer Rangez l appareil dans un lieu verrouil...

Page 32: ...z le r servoir ajoutez du carburant frais Bougie encrass e Remplacez ou nettoyez la Pare tincelles colmat Nettoyez ou remplacez le pare tincelles La temp rature ext rieure est inf rieure 40 F Tirez su...

Page 33: ...mm 0 020 po Lubrification M lange carburant huile Rapport carburant huile 40 1 Carburateur Membrane toutes positions D marreur Rembobinage automatique Silencieux Chicane avec protection Acc l rateur...

Page 34: ...F16 REMARQUES...

Page 35: ...garantie appelez le 1 800 345 8746 Garantie du fabricant La p riode de garantie commence la date o le moteur ou l quipement est livr l acheteur au d tail Le fabricant garantit au propri taire initial...

Page 36: ...eland OH 44136 0019 La garantie limit e nonc e ci apr s est accord e par MTD LLC MTD et concerne les marchandises neuves achet es et utilis es aux tats Unis ainsi que dans leurs possessions et territo...

Page 37: ...tos con las autoridades estatales o locales El incumplimiento de esos requisitos puede responsabilizarle o someterle a la imposici n de una multa Esta unidad fue equipada en la f brica con un parachis...

Page 38: ......

Page 39: ...afilar la cuchilla puede causar que la punta se desprenda mientras est en uso Esto puede dar lugar a graves lesiones personales SEGURIDAD DE LA RECORTADORA Y CORTADORA DE MALEZAS ADVERTENCIA Los obje...

Page 40: ...Elimine la mezcla vieja de aceite y combustible de acuerdo con los reglamentos federales estatales y locales gasolina y oxigenantes como por ejemplo etanol metanol o MTBE ter El combustible mezclado c...

Page 41: ...NSTALACI N DEL PROTECTOR ACCESORIO DE CORTE Saque el protector accesorio de corte cuando use la unidad como cortador de malezas Saque el protector accesorio de corte del montaje del protector retirand...

Page 42: ...plana contra el buje del eje de salida Fig 11 6 Alinee el orificio del buje del eje con la ranura de la varilla de cierre e inserte la varilla de cierre en el orificio del buje Fig 7 7 Coloque el ret...

Page 43: ...ca azul del obturador en la Posici n 1 Figura 7 5 Con la unidad en el suelo ponga un pie en el escal n de metal para mantener la unidad en su lugar Fig 17 Oprima la traba del regulador mientras apriet...

Page 44: ...ierdo est levemente doblado y la mano est sosteniendo la manija La unidad est debajo del nivel de la cintura El accesorio de corte est paralelo al suelo y hace f cil contacto con la vegetaci n que va...

Page 45: ...apagar el motor La cuchilla en deslizamiento puede causarle graves cortes si lo toca en forma accidental ADVERTENCIA No afile la cuchilla de corte Si afila la cuchilla la punta puede desprenderse dur...

Page 46: ...la ADVERTENCIA No use nunca l nea reforzada con metal alambre cadena ni soga etc Estos elementos pueden desprenderse y convertirse en un proyectil peligroso Carrete interior Resorte Bobina exterior B...

Page 47: ...xtremos de la l nea a trav s de los ojalillos de la bobina exterior y coloque el carrete interior con el resorte dentro de la bobina exterior Fig 31 Empuje el carrete interior y la bobina exterior ent...

Page 48: ...ndo el motor est en marcha lenta gire el tornillo de marcha lenta en sentido antihorario E12 INSTRUCCIONES DE MANTENIMIENTO Y REPARACI N Idle Speed Screw Fig 36 6 Cambie el filtro de aire dentro de la...

Page 49: ...bajo llave para prevenir el uso por personas no autorizadas y su da o Guarde la unidad en un rea seca y bien ventilada Guarde la unidad fuera del alcance de los ni os ALMACENAMIENTO PROLONGADO Si pla...

Page 50: ......

Page 51: ...ite 40 1 Carburador Diafragma multiposicional Arranque Rebobinado autom tico Silenciador Desviado con protecci n Regulador Retroceso manual a resorte Capacidad del tanque de combustible 355 ml 12 onza...

Page 52: ...E16 NOTAS...

Page 53: ...idades de la garant a debe llamar al 1 800 345 8746 Cobertura de Garant a del Fabricante El per odo de garant a comienza en la fecha en que el motor o equipo se entrega al comprador minorista El fabri...

Page 54: ......

Page 55: ...181813 Middle Handle Clamp 20 791 181814 Lower Handle Clamp 21 791 181815 Nut 22 753 05179 Throttle Cable 23 791 181817 Flexible Drive Shaft 24 791 182200 Shield Mount Screw Assembly 25 791 182193 2...

Page 56: ...nt a limitada establecida a continuaci n es dada por MTD LLC MTD con respecto a mercanc a nueva que sea comprada y usada en los Estados Unidos sus posesiones y territorios MTD garantiza este producto...

Reviews: