17
Fixing and removing Vacuum tube assembly
To fix the Vacuum tube assembly
WARNING:
Before performing any assembly always ensure that the battery pack has
been removed.
As shown in
Fig 6&7
1. Lift the quick-action clamp lever to release the additional handle/inlet opening cover. and
adjust the additional handle/ inlet opening cover to the desired position where you feel
comfortable handling it . then press down the quick-action clamp lever to lock it in place.
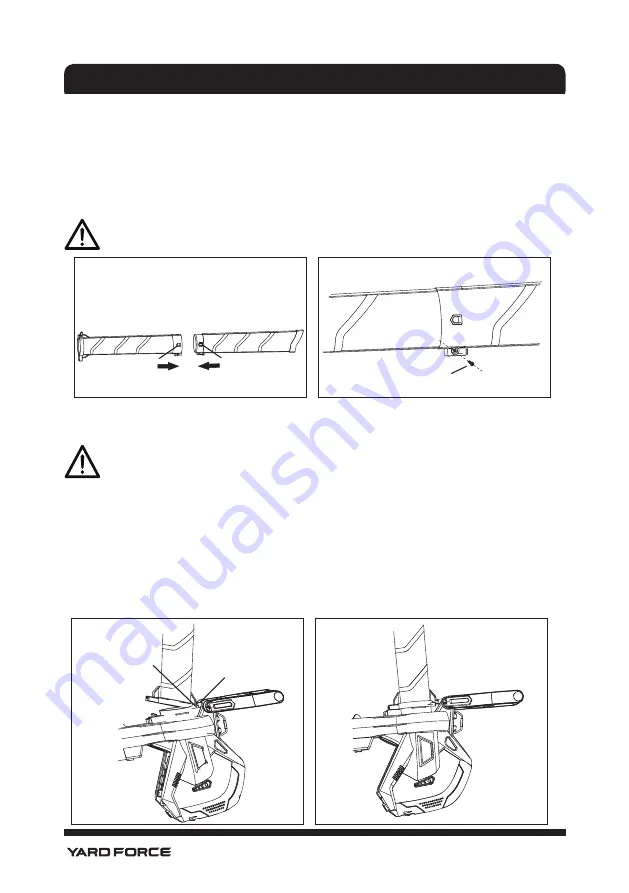
2. Insert the tongue of rear suction tube into the matching hole of the housing at a certain
angle.
3. Keep the tube assembly in line with the inlet opening. Then push it until the clip of the
inlet release button lock securely into place.
Using as leaf vacuum
Fixing front and rear suction tube together
As shown in
Fig 4 &5
1. Align the two clips of the front tube with the their corresponding holes on the rear tube
2. Push them against each other until they lock in place
3. Enhance the joint by using a screw (supplied)
NOTE :
Once the front and rear suction joint together, they cannot be detached any
more .
Fig 4
Fig 5
Push them against each other
Hole
Clip
Screw
Fig 6
Fig 7
Hole
Tongue
ASSEMBLY
Summary of Contents for LB G20A
Page 2: ......


