background image

6-9

1

2

3

4

5

6

7

8

9

EAU17226

PERIODIC MAINTENANCE AND MINOR REPAIR

EAU20061

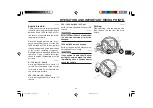
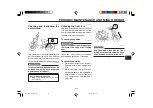
Final transmission oil

The final transmission case must be
checked for oil leakage before each ride.
If any leakage is found, have a Yamaha
dealer check and repair the scooter. In
addition, the final transmission oil must
be changed as follows at the intervals
specified in the periodic maintenance
and lubrication chart.

1. Start the engine, warm up the final

transmission oil by riding the
scooter for several minutes, and
then stop the engine.

2. Place the scooter on the

centerstand.

3. Place an oil pan under the final

transmission case to collect the
used oil.

4. Remove the oil filler cap and drain

bolt to drain the oil from the final
transmission case.

Final transmission oil<IXE>

ZAUM00**

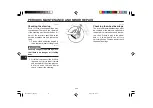
1

1. Final transmission oil filler cap

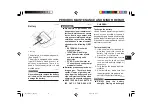
5. Install the final transmission oil

drain bolt, and then tighten it to the
specified torque.

ZAUM00**

1

1. Final transmission oil drain bolt

Tightening torque:

Final transmission oil drain bolt:

18 Nm (1.8 m • kgf, 13 ft  •  lbf)

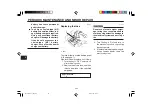
6. Add the specified amount of the

recommended final transmission
oil, and then install and tighten the
oil filler cap.

Recommended final transmission
oil:

See page 8-1.

Oil quantity:

0.11 L (0.12 US qt) (0.1 Imp.qt)

EWA11310

w

Make sure that no foreign mate-
rial enters the final transmission
case.

Make sure that no oil gets on the
tire or wheel.

7. Check the final transmission case

for oil leakage. If oil is leaking,
check for the cause.

5PJ-F8199-14_ch6.pmd

2007/04/20, 10:52

9

Summary of Contents for Zuma YW50X

Page 1: ...OWNER S MANUAL 5PJ F8199 14 YW50X LIT 11626 21 15 5PJ F8199 14_Cv pmd 2007 04 19 14 45 2 ...

Page 2: ...1 2 3 4 5 6 7 8 9 EAU10041 5PJ F8199 14_ch0 pmd 2007 04 19 14 44 1 ...

Page 3: ...aintenance of this scooter If you have any questions concerning the operation or maintenance of your scooter please consult a Yamaha dealer The design and manufacture of thisYamaha scooter fully comply with the emissions standards for clean air applicable at the date of manufacture Yamaha has met these standards without reducing the performance or economy of operation of the scooter To maintain th...

Page 4: ...eeks advancements in product design and quality Therefore while this manual contains the most current product information available at the time of printing there may be minor discrepancies between your scooter and this manual If you have any questions concerning this manual please consult your Yamaha dealer EWA12580 w PLEASE READ THIS MANUAL AND THE YOU AND YOUR MOTORCYCLE RIDING TIPS BOOKLET CARE...

Page 5: ...amaha Motor Corporation U S A 1st edition July 2007 All rights reserved Any reprinting or unauthorized use without the written permission of Yamaha Motor Corporation U S A is expressly prohibited Printed in Taiwan P N LIT 11626 21 15 AFFIX DEALER LABEL HERE 5PJ F8199 14_ch0 pmd 2007 04 19 14 44 4 ...

Page 6: ...ND MINOR REPAIR 6 1 Owner s tool kit 6 1 Periodic maintenance chart for the emission control system 6 3 General maintenance and lubrication chart 6 4 Removing and installing the panel 6 7 Checking the spark plug 6 7 Final transmission oil 6 9 Cleaning the air filter element 6 10 Carburetor 6 11 Checking the throttle cable free play 6 12 Tires 6 12 Cast wheels 6 14 Checking the front brake lever fr...

Page 7: ...ONSUMER INFORMATION 9 1 Identification numbers 9 1 Reporting safety defects 9 3 Scooter noise regulation 9 4 Maintenance record 9 5 YAMAHA MOTOR CORPORATION U S A 9 7 RIVA LIMITED WARRANTY 9 7 YAMAHA EXTENDED SERVICE Y E S 9 9 5PJ F8199 14_ch0 pmd 2007 04 19 14 44 6 ...

Page 8: ...not see the scooter Making yourself con spicuous appears to be very effec tive in reducing the chance of this type of accident Therefore Wear a brightly colored jacket Use extra caution when approaching and passing through intersections since intersections are the most likely places for scooter accidents to occur Ride where other motorists can see you Avoid riding in another motorist s blind spot ...

Page 9: ...s gloves etc is ef fective in preventing or reducing abrasions or lacerations Never wear loose fitting clothes otherwise they could catch on the control levers or wheels and cause injury or an accident Never touch the engine or exhaust system during or after operation They become very hot and can cause burns Always wear protec tive clothing that covers your legs ankles and feet Passengers should a...

Page 10: ...efore us ing it to make sure that it does not in any way reduce ground clear ance or cornering clearance limit suspension travel steering travel or control operation or obscure lights or reflectors Accessories fitted to the handlebar or the front fork area can create instability due to improper weight distribution or aerodynamic changes If accessories are added to the handlebar or front fork area ...

Page 11: ...The engine and exhaust system may be hot therefore park the scooter in a place where pedestrians or children are not likely to touch these hot areas Do not park the scooter on a slope or soft ground otherwise it may fall over Do not park the scooter near a flammable source e g a kerosene heater or near an open flame otherwise it could catch fire If you should swallow any gasoline inhale a lot of g...

Page 12: ...hole covers become extremely slippery when wet Slow down and cross them with caution Keep the scooter upright otherwise it could slide out from under you The brake lining could get wet when you wash the scooter After washing the scooter check the brakes before riding Always wear a helmet gloves trou sers tapered around the cuff and ankle so they do not flap and a bright colored jacket Do not carry...

Page 13: ...Q Q Q Q Q SAFETY INFORMATION EAU10381 Location of important labels Please read the following important labels carefully before operating this vehicle Labels location of IXE 1 2 4 5 6 3 5PJ F8199 14_ch1 pmd 2007 04 20 10 47 6 ...

Page 14: ...1 7 1 2 3 4 5 6 7 8 9 Q Q Q Q Q SAFETY INFORMATION 1 2 3 4 5 6 5PJ F8199 14_ch1 pmd 2007 04 20 10 47 7 ...

Page 15: ...1 8 1 2 3 4 5 6 7 8 9 Q Q Q Q Q SAFETY INFORMATION 5PJ F8199 14_ch1 pmd 2007 04 20 10 47 8 ...

Page 16: ...ont brake caliper page 6 15 3 Front turn signal light 4 Helmet holder page 3 8 5 Storage compartment page 3 9 6 Rear turn signal light 7 Rear wheel 8 Adjusting nut page 6 15 9 Kickstarter page 3 7 10 Air filter element page 6 10 11 Battery page 6 21 1 2 4 3 5 6 11 10 9 8 7 5PJ F8199 14_ch2 pmd 2007 04 20 10 48 1 ...

Page 17: ...ight view 12 Tail brake light 13 Carrier page 3 10 14 Fuel tank cap 15 2 stroke engine oil tank cap 16 Seat page 3 8 17 Headlight 18 Spark plug page 6 7 19 Centerstand 20 Muffler 12 13 14 15 16 17 18 19 20 5PJ F8199 14_ch2 pmd 2007 04 20 10 48 2 ...

Page 18: ...28 21 Rear brake lever page 3 4 22 Left handlebar switches page 3 3 23 Speedometer unit page 3 2 24 Fuel gauge page 3 3 25 Right handlebar switches page 3 3 26 Front brake lever page 3 4 27 Throttle grip page 6 12 28 Main switch steering lock page 3 1 5PJ F8199 14_ch2 pmd 2007 04 20 10 48 3 ...

Page 19: ...omatically when the engine is started EAU10670 The 2 stroke engine oil level warning light should come on See page 3 2 EAU10680 LOCK The steering is locked and all electri cal systems are off The key can be re moved To lock the steering ZAUM00 1 1 Push 1 Turn the handlebars all the way to the left 2 Push the key in from the OFF po sition and then turn it to LOCK while still pushing it 3 Remove the...

Page 20: ...eedmeter 2 Odmeter The speedometer unit is equipped with a speedometer and an odometer The speedometer shows the riding speed The odometer shows the total distance traveled EAU32441 2 stroke engine oil level warning light 7 7 7 7 7 The warning light comes on when the key is in the position or when the engine oil level in the 2 stroke engine oil tank is low during operation If the warning light com...

Page 21: ...ch 4 6 3 Horn switch ZAUM00 ENGINE STOP START 1 2 1 Engine stop switch 2 Start switch EAU12400 Dimmer switch Set this switch to for the high beam and to for the low beam EAU12460 Turn signal switch 4 4 4 4 4 6 6 6 6 6 To signal a right hand turn push this switch to 6 To signal a left hand turn push this switch to 4 When re leased the switch returns to the center position To cancel the turn signal ...

Page 22: ...2900 Front brake lever ZAUM00 The front brake lever is located on the right handlebar grip To apply the front brake pull this lever toward the handle bar grip Start switch IXE Brake lever front IXE Brake lever rear IXE EAU12950 Rear brake lever ZAUM00 The rear brake lever is located on the left handlebar grip To apply the rear brake pull this lever toward the handle bar grip 5PJ F8199 14_ch3 pmd 2...

Page 23: ...an then be removed To install the fuel tank cap Insert the fuel tank cap into the tank opening with the mark on the cap and fuel filler aligned Turn the lever to the LOCK position and then push it down EWA10120 w Make sure that the fuel tank cap is properly closed and locked before riding 2 stroke engine oil tank cap ZAUM00 1 1 2 stroke engine oil tank cap Remove the 2 stroke engine oil tank cap b...

Page 24: ...D GASOLINE ONLY Fuel tank capacity 5 7 L 1 5 US gal 1 25 Imp gal YourYamaha engine has been designed to use regular unleaded gasoline with a pump octane number R M 2 of 86 or higher or a research octane number of 91 or higher If knocking or pinging occurs use a gasoline of a different brand or premium unleaded fuel Use of unleaded fuel will extend spark plug life and reduce maintenance costs Gasoh...

Page 25: ...fire hazards such as grass or other materials that easily burn Do not allow the engine to idle too long Catalytic converter IXE Engine oil IXE Kickstarter IXE EAU13452 2 stroke engine oil Make sure that there is sufficient 2 stroke engine oil in the oil tank Add the recommended 2 stroke engine oil as necessary ZAUM00 1 1 2 stroke engine oil tank cap Recommended oil See page 8 1 Oil quantity 1 4 L ...

Page 26: ... to lock it in place 2 Remove the key from the main switch if the scooter will be left un attended NOTE Make sure that the seat is properly se cured before riding EAU14300 Helmet holder ZAUM00 1 1 Helmet holder The helmet holder is located under the seat To secure a helmet to the helmet holder 1 Open the seat See page 3 8 2 Attach the helmet to the helmet holder and then securely close the seat EW...

Page 27: ...t ment Since the storage compartment accumulates heat when exposed to the sun do not store anything susceptible to heat inside it To avoid humidity from spread ing through the storage com partment wrap wet articles in a plastic bag before storing them in the compartment Since the storage compartment may get wet while the scooter is being washed wrap any articles stored in the compartment in a plas...

Page 28: ...lb for the front storage compartment Do not exceed the maximum load of 143 kg 315 lb for the ve hicle EAU15110 Carrier ZAUM00 1 1 Carrier EWA10170 w Do not exceed the load limit of 3 kg 7 lb for the carrier Do not exceed the maximum load of 143 kg 315 lb for the ve hicle Storage compartment front IXE Carrier IXE tended with the seat open 5PJ F8199 14_ch3 pmd 2007 04 20 10 49 10 ...

Page 29: ...ressure could have serious consequences Therefore it is very important in addition to a thorough visual inspection to check the following points before each ride NOTE Pre operation checks should be made each time the vehicle is used Such an inspection can be accomplished in a very short time and the added safety it assures is more than worth the time involved EWA11150 w If any item in the Pre oper...

Page 30: ...ads for wear Replace if necessary Check fluid level in reservoir If necessary add recommended brake fluid to specified level Check hydraulic system for leakage 6 15 6 17 Rear brake Check operation Lubricate cable if necessary Check lever free play Adjust if necessary 6 14 6 15 Throttle grip Make sure that operation is smooth Check cable free play If necessary have Yamaha dealer adjust cable free p...

Page 31: ...smooth Lubricate pivot if necessary 6 19 Chassis fasteners Make sure that all nuts bolts and screws are properly tightened Tighten if necessary Instruments lights signals and switches Check operation Correct if necessary 3 2 3 3 ITEM CHECKS PAGE 5PJ F8199 14_ch4 pmd 2007 04 19 14 35 3 ...

Page 32: ...5 4 for engine break in in structions prior to operating the ve hicle for the first time ZAUM00 ENGINE STOP START 1 1 Engine stop switch 1 Set the engine stop switch to 2 Turn the key to and when the 2 stroke engine oil level warning light comes on turn the key to ON Starting and warming up a cold engine IXE ECA11580 cC If the 2 stroke engine oil level warn ing light does not come on have a Yamaha...

Page 33: ...ng off Never accelerate hard when the engine is cold EAU16770 Starting off NOTE Before starting off allow the engine to warm up 1 While pulling the rear brake lever with your left hand and holding the carrier with your right hand push the scooter off the centerstand ZAUM00 2 Sit astride the seat and then ad just the rear view mirrors 3 Switch the turn signal on 4 Check for oncoming traffic and the...

Page 34: ...nt and rear brakes simultaneously while gradually in creasing the pressure FRONT ZAUM00 REAR ZAUM00 EWA10300 w Avoid braking hard or suddenly especially when leaning over to one side otherwise the scooter may skid or overturn Railroad crossings streetcar rails iron plates on road con struction sites and manhole covers become extremely slip pery when wet Therefore slow down when approaching such ar...

Page 35: ... break in IXE Parking IXE EAUM2090 0 150 km 0 90 mi Avoid prolonged operation above 1 3 throttle Vary the speed of the scooter from time to time Do not operate it at one set throttle position 150 500 km 90 300 mi Avoid prolonged operation above 1 2 throttle 500 1000 km 300 600 mi Avoid cruising speeds in excess of 3 4 throttle ECAM1070 cC After 1000 km 600 mi of operation the final transmission oi...

Page 36: ...become very hot park in a place where pedestri ans or children are not likely to touch them Do not park on a slope or on soft ground otherwise the vehicle may overturn ECA10380 cC Never park in an area where there are fire hazards such as grass or other flammable materials 5PJ F8199 14_ch5 pmd 2007 04 20 10 51 5 ...

Page 37: ...k have aYamaha dealer do it for you EWA10330 w This scooter is designed for use on paved roads only If this scooter is operated in abnormally dusty muddy or wet conditions the air filter ele ment should be cleaned or replaced more frequently otherwise rapid en gine wear may result Consult a Yamaha dealer for proper mainte nance intervals EAU17460 Owner s tool kit ZAUM00 1 1 Owner s tool kit The ow...

Page 38: ...eri ence required for a particular job have a Yamaha dealer perform it for you EWA10340 w Modifications not approved by Yamaha may cause loss of perfor mance excessive emissions and render the vehicle unsafe for use Consult a Yamaha dealer before at tempting any changes 5PJ F8199 14_ch6 pmd 2007 04 20 10 52 2 ...

Page 39: ...0 km or 1 month 2 000 mi 4 000 km or 6 months 4 000 mi 7 000 km or 12 months 6 000 mi 10 000 km or 18 months 8 000 mi 13 000 km or 24 months 10 000 mi 16 000 km or 30 months 1 Fuel line Check fuel and vacuum hoses for cracks or damage Replace if necessary 2 Idle speed Check and adjust engine idle speed 3 Exhaust system Check for leakage Tighten if necessary Replace gasket s if necessary 4 Air indu...

Page 40: ...ent Replace if necessary 2 Front brake Check operation fluid level and for fluid leakage Replace brake pads if necessary 3 Rear brake Check operation Adjust cable and replace brake shoes if necessary 4 Wheels Check runout and for damage Replace if necessary 5 Tires Check tread depth and for damage Replace if necessary Check air pressure Correct if necessary 6 Wheel bearings Check bearings for smoo...

Page 41: ...ecessary 13 Shock absorber assembly Check operation and for oil leakage Replace if necessary 14 Autolube pump Check operation Bleed if necessary 15 Final transmission oil Check vehicle for oil leakage Change 16 V belt Replace Every 6250 mi 10000 km 17 Control and meter cables Apply Yamaha chain and cable lube or engine oil 10W 30 thoroughly NO ITEM ROUTINE INITIAL ODOMETER READING 600 mi 1 000 km ...

Page 42: ... beam NO ITEM ROUTINE INITIAL ODOMETER READING 600 mi 1 000 km or 1 month 2 000 mi 4 000 km or 6 months 4 000 mi 7 000 km or 12 months 6 000 mi 10 000 km or 18 months 8 000 mi 13 000 km or 24 months 10 000 mi 16 000 km or 30 months EAU17620 NOTE The air filter needs more frequent service if you are riding in unusually wet or dusty areas Hydraulic brake system When disassembling the master cylinder...

Page 43: ...onent which is easy to check Since heat and deposits will cause any spark plug to slowly erode the spark plug should be removed and checked in accordance with the periodic main tenance and lubrication chart In addi tion the condition of the spark plug can reveal the condition of the engine To remove the spark plug 1 Remove panel A See page 6 7 2 Remove the spark plug cap ZAUM00 1 1 Spark plug cap ...

Page 44: ...s and replace it if necessary Specified spark plug BPR7HS NGK To install the spark plug 1 Measure the spark plug gap with a wire thickness gauge and if nec essary adjust the gap to specifi cation ZAUM00 1 1 Spark plug gap Spark plug gap 0 6 0 7 mm 0 024 0 028 in 2 Clean the surface of the spark plug gasket and its mating surface and then wipe off any grime from the spark plug threads 3 Install the...

Page 45: ...e the oil filler cap and drain bolt to drain the oil from the final transmission case Final transmission oil IXE ZAUM00 1 1 Final transmission oil filler cap 5 Install the final transmission oil drain bolt and then tighten it to the specified torque ZAUM00 1 1 Final transmission oil drain bolt Tightening torque Final transmission oil drain bolt 18 Nm 1 8 m kgf 13 ft lbf 6 Add the specified amount ...

Page 46: ... air filter case by re moving the screws on the crank case side ZAUM00 1 2 2 1 Air filter case 2 Screw 4 Remove the air filter case cover by removing the screws ZAUM00 2 4 1 1 Air filter case cover 2 Screw Air filter element cleaning IXE ZAUM00 1 1 Air filter element 5 Pull the air filter element out 6 Clean the air filter element with sol vent and then squeeze the remain ing solvent out EW000075 ...

Page 47: ... the screws 11 Install the air filter case by install ing the screws and then install the air filter joint clamp 12 Install the panel EC000082 cC Make sure that the air filter ele ment is properly seated in the air filter case The engine should never be op erated without the air filter ele ment installed otherwise the piston and or cylinder may be come excessively worn EAU21251 Carburetor The carb...

Page 48: ...ature The tire air pressure must be adjusted in accordance with the riding speed and with the total weight of rider passenger cargo and accessories ap proved for this model Tire air pressure measured on cold tires Up to 90 kg 198 lb Front 200 kPa 29 psi 2 00 kgf cm2 Rear 200 kPa 29 psi 2 00 kgf cm2 90 kg 198 lb to maximum load Front 200 kPa 29 psi 2 00 kgf cm2 Rear 200 kPa 29 psi 2 00 kgf cm2 Maxi...

Page 49: ...fer from country to country Always comply with the local regulations Tire information This scooter is equipped with cast wheels and tubeless tires with valves EWA10590 w Operating the scooter with exces sively worn tires decrease riding sta bility and can lead to loss of control Have excessively worn tires replaced by a Yamaha dealer immediately Brakes tires and related wheel parts replacement sho...

Page 50: ...ver free play checking IXE Rear brake lever free play adjusting IXE EAU37911 Checking the front brake lever free play There should be no free play at the brake lever end If there is free play have aYamaha dealer inspect the brake sys tem EWA14210 w A soft or spongy feeling in the brake lever can indicate the presence of air in the hydraulic system If there is air in the hydraulic system have a Yam...

Page 51: ...you to check the brake pad wear without hav ing to disassemble the brake To check the brake pad wear check the position Brake pads and shoes checking IXE of the wear indicators while applying the brake If a brake pad has worn to the point that a wear indicator almost touches the brake disc have aYamaha dealer replace the brake pads as a set EAU22540 Rear brake shoes ZAUM00 1 2 1 Wear indicator 2 W...

Page 52: ...l checking IXE make sure that the top of the mas ter cylinder is level by turning the handlebars Use only the recommended qual ity brake fluid otherwise the rub ber seals may deteriorate causing leakage and poor braking perfor mance Recommended brake fluid DOT 4 Refill with the same type of brake fluid Mixing fluids may result in a harmful chemical reaction and lead to poor braking performance Be ...

Page 53: ...bricating the cables The operation of all control cables and the condition of the cables should be checked before each ride and the cables and cable ends should be lubri cated if necessary If a cable is dam aged or does not move smoothly have a Yamaha dealer check or replace it Recommended lubricant Yamaha Chain and Cable Lube or engine oil SAE 10W 30 EWA10710 w Damage to the outer housing of cabl...

Page 54: ...rication chart Autolube pump adjusting IXE Brake levers lubricating IXE EAU43640 Lubricating the front and rear brake levers Front brake lever ZAUM00 Rear brake lever ZAUM00 The pivoting points of the front and rear brake levers must be lubricated at the intervals specified in the periodic main tenance and lubrication chart Recommended lubricants Front brake lever Silicone grease Rear brake lever ...

Page 55: ...t fork The condition and operation of the front fork must be checked as follows at the intervals specified in the periodic main tenance and lubrication chart To check the condition EWA10750 w Securely support the motorcycle so that there is no danger of it falling over Check the inner tubes for scratches damage and excessive oil leakage To check the operation 1 Place the motorcycle on a level sur ...

Page 56: ...otorcycle so that there is no danger of it falling over 2 Hold the lower ends of the front fork legs and try to move them forward and backward If any free play can be felt have a Yamaha dealer check or repair the steering Steering checking IXE Wheel bearings checking IXE EAU23290 Checking the wheel bearings The front and rear wheel bearings must be checked at the intervals specified in the periodi...

Page 57: ...nutes and seek prompt medical attention Batteries produce explosive hy drogen gas Therefore keep sparks flames cigarettes etc away from the battery and pro vide sufficient ventilation when charging it in an enclosed space KEEP THIS AND ALL BATTER IES OUT OF THE REACH OF CHILDREN To charge the battery Have a Yamaha dealer charge the bat tery as soon as possible if it seems to have discharged Keep i...

Page 58: ... is located behind panel A See page 6 7 If the fuse is blown replace it as follows 1 Turn the key to OFF and turn off all electrical circuits 2 Remove the blown fuse and then install a new fuse of the specified amperage Specified fuse 7 A Fuse replacing IXE ECA10640 cC Do not use a fuse of a higher amper age rating than recommended to avoid causing extensive damage to the electrical system and pos...

Page 59: ...following troubleshooting chart rep resents a quick and easy procedure for checking these vital systems yourself However should your scooter require any repair take it to a Yamaha dealer whose skilled technicians have the nec essary tools experience and know how to service the scooter properly Use only genuineYamaha replacement parts Imitation parts may look like Yamaha parts but they are often in...

Page 60: ...and correct the spark plug gaps or replace the spark plug Have a Yamaha dealer check the vehicle The engine does not start Have a Yamaha dealer check the vehicle The engine does not start Check the battery Operate the electric starter 4 Battery The engine turns over quickly The engine turns over slowly The battery is good Check the battery lead connections and charge the battery if necessary Dry W...

Page 61: ...irt do not leave the cleaner on the af fected area any longer than in structed Also thoroughly rinse the area off with water immedi ately dry it and then apply a cor rosion protection spray Improper cleaning can damage plastic parts such as cowlings panels windshields headlight lenses meter lenses etc Use only a soft clean cloth or sponge with mild detergent and water to clean plastic Do not use a...

Page 62: ...1 Dry the scooter with a chamois or an absorbing cloth 2 Use a chrome polish to shine chrome aluminum and stainless steel parts including the exhaust system Even the thermally in duced discoloring of stainless steel exhaust systems can be removed through polishing 3 To prevent corrosion it is recom mended to apply a corrosion pro tection spray on all metal includ ing chrome and nickel plated sur f...

Page 63: ...rain bolt this will prevent fuel deposits from building up Pour the drained fuel into the fuel tank Storage IXE 3 Fill up the fuel tank and add fuel stabilizer if available to prevent the fuel tank from rusting and the fuel from deteriorating 4 Perform the following steps to pro tect the cylinder piston rings etc from corrosion a Remove the spark plug cap and spark plug b Pour a teaspoonful of eng...

Page 64: ...a tively turn the wheels a little every month in order to prevent the tires from becoming degraded in one spot 7 Cover the muffler outlet with a plas tic bag to prevent moisture from en tering it 8 Remove the battery and fully charge it Store it in a cool dry place and charge it once a month Do not store the battery in an ex cessively cold or warm place less than 0 C 30 F or more than 30 C 90 F Fo...

Page 65: ...ransmission oil Type SAE 85W140 Oil change quantity 0 11 L 0 12 US qt 0 10 Imp qt Air filter Air filter element Wet element Fuel Recommended fuel Regular unleaded gasoline only Fuel tank capacity 5 7 L 1 51 US gal 1 25 Imp gal Carburetor Manufacturer TEIKEI Type x quantity 5PJ Y14P x 1 Spark plug s Manufacturer model NGK BPR7HS Spark plug gap 0 6 0 7 mm 0 024 0 028 in Clutch Clutch type Dry centri...

Page 66: ...uspension Type Telescopic fork Spring shock absorber type Coil spring oil damper Rear suspension Type Unit swing Spring shock absorber type Coil spring oil damper Electrical system Ignition system CDI Charging system CDI magneto Battery Model GTX5L BS Voltage capacity 12 V 4 0 Ah Headlight Bulb type Halogen bulb Bulb voltage wattage x quantity Headlight 12 V 35 W 35 0 W x 1 Tail brake light 12 V 5...

Page 67: ...mber IXE Vehicle identification number IXE EAU26381 Key identification number ZAUM00 1 1 Key identification number The key identification number is stamped into the key tag Record this number in the space pro vided and use it for reference when or dering a new key EAU26342 CONSUMER INFORMATION EAU26410 Vehicle identification number ZAUM00 1 1 Vehicle identification number The vehicle identificatio...

Page 68: ...0 Model label ZAUM00 1 1 Model label The model label is affixed to the loca tion shown Record the information on this label in the space provided This information will be needed when order ing spare parts from a Yamaha dealer 5PJ F8199 14_ch9ind pmd 2007 04 20 10 53 2 ...

Page 69: ...may open an investigation and if it finds that a safety defect exists in a group of vehicles it may order a recall and remedy campaign However NHTSA cannot become involved in individual problems between you your dealer or Yamaha Motor Corporation U S A To contact NHTSA you may call the Vehicle Safety Hotline toll free at 1 888 327 4236 TTY 1 800 424 9153 go to http www safercar gov or write to Adm...

Page 70: ...on other than for purposes of maintenance repair or replacement of any device or element of design incorporated into any new vehicle for the purpose of noise control prior to its sale or delivery to the ultimate purchaser or while it is in use or 2 the use of the vehicle after such device or element of design has been removed or rendered inoperative by any person AMONG THOSE ACTS PRESUMED TO CONST...

Page 71: ...nted only as a reminder that maintenance work is required It is not acceptable proof of maintenance work Maintenance record IXE Maintenance interval Date of service Mileage Servicing dealer name and address Remarks 600 mi 1000 km or 1 month 2000 mi 4000 km or 6 months 4000 mi 7000 km or 12 months 6000 mi 10000 km or 18 months 8000 mi 13000 km or 24 months 10000 mi 16000 km or 30 months 12000 mi 19...

Page 72: ...NFORMATION 16000 mi 25000 km or 48 months 18000 mi 28000 km or 54 months 20000 mi 31000 km or 60 months Maintenance interval Date of service Mileage Servicing dealer name and address Remarks 5PJ F8199 14_ch9ind pmd 2007 04 20 10 53 6 ...

Page 73: ...9 7 1 2 3 4 5 6 7 8 9 CONSUMER INFORMATION Warranty limited IXE EAU26681 YAMAHA MOTOR CORPORATION U S A RIVA LIMITED WARRANTY 5PJ F8199 14_ch9ind pmd 2007 04 20 10 53 7 ...

Page 74: ...9 8 1 2 3 4 5 6 7 8 9 CONSUMER INFORMATION 5PJ F8199 14_ch9ind pmd 2007 04 20 10 53 8 ...

Page 75: ...s no deductible to pay and repairs aren t pro rated You don t have any out of pocket expenses for covered repairs In addition Travel and Recreation Interruption Protection TRIP is included at no extra cost TRIP gives you up to 150 reimbursement per occurrence for any reasonable expenses you incur because your Yamaha needs covered service replacement vehicle rental emergency towing phone calls even...

Page 76: ...factory backed protection even after your Yamaha Limited Warranty expires A special note If visiting your dealer isn t convenient contact Yamaha with your Primary ID number your frame number We ll be happy to help you get the Y E S coverage you need Yamaha Service Marketing P O Box 6555 Cypress CA 90630 1 866 YES EXTD 1 866 937 3983 5PJ F8199 14_ch9ind pmd 2007 04 20 10 53 10 ...

Page 77: ... 3 2 K Key identification number 9 1 Kickstarter 3 7 L Labels location of 1 6 M Main switch steering lock 3 1 Maintenance and lubrication periodic 6 4 Maintenance record 9 5 Maintenance emission control system 6 3 Model label 9 2 N Noise regulation 9 4 P Panel removing and installing 6 7 Parking 5 4 Part locations 2 1 Pre operation check list 4 2 R Rear brake lever free play adjusting 6 14 S Safe ...

Page 78: ...INDEX 5PJ F8199 14_ch9ind pmd 2007 04 20 10 53 12 ...

Page 79: ...1 2 3 4 5 6 7 8 9 5PJ F8199 14_ch9ind pmd 2007 04 20 10 53 13 ...

Page 80: ...1 2 3 4 5 6 7 8 9 5PJ F8199 14_ch9ind pmd 2007 04 20 10 53 14 ...

Page 81: ...1 2 3 4 5 6 7 8 9 5PJ F8199 14_ch9ind pmd 2007 04 20 10 53 15 ...

Page 82: ...1 2 3 4 5 6 7 8 9 5PJ F8199 14_ch9ind pmd 2007 04 20 10 53 16 ...

Page 83: ...1 2 3 4 5 6 7 8 9 5PJ F8199 14_ch9ind pmd 2007 04 20 10 53 17 ...

Page 84: ...YAMAHA MOTOR TAIWAN CO LTD PRINTED IN TAIWAN 2007 06 1 3 1 E 5PJ F8199 14_Cv pmd 2007 04 19 14 45 1 ...

Reviews: