background image

1

2

3

4

5

6

7

8

9

9-9

EAU26343

CONSUMER INFORMATION

EAU26751

YAMAHA EXTENDED SERVICE (Y.E.S.)

Keep your Yamaha protected even after your warranty 
expires with genuine Yamaha Extended Service (Y.E.S.).

Y.E.S. is designed and administered by Yamaha Motor 
Corporation to provide maximum owner satisfaction. You 
get uninterrupted factory-backed coverage for extra 
peace of mind.

Y.E.S. is flexible. You choose the plan that’s right for
you: 12 months, 24 months, 36 months or, on certain 
models, even 48 months beyond your warranty period.

Y.E.S. is designed and administered by the same 
Yamaha people who handle your warranty – and it
shows in the comprehensive coverage benefits. There 
are no mileage limitations. Coverage isn’t limited to 
“moving parts” or the “drive train” like many other plans. 
And Y.E.S. covers manufacturing defects just like the 
warranty. See the sample contract at your Yamaha
dealer to see how comforting uninterrupted factory-
backed protection can be.

You don’t have to pay anything for covered repairs. 
There’s no deductible to pay, and repairs aren’t
“pro-rated.” You don’t have any “out-of-pocket” expenses 
for covered repairs.

In addition, Travel and Recreation Interruption Protection 
(TRIP) is included at no extra cost. TRIP gives you up to 
$250 reimbursement per occurrence for any reasonable 
expenses you incur because your Yamaha needs 
covered service: replacement vehicle rental, emergency 
towing, phone calls, even food and lodging when you are 
away from home. This superb coverage goes into effect 
when you purchase Y.E.S., so it applies to any warranty 
repairs as well as covered repairs during your entire 
Y.E.S. plan period.

Y.E.S. coverage is honored at any authorized Yamaha 
dealer nationwide.

Y.E.S. coverage is transferable to a new owner if you
sell or trade-in. That can make your Yamaha much more 
valuable!

This excellent Y.E.S. plan coverage is only available to 
Yamaha owners like you, and only while your Yamaha is still 
within the Yamaha Limited Warranty period. So visit your 
authorized Yamaha dealer to get all the facts. He can show 
you how easy it is to protect your investment with Yamaha 
Extended Service.

6)LQGG

ࣉࣟࢭࢫࢩ࢔ࣥ ࣉࣟࢭࢫ࣐ࢮࣥࢱࣉࣟࢭࢫ࢖࢚࣮ࣟ

ࣉࣟࢭࢫࣈࣛࢵࢡ

Summary of Contents for Zuma YW125B

Page 1: ...32S F8199 13 YW125B OWNER S MANUAL Read this manual carefully before operating this vehicle LIT 11626 25 47 6 LQGG ...

Page 2: ...EAU10042 Q Read this manual carefully before operating this vehicle This manual should stay with this vehicle if it is sold 6 LQGG ࣉࣟࢭࢫࢩ ࣥ ࣉࣟࢭࢫ ࢮࣥࢱࣉࣟࢭࢫ ࣟ ࣉࣟࢭࢫࣈࣛࢵࢡ ...

Page 3: ...s important that you and your Yamaha dealer pay close attention to the recommended maintenance schedules and operating instructions contained within this manual Yamaha continually seeks advancements in product design and quality Therefore while this manual contains the most current product information available at the time of printing there may be minor discrepancies between your scooter and this ...

Page 4: ...ards Obey all safety messages that follow this symbol to avoid possible injury or death WARNING A WARNING indicates a hazardous situation which if not avoided could result in death or serious injury NOTICE A NOTICE indicates special precautions that must be taken to avoid damage to the vehicle or other property TIP A TIP provides key information to make procedures easier or clearer 6 LQGG ࣉࣟࢭࢫࢩ ࣥ ...

Page 5: ...maha Motor Corporation U S A 1st edition July 2011 All rights reserved Any reprinting or unauthorized use with out the written permission of Yamaha Motor Corporation U S A is expressly prohibited Printed in Taiwan P N LIT 11626 25 47 6 LQGG ࣉࣟࢭࢫࢩ ࣥ ࣉࣟࢭࢫ ࢮࣥࢱࣉࣟࢭࢫ ࣟ ࣉࣟࢭࢫࣈࣛࢵࢡ ...

Page 6: ...nance and lubrication chart 6 5 Removing and installing panels 6 9 Checking the spark plug 6 10 Engine oil 6 11 Final transmission oil 6 13 Air filter and V belt case air filter elements 6 14 Checking the engine idling speed 6 16 Checking the throttle grip free play 6 16 Valve clearance 6 16 Tires 6 17 Cast wheels 6 18 Checking the front brake lever free play 6 19 Adjusting the rear brake lever fr...

Page 7: ...on numbers 9 1 Vehicle Emission Control Information label 9 2 Reporting safety defects 9 3 Motorcycle noise regulation 9 4 Maintenance record 9 5 YAMAHA MOTOR CORPORATION U S A RIVA LIMITED WARRANTY 9 7 YAMAHA EXTENDED SERVICE Y E S 9 9 6 LQGG ࣉࣟࢭࢫࢩ ࣥ ࣉࣟࢭࢫ ࢮࣥࢱࣉࣟࢭࢫ ࣟ ࣉࣟࢭࢫࣈࣛࢵࢡ ...

Page 8: ...contain important information for safe and proper operation of your vehicle Never remove any labels from your vehicle If a label becomes difficult to read or comes off a replace ment label is available from your Yamaha dealer EAU45762 LOCATION OF IMPORTANT LABELS 1 2 3 4 5 6 LQGG ࣉࣟࢭࢫࢩ ࣥ ࣉࣟࢭࢫ ࢮࣥࢱࣉࣟࢭࢫ ࣟ ࣉࣟࢭࢫࣈࣛࢵࢡ ...

Page 9: ...ETY INFORMATION EAU45762 LOCATION OF IMPORTANT LABELS 1 2 3 4 5 175kpa 1 75kgf cm2 25psi 200kpa 2 00kgf cm2 29psi 225kpa 2 25kgf cm2 33psi 200kpa 2 00kgf cm2 29psi 24P F1668 00 4JK F8446 01 6 LQGG ࣉࣟࢭࢫࢩ ࣥ ࣉࣟࢭࢫ ࢮࣥࢱࣉࣟࢭࢫ ࣟ ࣉࣟࢭࢫࣈࣛࢵࢡ ...

Page 10: ...ure of motorists to detect and recognize scooters in traf fic is the predominating cause of automobile scooter accidents Many accidents have been caused by an automobile driver who did not see the scooter Mak ing yourself conspicuous appears to be very effective in reducing the chance of this type of acci dent Therefore Wear a brightly colored jacket Use extra caution when you are approaching and ...

Page 11: ...d contribute to an impairment of vision that could delay seeing a hazard The use of a jacket substantial shoes trousers gloves etc is effective in preventing or reducing abrasions or lacerations Never wear loose fitting clothes otherwise they could catch on the control levers or wheels and cause injury or an accident Always wear protective clothing that covers your legs ankles and feet The engine ...

Page 12: ... items as close to the center of the ve hicle as possible and make sure to distribute the weight as evenly as possible on both sides of the scooter to minimize imbalance or instability Shifting weights can create a sudden imbalance Make sure that accessories and cargo are securely attached to the scooter before riding Check accessory mounts and cargo restraints fre quently Properly adjust the susp...

Page 13: ...o improp er weight distribution or aerody namic changes If accessories are added to the handlebar or front fork area they must be as lightweight as possible and should be kept to a minimum Bulky or large accessories may seriously affect the stability of the scooter due to aerodynamic effects Wind may attempt to lift the scooter or the scooter may become unstable in cross winds These accessories ma...

Page 14: ...rs become extremely slip pery when wet Slow down and cross them with caution Keep the scooter upright otherwise it could slide out from under you The brake lining could get wet when you wash the scooter After washing the scooter check the brakes before riding Remove all loose items from the scooter Point the front wheel straight ahead on the trailer or in the truck bed and choke it in a rail to pr...

Page 15: ...1 2 3 4 5 6 7 8 9 1 8 Q SAFETY INFORMATION 6 LQGG ࣉࣟࢭࢫࢩ ࣥ ࣉࣟࢭࢫ ࢮࣥࢱࣉࣟࢭࢫ ࣟ ࣉࣟࢭࢫࣈࣛࢵࢡ ...

Page 16: ...Battery page 6 26 3 Helmet holder page 3 9 4 Sidestand page 3 10 5 V belt case air filter cover page 6 14 6 Centerstand page 6 23 7 Air filter page 6 14 EAU10410 Left view 8 Rear turn signal light page 6 29 EAU10401 DESCRIPTION 1 2 3 4 5 6 7 8 6 LQGG ࣉࣟࢭࢫࢩ ࣥ ࣉࣟࢭࢫ ࢮࣥࢱࣉࣟࢭࢫ ࣟ ࣉࣟࢭࢫࣈࣛࢵࢡ ...

Page 17: ...ION EAU10420 Right view 1 Tail brake light page 6 29 2 Muffler page 3 7 3 Storage compartment page 3 9 4 Seat page 3 8 5 Fuel tank cap page 3 5 6 Spark plug page 6 10 7 Headlight page 6 28 1 2 3 4 5 6 7 6 LQGG ࣉࣟࢭࢫࢩ ࣥ ࣉࣟࢭࢫ ࢮࣥࢱࣉࣟࢭࢫ ࣟ ࣉࣟࢭࢫࣈࣛࢵࢡ ...

Page 18: ...9 2 Left handlebar switches page 3 4 3 Speedometer unit page 3 3 4 Fuel gauge page 3 3 5 Brake fluid reservoir page 6 21 6 Right handlebar switches page 3 4 7 Front brake lever page 6 19 8 Throttle grip page 5 2 9 Main switch steering lock page 3 1 1 2 3 4 5 6 7 8 9 6 LQGG ࣉࣟࢭࢫࢩ ࣥ ࣉࣟࢭࢫ ࢮࣥࢱࣉࣟࢭࢫ ࣟ ࣉࣟࢭࢫࣈࣛࢵࢡ ...

Page 19: ... The key cannot be removed TIP The headlight comes on automatically when the engine is started and stays on until the key is turned to OFF EAU10661 OFF All electrical systems are off The key can be removed EWA10061 WARNING Never turn the key to OFF or LOCK while the vehicle is mov ing Otherwise the electrical sys tems will be switched off which may result in loss of control or an accident EAU10683...

Page 20: ...y to the right to open the cover To close the keyhole cover Push the keyhole cover lever inward and the keyhole cover will close EAU10981 Indicator lights 1 2 3 1 Turn signal indicator light 4 6 2 High beam indicator light 3 Engine trouble warning light EAU11020 Turn signal indicator light 4 6 This indicator light flashes when the turn signal switch is pushed to the left or right EAU11080 High bea...

Page 21: ...es not come on initially when the key is turned to ON or if the warning light remains on have a Yamaha dealer check the electrical circuit EAUT1821 Speedometer unit 1 2 1 Speedometer 2 Odometer The speedometer unit is equipped with a speedometer and an odometer The speedometer shows the riding speed The odometer shows the total distance traveled EAU12140 Fuel gauge 1 1 Fuel gauge The fuel gauge in...

Page 22: ...itch to 4 When released the switch returns to the center position To cancel the turn signal lights push the switch in after it has returned to the center position EAU12500 Horn switch Press this switch to sound the horn EAU12660 Engine stop switch Set this switch to before starting the engine Set this switch to to stop the engine in case of an emer gency such as when the vehicle overturns or when ...

Page 23: ...located on the left handlebar grip To apply the rear brake pull this lever toward the han dlebar grip EAU13041 Fuel tank cap LO CK 1 1 Fuel tank cap To open the fuel tank cap Insert the key into the lock and turn it 1 4 turn clockwise The lock will be released and the fuel tank cap can be opened To close the fuel tank cap 1 Push the fuel tank cap into posi tion with the key inserted in the lock 2 ...

Page 24: ... fuel while smoking or while in the vicinity of sparks open flames or other sources of ignition such as the pilot lights of water heaters and clothes dryers 2 Do not overfill the fuel tank When refueling be sure to insert the pump nozzle into the fuel tank fill er hole Stop filling when the fuel reaches the bottom of the filler tube Because fuel expands when it heats up heat from the engine or the...

Page 25: ...ll extend spark plug life and re duce maintenance costs Gasohol There are two types of gasohol gaso hol containing ethanol and that con taining methanol Gasohol containing ethanol can be used if the ethanol content does not exceed 10 E10 Gasohol containing methanol is not recommended by Yamaha because it can cause damage to the fuel system or vehicle performance problems EAU13433 Catalytic convert...

Page 26: ...tch and then turn it counter clockwise to the OPEN position If the main switch is in the ON position turn the key clockwise to the OPEN position The seat will fold up automatically TIP Do not push inward when turning the key from OFF to OPEN or from ON to OPEN To close the seat 1 Fold the seat down and then push it down to lock it in place 2 Remove the key from the main switch if the scooter will ...

Page 27: ...elease the helmet from the hel met holder Open the seat remove the helmet from the helmet holder and then close the seat EAU14453 Storage compartment 1 1 Storage compartment The storage compartment is located under the seat See page 3 8 When storing the Owner s Manual or other documents in the storage com partment be sure to wrap them in a plastic bag so that they will not get wet When washing the...

Page 28: ...anation of the ignition circuit cut off system EWA10241 WARNING The vehicle must not be ridden with the sidestand down or if the sid estand cannot be properly moved up or does not stay up otherwise the sidestand could contact the ground and distract the operator resulting in a possible loss of con trol Yamaha s ignition circuit cut off system has been designed to assist the operator in fulfilling ...

Page 29: ...es has the following functions It prevents starting when the sid estand is up but neither brake is applied It prevents starting when either brake is applied but the sides tand is still down It cuts the running engine when the sidestand is moved down Periodically check the operation of the ignition circuit cut off system accord ing to the following procedure 6 LQGG ࣉࣟࢭࢫࢩ ࣥ ࣉࣟࢭࢫ ࢮࣥࢱࣉࣟࢭࢫ ࣟ ࣉࣟࢭࢫࣈࣛࢵࢡ ...

Page 30: ...With the engine still running 9 Move the sidestand down Does the engine stall The system is OK The scooter can be ridden The sidestand switch may not be working correctly The scooter should not be ridden until checked by a Yamaha dealer The brake switch may not be working correctly The scooter should not be ridden until checked by a Yamaha dealer The sidestand switch may not be working correctly T...

Page 31: ...ow the in spection and maintenance procedures and schedules described in the Owner s Manual EWA11151 WARNING Failure to inspect or maintain the vehicle properly increases the possibility of an accident or equipment dam age Do not operate the vehicle if you find any problem If a problem cannot be corrected by the procedures pro vided in this manual have the vehicle inspected by a Yamaha dealer 6 LQ...

Page 32: ...rake pads for wear Replace if necessary Check fluid level in reservoir If necessary add specified brake fluid to specified level Check hydraulic system for leakage 6 19 6 22 Rear brake Check operation Lubricate cable if necessary Check lever free play Adjust if necessary 6 19 6 20 Throttle grip Make sure that operation is smooth Check throttle grip free play If necessary have Yamaha dealer adjust ...

Page 33: ...Lubricate pivots if necessary 6 23 Chassis fasteners Make sure that all nuts bolts and screws are properly tightened Tighten if necessary Instruments lights signals and switches Check operation Correct if necessary 3 2 3 4 Engine stop switch Check operation 3 4 Sidestand switch Check operation of ignition circuit cut off system If system is not working correctly have Yamaha dealer check vehicle 3 ...

Page 34: ...OTICE See page 5 3 for engine break in instructions prior to operating the vehicle for the first time In order for the ignition circuit cut off system to enable starting the sides tand must be up See page 3 10 for more information 1 Turn the key to ON and make sure that the engine stop switch is set to The engine trouble warning light should come on for a few sec onds then go off NOTICE If the war...

Page 35: ...and closing the throttle To in crease the speed turn the throttle grip in direction a To reduce the speed turn the throttle grip in direction b EAU16793 Braking EWA10300 WARNING Avoid braking hard or sud denly especially when leaning over to one side otherwise the scooter may skid or overturn Railroad crossings streetcar rails iron plates on road con struction sites and manhole covers become extre...

Page 36: ...ves to the correct operating clear ances During this period prolonged full throttle operation or any condition that might result in engine overheating must be avoided EAU16951 0 150 km 0 90 mi Avoid prolonged operation above 1 3 throttle After every hour of operation stop the engine and then let it cool for five to ten minutes Vary the engine speed from time to time Do not operate the engine at on...

Page 37: ...ince the engine and exhaust system can become very hot park in a place where pedestri ans or children are not likely to touch them and be burned Do not park on a slope or on soft ground otherwise the ve hicle may overturn increasing the risk of a fuel leak and fire Do not park near grass or other flammable materials which might catch fire 6 LQGG ࣉࣟࢭࢫࢩ ࣥ ࣉࣟࢭࢫ ࢮࣥࢱࣉࣟࢭࢫ ࣟ ࣉࣟࢭࢫࣈࣛࢵࢡ ...

Page 38: ...122 WARNING Turn off the engine when perform ing maintenance unless otherwise specified A running engine has moving parts that can catch on body parts or clothing and electrical parts that can cause shocks or fires Running the engine while ser vicing can lead to eye injury burns fire or carbon monox ide poisoning possibly lead ing to death See page 1 3 for more information about carbon monoxide EW...

Page 39: ... the storage compartment under the seat See page 3 8 The service information included in this manual and the tools provided in the owner s tool kit are intended to as sist you in the performance of preven tive maintenance and minor repairs However additional tools such as a torque wrench may be necessary to perform certain maintenance work correctly TIP If you do not have the tools or expe 6 LQGG ...

Page 40: ...0 km or 1 month 2000 mi 4000 km or 6 months 4000 mi 7000 km or 12 months 6000 mi 10000 km or 18 months 8000 mi 13000 km or 24 months 10000 mi 16000 km or 30 months 1 Fuel line Check fuel hoses for cracks or damage Replace if necessary 2 Spark plug Check condition Adjust gap and clean Replace at 4000 mi 7000 km or 12 months and thereafter every 4000 mi 6000 km or 12 months Replace Replace 3 Valve c...

Page 41: ...ADING 600 mi 1000 km or 1 month 2000 mi 4000 km or 6 months 4000 mi 7000 km or 12 months 6000 mi 10000 km or 18 months 8000 mi 13000 km or 24 months 10000 mi 16000 km or 30 months 6 Exhaust system Check for leakage Tighten if necessary Replace gasket s if necessary 6 LQGG ࣉࣟࢭࢫࢩ ࣥ ࣉࣟࢭࢫ ࢮࣥࢱࣉࣟࢭࢫ ࣟ ࣉࣟࢭࢫࣈࣛࢵࢡ ...

Page 42: ... air filter element Clean 3 Front brake Check operation fluid level and for fluid leakage Replace brake pads if necessary 4 Rear brake Check operation Adjust cable and replace brake shoes if necessary 5 Brake hose Check for cracks or damage Check for correct routing and clamping Replace Every 4 years 6 Wheels Check runout and for damage Replace if necessary 7 Tires Check tread depth and for dam ag...

Page 43: ...teners Check all chassis fitting and fas teners Correct if necessary 11 Front brake lever pivot shaft Apply silicone grease lightly 12 Rear brake lever pivot shaft Apply lithium soap based grease lightly 13 Centerstand and sidestand pivots Check operation Apply lithium soap based grease lightly 14 Sidestand switch Check operation and replace if necessary 15 Front fork Check operation and for oil l...

Page 44: ...ne oil strainer Clean 19 Final transmission oil Check vehicle for oil leakage Change 20 V belt Replace Every 10500 mi 18000 km 21 Front and rear brake switches Check operation 22 Control and meter cables Apply Yamaha chain and cable lube or engine oil thoroughly 23 Throttle grip Check operation Check throttle grip free play and adjust if necessary Lubricate cable and grip housing 24 Lights signals...

Page 45: ... and V belt filter needs to be serviced more frequently when riding in unusually wet or dusty areas Hydraulic brake service After disassembling the brake master cylinder and caliper always change the fluid Regularly check the brake fluid level and fill the reservoir as required Every two years replace the internal components of the brake master cylinder and caliper and change the brake fluid Repla...

Page 46: ...l Remove the screw and then pull out ward on the areas shown 1 2 1 Panel A 2 Screw To install the panel Place the panel in the original posi tion and then install the screw EAUT2532 Panel B To remove the panel 1 Remove panel A See page 6 8 2 Remove the screws and the quick fastener screws and then take the panel off 1 2 3 3 1 Panel B 2 Screw 3 Quick fastener screw To install the panel 1 Place the ...

Page 47: ... the spark plug is a medium to light tan the ideal color when the vehicle is ridden normally TIP If the spark plug shows a distinctly different color the engine could be operating improperly Do not attempt to diagnose such problems yourself Instead have a Yamaha dealer check the vehicle 2 Check the spark plug for elec trode erosion and excessive carbon or other deposits and re place it if necessar...

Page 48: ... a false reading 2 Start the engine warm it up for several minutes and then turn it off 1 2 3 1 Oil filler cap 2 Maximum level mark 3 Minimum level mark 3 Wait a few minutes until the oil settles remove the oil filler cap wipe the dipstick clean insert it back into the oil filler hole without screwing it in and then remove it again to check the oil level TIP The engine oil should be between the mi...

Page 49: ...install and tighten the oil filler cap Recommended engine oil See page 8 1 Oil change quantity 0 85 L 0 90 US qt 0 75 Imp qt ECA11670 NOTICE Do not use oils with a diesel specification of CD or oils of a higher quality than specified In addition do not use oils la beled ENERGY CONSERVING II or higher Be sure no foreign material en ters the crankcase 6 Start the engine and then let it idle for seve...

Page 50: ...d oil 1 1 Final transmission oil filler cap 4 Remove the final transmission oil filler cap and its O ring from the final transmission case 5 Remove the final transmission oil drain bolt and its gasket to drain the oil from the final transmission case 6 Install the final transmission oil drain bolt and its new gasket and then tighten the bolt to the speci fied torque 1 1 Final transmission oil drai...

Page 51: ...sary Replacing the air filter element 1 3 2 1 Air filter case cover 2 Screw 3 Air filter check hose 1 Place the scooter on the center stand 2 Remove the air filter case cover by removing the screws 3 Pull the air filter element out 4 Insert a new air filter element into the air filter case NOTICE Make sure that the air filter element is properly seated in the air filter case The engine should neve...

Page 52: ... parts cleaning sol vent To avoid the risk of fire or explosion do not use gasoline or solvents with a low flash point EWA10431 NOTICE To avoid damaging the air filter element handle it gently and carefully and do not twist it ECA10521 4 Apply oil of the recommended type to the entire surface of the sponge material and then squeeze the excess oil out TIP The air filter element should be wet but no...

Page 53: ...air fuel mix ture and or engine noise To prevent this from occurring the valve clear ance must be adjusted by a Yamaha dealer at the intervals specified in the periodic maintenance and lubrication chart EAU21384 Checking the throttle grip free play 1 1 Throttle cable free play The throttle grip free play should mea sure 3 5 mm 0 12 0 20 in at the inner edge of the throttle grip Periodi cally check...

Page 54: ...and accessories ap proved for this model Tire air pressure measured on cold tires Up to 90 kg 198 lb Front 175 kPa 1 75 kgf cm2 25 psi Rear 200 kPa 2 00 kgf cm2 29 psi 90 kg 198 lb to maximum load Front 200 kPa 2 00 kgf cm2 29 psi Rear 225 kPa 2 25 kgf cm2 33 psi Maximum load 155 kg 342 lb Total weight of rider passenger cargo and accessories EWA10511 WARNING Never overload your vehicle Op eration...

Page 55: ...th a worn out tire When a tire tread begins to show crosswise lines have a Yamaha dealer re place the tire immediately The replacement of all wheel and brake related parts includ ing the tires should be left to a Yamaha dealer who has the necessary professional knowl edge and experience EAU21962 Cast wheels To maximize the performance dura bility and safe operation of your ve hicle note the follow...

Page 56: ...res ence of air in the hydraulic system If there is air in the hydraulic sys tem have a Yamaha dealer bleed the system before operating the vehicle Air in the hydraulic system will diminish the braking perfor mance which may result in loss of control and an accident EAU22170 Adjusting the rear brake lever free play 1 1 Rear brake lever free play The brake lever free play should mea sure 10 20 mm 0...

Page 57: ...r groove 2 Brake pad 3 Brake disc Each front brake pad is provided with a wear indicator groove which al lows you to check the brake pad wear without having to disassemble the brake To check the brake pad wear check the wear indicator groove If a brake pad has worn to the point that the wear indicator groove has almost disappeared have a Yamaha dealer replace the brake pads as a set EAU22540 Rear ...

Page 58: ...g braking perfor mance Clean the filler cap before re moving Use only DOT 4 brake fluid from a sealed container Use only the specified brake fluid otherwise the rubber seals may deteriorate causing leakage Refill with the same type of brake fluid Adding a brake flu id other than DOT 4 may result in a harmful chemical reaction Be careful that water does not enter the brake fluid reser voir when ref...

Page 59: ... be sure to check the brake pads for wear and the brake system for leakage If the brake fluid level goes down suddenly have a Yamaha dealer check the cause be fore further riding EAU23095 Checking and lubricating the cables The operation of all control cables and the condition of the cables should be checked before each ride and the cables and cable ends should be lubricated if necessary If a cabl...

Page 60: ...d does not move up and down smoothly have a Yamaha dealer check or repair it Otherwise the centerstand or sidestand could contact the ground and distract the operator resulting in a possible loss of control EAU23114 Checking and lubricating the throttle grip and cable The operation of the throttle grip should be checked before each ride In addition the cable should be lubri cated by a Yamaha deale...

Page 61: ...heck the operation 1 Place the vehicle on a level sur face and hold it in an upright position WARNING To avoid injury securely support the ve hicle so there is no danger of it falling over EWA10751 2 While applying the front brake push down hard on the handle bars several times to check if the front fork compresses and re bounds smoothly Recommended lubricant Lithium soap based grease ECA10590 NOT...

Page 62: ...rely support the ve hicle so there is no danger of it falling over EWA10751 2 Hold the lower ends of the front fork legs and try to move them forward and backward If any free play can be felt have a Yamaha dealer check or repair the steer ing EAU23291 Checking the wheel bearings The front and rear wheel bearings must be checked at the intervals specified in the periodic maintenance and lubrication...

Page 63: ...en gas Therefore keep sparks flames cigarettes etc away from the battery and pro vide sufficient ventilation when charging it in an enclosed space KEEP THIS AND ALL BATTER IES OUT OF THE REACH OF CHILDREN ECA10620 NOTICE Never attempt to remove the bat tery cell seals as this would per manently damage the battery The battery is located under panel A Remove the panel to access the bat tery See page...

Page 64: ...e positive lead be fore connecting the negative lead ECA16840 4 After installing the battery make sure that the battery leads are properly connected to the battery terminals 5 Turn the key from ON to OFF three times in three second in tervals to initialize the idle speed control system ECA16530 NOTICE Always keep the battery charged Storing a discharged battery can cause permanent battery damage E...

Page 65: ...in question to check if the device operates 4 If the fuse immediately blows again have a Yamaha dealer check the electrical system 1 1 Spare fuse 2 Remove the blown fuse and then install a new fuse of the specified amperage WARNING Do not use a fuse of a higher amper age rating than recommended to avoid causing extensive damage to the electrical sys tem and possibly a fire EWA15131 EAU34241 Replac...

Page 66: ...bulb by pushing it in and turning it coun EAU43040 Tail brake light 1 1 Tail brake light If the tail brake light does not come on have a Yamaha dealer check its electrical circuit or replace the bulb terclockwise 3 Insert a new bulb into the socket push it in and then turn it clock wise until it stops 4 Install the lens by installing the screw NOTICE Do not over tighten the screw otherwise the len...

Page 67: ...arting and loss of power The following troubleshooting chart represents a quick and easy pro cedure for checking these vital sys tems yourself However should your scooter require any repair take it to a Yamaha dealer whose skilled techni cians have the necessary tools expe rience and know how to service the scooter properly Use only genuine Yamaha replace ment parts Imitation parts may look like Y...

Page 68: ... check the vehicle Remove the spark plug and check the electrodes 3 Ignition Wipe off with a dry cloth and correct the spark plug gap or replace the spark plug Have a Yamaha dealer check the vehicle The engine does not start Have a Yamaha dealer check the vehicle The engine does not start Check the battery Operate the electric starter 4 Battery The engine turns over quickly The engine turns over s...

Page 69: ...d extend its life and optimize its performance Before cleaning 1 Cover the muffler outlet with a plastic bag after the engine has cooled down 2 Make sure that all caps and cov ers as well as all electrical cou plers and connectors including the spark plug cap are tightly installed 3 Remove extremely stubborn dirt like oil burnt onto the crankcase with a degreasing agent and a brush but never apply...

Page 70: ...ld is scratched use a quality plastic polishing com pound after washing After normal use Remove dirt with warm water a mild detergent and a soft clean sponge and then rinse thoroughly with clean water Use a toothbrush or bottlebrush for hard to reach areas Stubborn dirt and insects will come off more easily if the area is covered with a wet cloth for a few minutes before cleaning After riding in t...

Page 71: ...pe off any excess Never apply oil or wax to any rubber and plastic parts but treat them with a suitable care product Avoid using abrasive polishing compounds as they will wear away the paint TIP Consult a Yamaha dealer for ad vice on what products to use Washing rainy weather or humid climates can cause the headlight lens to fog Turning the headlight on for a short period of time will help remove ...

Page 72: ... plug cap WARNING To prevent damage or injury from sparking make sure to ground the spark plug elec trodes while turning the en gine over EWA10951 4 Lubricate all control cables and the pivoting points of all levers and pedals as well as of the sidestand centerstand 5 Check and if necessary correct the tire air pressure and then lift the scooter so that both of its wheels are off the ground Alter ...

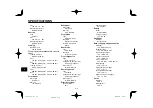
Page 73: ...5W 40 SAE 20W 40 SAE 20W 50 SAE 10W 40 SAE 10W 50 Recommended engine oil grade API service SG type or higher JASO standard MA Engine oil quantity Without oil filter element removal 0 85 L 0 90 US qt 0 75 Imp qt Final transmission oil Type SAE 10W 30 type SE motor oil Quantity 0 13 L 0 14 US qt 0 11 Imp qt Air filter Air filter element Wet element Fuel Recommended fuel Regular unleaded gasoline onl...

Page 74: ...ke Type Drum brake Operation Left hand operation Front suspension Type Telescopic fork Spring shock absorber type Coil spring oil damper Wheel travel 78 0 mm 3 07 in Rear suspension Type Unit swing Spring shock absorber type Coil spring oil damper Wheel travel 71 0 mm 2 80 in Electrical system Ignition system TCI Charging system AC magneto Battery Model MF YT7B BS Voltage capacity 12 V 6 5 Ah Head...

Page 75: ...7 8 9 8 3 SPECIFICATIONS Signaling system fuse 15 0 A Ignition fuse 10 0 A Fuel injection system fuse 10 0 A Spare fuse 20 0 A x 1 Spare fuse 10 0 A x 1 Spare fuse 15 0 A x 1 6 LQGG ࣉࣟࢭࢫࢩ ࣥ ࣉࣟࢭࢫ ࢮࣥࢱࣉࣟࢭࢫ ࣟ ࣉࣟࢭࢫࣈࣛࢵࢡ ...

Page 76: ...TIFICATION NUM BER MODEL LABEL INFORMATION EAU26381 Key identification number 1 1 Key identification number The key identification number is stamped into the key tag Record this number in the space pro vided and use it for reference when ordering a new key EAU26410 Vehicle identification number 1 1 Vehicle identification number The vehicle identification number is stamped into the frame TIP The ve...

Page 77: ...ormation will be needed when ordering spare parts from a Yamaha dealer EAU48270 Vehicle Emission Control In formation label 1 1 Vehicle Emission Control Information label The Vehicle Emission Control Infor mation label is affixed at the location in the illustration This label shows specifications related to exhaust emis sions as required by federal law state law and Environment Canada 6 LQGG ࣉࣟࢭࢫࢩ...

Page 78: ...n an investigation and if it finds that a safety defect exists in a group of vehicles it may order a recall and remedy campaign However NHTSA cannot become involved in individual problems between you your dealer or Yamaha Motor Corporation U S A To contact NHTSA you may call the Vehicle Safety Hotline toll free at 1 888 327 4236 TTY 1 800 424 9153 go to http www safercar gov or write to Administra...

Page 79: ... into any new vehicle for the purpose of noise control prior to its sale or delivery to the ultimate purchaser or while it is in use or 2 the use of the vehicle after such device or element of design has been removed or rendered inoperative by any person AMONG THOSE ACTS PRESUMED TO CONSTITUTE TAMPERING ARE THE ACTS LISTED BELOW These acts include tampering with the following systems i e modificat...

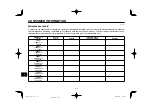
Page 80: ...chart below is printed only as a reminder that maintenance work is required It is not acceptable proof of maintenance work Maintenance interval Date of service Mileage Servicing dealer name and address Remarks 600 mi 1000 km or 1 month 2000 mi 4000 km or 6 months 4000 mi 7000 km or 12 months 6000 mi 10000 km or 18 months 8000 mi 13000 km or 24 months 10000 mi 16000 km or 30 months 12000 mi 19000 k...

Page 81: ...SUMER INFORMATION Maintenance interval Date of service Mileage Servicing dealer name and address Remarks 16000 mi 25000 km or 48 months 18000 mi 28000 km or 54 months 20000 mi 31000 km or 60 months 6 LQGG ࣉࣟࢭࢫࢩ ࣥ ࣉࣟࢭࢫ ࢮࣥࢱࣉࣟࢭࢫ ࣟ ࣉࣟࢭࢫࣈࣛࢵࢡ ...

Page 82: ...1 2 3 4 5 6 7 8 9 9 7 EAU26343 CONSUMER INFORMATION EAU26681 YAMAHA MOTOR CORPORATION U S A RIVA LIMITED WARRANTY 6 LQGG ࣉࣟࢭࢫࢩ ࣥ ࣉࣟࢭࢫ ࢮࣥࢱࣉࣟࢭࢫ ࣟ ࣉࣟࢭࢫࣈࣛࢵࢡ ...

Page 83: ...1 2 3 4 5 6 7 8 9 9 8 EAU26343 CONSUMER INFORMATION 6 LQGG ࣉࣟࢭࢫࢩ ࣥ ࣉࣟࢭࢫ ࢮࣥࢱࣉࣟࢭࢫ ࣟ ࣉࣟࢭࢫࣈࣛࢵࢡ ...

Page 84: ...nything for covered repairs There s no deductible to pay and repairs aren t pro rated You don t have any out of pocket expenses for covered repairs In addition Travel and Recreation Interruption Protection TRIP is included at no extra cost TRIP gives you up to 250 reimbursement per occurrence for any reasonable expenses you incur because your Yamaha needs covered service replacement vehicle rental...

Page 85: ...strong factory backed protection even after your Yamaha Limited Warranty expires A special note If visiting your dealer isn t convenient contact Yamaha with your Primary ID number your frame number We ll be happy to help you get the Y E S coverage you need Yamaha Service Marketing P O Box 6555 Cypress CA 90630 1 866 YES EXTD 1 866 937 3983 6 LQGG ࣉࣟࢭࢫࢩ ࣥ ࣉࣟࢭࢫ ࢮࣥࢱࣉࣟࢭࢫ ࣟ ࣉࣟࢭࢫࣈࣛࢵࢡ ...

Page 86: ...ole cover 3 2 Key identification number 9 1 L Labels location 1 1 Labels location 1 2 M Maintenance emission control system 6 3 Maintenance and lubrication periodic 6 5 Maintenance record 9 5 Main switch steering lock 3 1 Matte color caution 7 1 Model label 9 2 N Noise regulation 9 4 P Panels removing and installing 6 9 Parking 5 4 Part locations 2 1 Rear brake lever free play adjusting 6 19 S Saf...

Page 87: ...INDEX 6 LQGG ࣉࣟࢭࢫࢩ ࣥ ࣉࣟࢭࢫ ࢮࣥࢱࣉࣟࢭࢫ ࣟ ࣉࣟࢭࢫࣈࣛࢵࢡ ...

Page 88: ...INDEX 6 LQGG ࣉࣟࢭࢫࢩ ࣥ ࣉࣟࢭࢫ ࢮࣥࢱࣉࣟࢭࢫ ࣟ ࣉࣟࢭࢫࣈࣛࢵࢡ ...

Page 89: ...INDEX 6 LQGG ࣉࣟࢭࢫࢩ ࣥ ࣉࣟࢭࢫ ࢮࣥࢱࣉࣟࢭࢫ ࣟ ࣉࣟࢭࢫࣈࣛࢵࢡ ...

Page 90: ...INDEX 6 LQGG ࣉࣟࢭࢫࢩ ࣥ ࣉࣟࢭࢫ ࢮࣥࢱࣉࣟࢭࢫ ࣟ ࣉࣟࢭࢫࣈࣛࢵࢡ ...

Page 91: ...ing your Genuine Yamaha Accessories will fit right and perform right right out of the box Yamalube Take care of your Yamaha with legendary Yamalube oils lubricants and care products They re formulated and approved by the toughest judges we know the Yamaha engineering teams that know your Yamaha from the inside out Genuine Yamaha Service Manuals Get the same factory manual for your vehicle that the...

Page 92: ...PRINTED IN TAIWAN 2011 06 0 8 1 E 6 LQGG ...

Reviews: