background image

SETTINGS

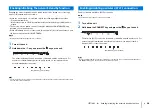
Using the TV’s remote control to adjust the unit’s volume

En

27

3

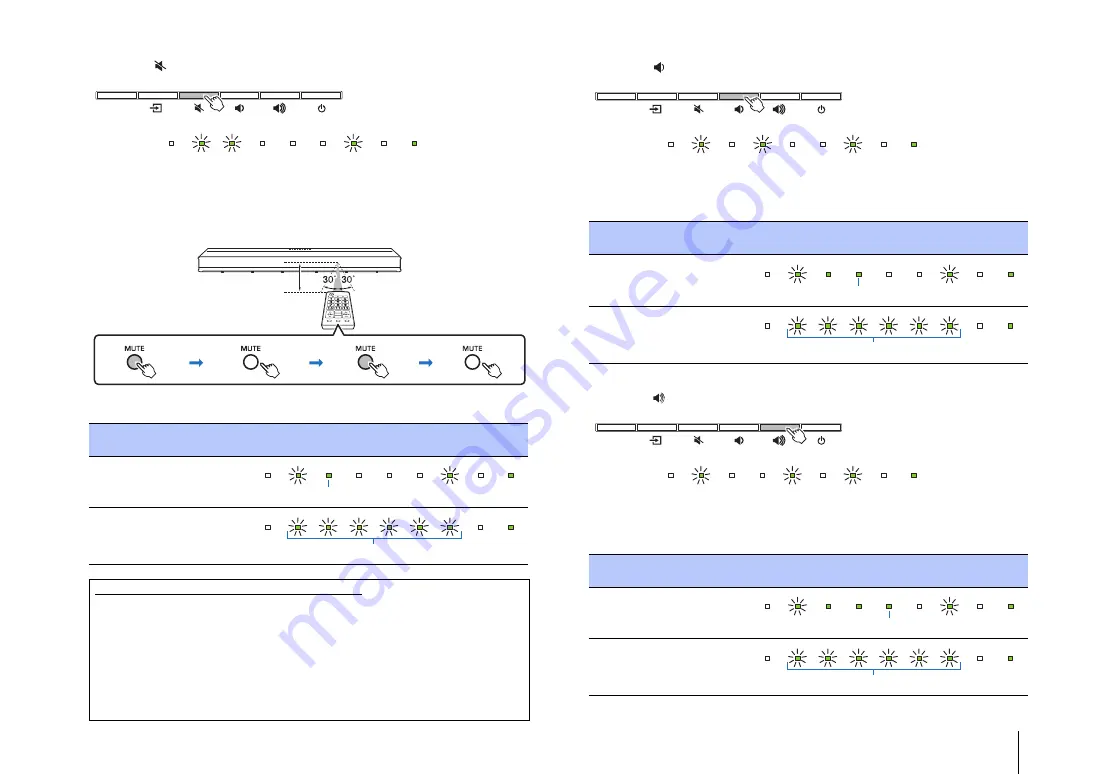
Teach the unit the TV remote control’s “Mute” command.

3-1

Press the 

 key on the unit.

3-2

Point the TV’s remote control at the remote control sensor on the unit, hold 
down the mute key for at least 1 second, and then release it for at least 1 
second. Perform this operation twice.

The position of the remote control sensor varies depending upon the installation of 
the unit (p.8, 9).

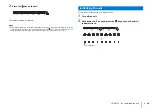
4

Teach the unit the TV remote control’s “Volume (–)” command.

4-1

Press the 

 key on the unit.

4-2

Point the TV’s remote control at the remote control sensor on the unit, hold 
down the volume (–) key for at least 1 second, and then release it for at least 
1 second. Perform this operation twice.

5

Teach the unit the TV remote control’s “Volume (+)” command.

5-1

Press the 

 key on the unit.

5-2

Point the TV’s remote control at the remote control sensor on the unit, hold 
down the volume (+) key for at least 1 second, and then release it for at least 
1 second. Perform this operation twice.

Result

Bleep/

buzzer

Indicators

Successfully 
learned

Once

Failed to learn

Repeat from Step 
3-1.

Twice

Troubleshooting the unit’s failure to learn commands

Is the TV turned off?

Is direct sunlight or fluorescent light striking the unit and interfering with operation?

Are you using the TV's remote control for Steps 3 though 6? (The unit's remote control is not 
used.)

Are you using the remote control within the range indicated above?

Are you holding down keys on the TV’s remote control for at least 1 second, and then releasing 
them for at least 1 second?

If the unit fails to learn commands even after checking all of the above, hold down and release the 
key on the TV’s remote control three times.

CONNECT

Indicators

Approx. 30 cm (1 ft)

TV’s remote control

Hold down

(for at least 1 second)

Release

(for at least 1 second)

Hold down

(for at least 1 second)

Release

Glows

Flash

Result

Bleep/

buzzer

Indicators

Successfully 
learned

Once

Failed to learn

Repeat from Step 
4-1.

Twice

Result

Bleep/

buzzer

Indicators

Successfully 
learned

Once

Failed to learn

Repeat from Step 
5-1.

Twice

CONNECT

Indicators

Glows

Flash

CONNECT

Indicators

Glows

Flash

Summary of Contents for YAS-306

Page 1: ...Front Surround System Owner s Manual Read the supplied booklet Quick Start Guide before using the unit English EN...

Page 2: ...2 Listening to Internet radio 23 Playing back music with AirPlay 24 Playing back music stored on mobile devices 25 SETTINGS Settings 26 Using the TV s remote control to adjust the unit s volume 26 Usi...

Page 3: ...a wall point the remote control at the remote control sensor on the top panel p 9 The unit Remote control Batteries x 2 AAA R03 UM4 Optical digital audio cable 1 5 m 4 9 ft Mounting template Use when...

Page 4: ...Unrestricted playback of music over a network using MusicCast CONTROLLER The free app for mobile devices MusicCast CONTROLLER allows you to listen to music stored on mobile devices such smartphones or...

Page 5: ...Yes Bluetooth wireless headphones can be used p 17 Q5 Can sound playing via the unit be played on another audio device at the same time or vice versa A5 Yes Sound from one MusicCast enabled audio devi...

Page 6: ...p 12 4 mute key Mute the audio output Press the key again to unmute p 13 5 volume keys Adjust the volume p 13 6 power key Turn on or off the unit p 12 HINT The unit may automatically turn off when th...

Page 7: ...4 BD DVD input jack For connecting to a playback device such as a Blu ray Disc BD player with a coaxial digital audio cable p 11 5 NETWORK jack For connecting to a network with a network cable p 18 6...

Page 8: ...e used even when the unit is turned off as long as the unit s power cable is plugged into an AC wall outlet Cautions Do not stack the unit and a BD player or other device directly on each other Doing...

Page 9: ...n work Improper or inadequate installation could cause the unit to fall resulting in personal injury To avoid falling the unit attach the unit to a dry wall Make sure you use commercially available sc...

Page 10: ...ollowing audio signals PCM 2 channel Dolby Digital up to 5 1 channel DTS Digital Surround up to 5 1 channel Connection method 1 Connect the unit to a TV If the TV has an optical audio output jack Conn...

Page 11: ...onnect audio output jack s on each playback device to input jack s on the unit To watch video from an external device Change the TV s input source Switch to the input source for the BD DVD player or o...

Page 12: ...to the unit s TV input jack BD DVD Sound from a device connected to the BD DVD input jack ANALOG Sound from a device connected to the ANALOG input jacks BLUETOOTH Sound from a Bluetooth connected dev...

Page 13: ...dio station p 22 to 25 2 Hold down the NET RADIO 1 2 or 3 key for more than 3 seconds Tune in to an assigned Internet radio station 1 Press the NET RADIO 1 2 or 3 key to which the desired Internet rad...

Page 14: ...und Follow the procedure below to adjust the audio delay NOTE The audio delay cannot be adjusted in the following situations When Bluetooth or NET is selected as the input source When sound is distrib...

Page 15: ...few seconds INFO key While the INFO key is held down status including the type of audio signal being input and whether the clear voice function is enabled or disabled can be confirmed by the glowing o...

Page 16: ...pressed Terminate this connection to connect a new device 2 Enable the Bluetooth function on the Bluetooth device 3 Select YAS 306 xxxxxx Bluetooth in the Bluetooth device list on the device If the un...

Page 17: ...unit as a MusicCast enabled device p 19 2 Use the MusicCast CONTROLLER app to play a song via any device other than a Bluetooth device 3 Configure a Bluetooth device wireless headphones etc for Bluet...

Page 18: ...settings A network connection cannot be established if the MAC address filter on your router is enabled Check your router s settings To configure your router s subnet mask manually apply the same subn...

Page 19: ...m close to each other Connecting with the MusicCast CONTROLLER app registering the unit as a MusicCast enabled device Install the MusicCast CONTROLLER app on your mobile device to connect the unit to...

Page 20: ...etwork settings When a screen like that at left below is displayed select the network to which the unit will be connected and enter the router s password encryption key The router s password encryptio...

Page 21: ...n name and the name and photo of the room where the unit is installed can be changed later Network connection with the MusicCast CONTROLLER app is now complete and the unit has been registered as a Mu...

Page 22: ...PC s manufacturer or Windows Media Player Help for details 1 Start Windows Media Player 12 on your PC 2 Select Stream then Turn on media streaming 3 Click Turn on media streaming 4 Select Allowed from...

Page 23: ...o Internet radio 1 Use the MusicCast CONTROLLER app to select the unit s room Room1 etc 2 Tap Net Radio 3 Select a station from Locations Genres etc HINT When an Internet radio station is registered w...

Page 24: ...from your iOS device an iPhone etc can be applied to the unit to connect the unit to a wireless network The indicator does not flash if the unit s NETWORK jack is connected to a router using a cable w...

Page 25: ...o play music stored on your mobile device over a network Using a mobile device to play songs Use the MusicCast CONTROLLER app installed on your mobile device to operate playback NOTE Register the unit...

Page 26: ...6 The unit s remote control is not used If the unit has already learned functions indicators will glow as follows Mute BD DVD Volume ANALOG Volume BLUETOOTH Power NET If the unit is taught TV remote c...

Page 27: ...ast 1 second Perform this operation twice Result Bleep buzzer Indicators Successfully learned Once Failed to learn Repeat from Step 3 1 Twice Troubleshooting the unit s failure to learn commands Is th...

Page 28: ...when the TV s remote control is used to increase volume Should this occur set TV volume as low as possible using the button on the TV itself or disable output from the TV s internal speaker s HINT If...

Page 29: ...ope and U K models and disabled on other models When the auto power standby function is enabled the unit automatically turns off in any of the following situations No operations for 8 hours No audio i...

Page 30: ...sabled and the unit turns on For several seconds immediately after the unit is turned on the indicator shows network standby function status HINT The unit consumes more power when it is off with the n...

Page 31: ...irmware is updated Update progress can also be confirmed using the indicators on the unit HINT If there are multiple firmware updates the indicators will start glowing as each firmware update begins I...

Page 32: ...p and the indicator at far right on the unit will flash blue Press the key to turn unit off and then on again and try updating the firmware again If the update fails again check the network connection...

Page 33: ...If the power still turns off frequently unplug the power cable from the AC wall outlet and contact the nearest authorized Yamaha dealer or service center The power cannot be turned on The protection c...

Page 34: ...ot contain low frequency signals Play back a sound source containing low frequency signals and confirm that the sound is output from the subwoofer The volume decreases when the unit is turned on The a...

Page 35: ...use infrared signals Some remote controls may not function even if it uses infrared signals The TV s remote control cannot be used to teach the unit TV remote control commands Use the unit s remote c...

Page 36: ...Bluetooth connection of the unit with the device is disconnected Perform Bluetooth connection operations again p 16 Problem Cause Remedy Cannot make the unit connected to the Bluetooth device The Blu...

Page 37: ...stations broadcast silence at certain of times of the day Try the station later or select another station Access to the network is restricted by the firewall settings of your network devices such as t...

Page 38: ...ICE ONLY LAN 1 NETWORK Network Ethernet standard 100BASE T 10BASE T Supported codecs WAV PCM format only AIFF FLAC up to 192 kHz ALAC up to 96 kHz MP3 WMA MPEG 4 AAC up to 48 kHz Compatible with DLNA...

Page 39: ...signal transfer and the distance at which communications is possible differs according to the distance between the communicating devices the presence of obstacles radio wave conditions and type of eq...

Page 40: ...Published 06 2016 KS A0 Manual Development Group 2016 Yamaha Corporation YH928A0 EN Yamaha Global Site http www yamaha com Yamaha Downloads http download yamaha com...

Reviews: