5-26
POWR
E
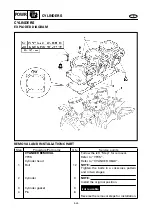
CYLINDERS
SERVICE POINTS
Cylinder inspection
1. Eliminate:
●
Carbon deposits
(with a rounded scraper
1
)
2. Inspect:
●
Cylinder water jacket
Corrosion/mineral deposits
→
Clean
or replace.
●
Cylinder inner surface
Score marks
→
Replace.
3. Measure:
●
Cylinder bore “D”
(with a cylinder gauge)
Out of specification
→
Replace cylin-
der and piston as a set.
NOTE:
Measure the cylinder bore in parallel and at
a right angle to the crankshaft. Then, aver-
age the measurements.
Standard
Limit
Cylinder
bore “D”
80.000 ~
80.018 mm
(3.1496 ~
3.1503 in)
Original cylinder
bore + 0.04 mm
(0.0016 in)
Taper “T”
—
0.08 mm
(0.003 in)
Out of
round “R”
—
0.05 mm
(0.002 in)
D = Maximum (D
1
~ D
6
)
T = (Maximum D
1
or D
2
) – (Maximum D
5
or D
6
)
R = (Maximum D
1
, D
3
or D
5
) – (Minimum
D
2
, D
4
or D
6
)


