16
5
“Receive” button
Click this to open the “Receive” dialog to receive all settings from your tone generator.
6
“Library Window” button
Click this to bring the Library Window back into view. See
for details.
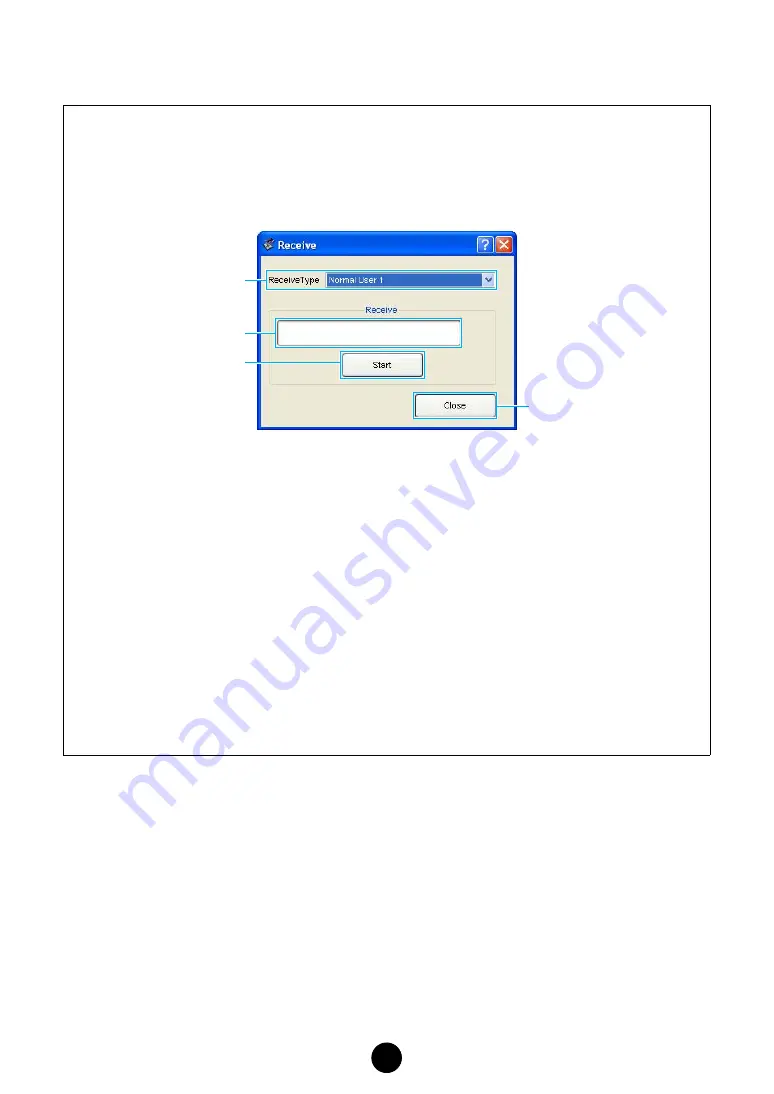
“Receive” Dialog
Voice data can be received in bulk from your tone generator. Select the bulk voice data you wish to
receive, then click the [Start] button. The progress bar shows how much of the data has been
received. Finally, click the [Close] button to quit the dialog.
1
Receive Type................... Click this and choose the Voice data (internal/external/all) to receive.
Normal User 1 ........................ All Normal User 1 Voices
Normal User 2 ........................ All Normal User 2 Voices
Normal User 1+2 .................... All Normal User 1, 2 Voices
Drum User .............................. All Drum User Voices
Normal User 1+2+Drum ......... All Normal User 1, 2 Voices and Drum User Voices
Plug-in 1 User......................... All Plug-in 1 User Voices
Plug-in 2 User......................... All Plug-in 2 User Voices
Plug-in 1+2 User..................... All Plug-in 1, 2 User Voices
All ........................................... All User Voices (Normal 1, 2, Drum, and Plug-in 1, 2)
Preset ..................................... All Preset Voices
2
Progress bar ................... Indicates how much of the data has been received.
3
[Start] button ................... Click this to receive the data.
4
[Close] button.................. Click this to close this dialog.
n
The MIDI Device Number has to be set correctly in order to receive bulk data. For further details,
see
1
2
3
4