background image

Selecting and Playing Songs

35

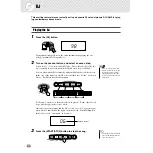
A-B Repeat

This useful function is ideal for practicing and learning purposes.  It allows you to 
specify any phrase of a song (between point A and point B) and repeat it — while 
you play or practice along with it.

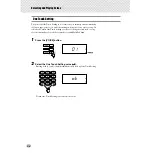
1

While playing back a song, set point A (the start point).

Select and play back the desired song.  (See page 31.)  Then, while the song 
is playing back, press the [A-B REPEAT] button once at the start point of the 
phrase to be repeated. 

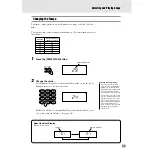
2

Set point B (the end point).

Press the [A-B REPEAT] button once again, at the ending point of the phrase 
to be repeated.  The selected phrase repeats indefinitely until stopped.

3

Pause or stop playback as needed.

Use the [

PAUSE] and [START/STOP] buttons.  Stopping playback does 

not cancel the set A/B points or the A-B Repeat function.

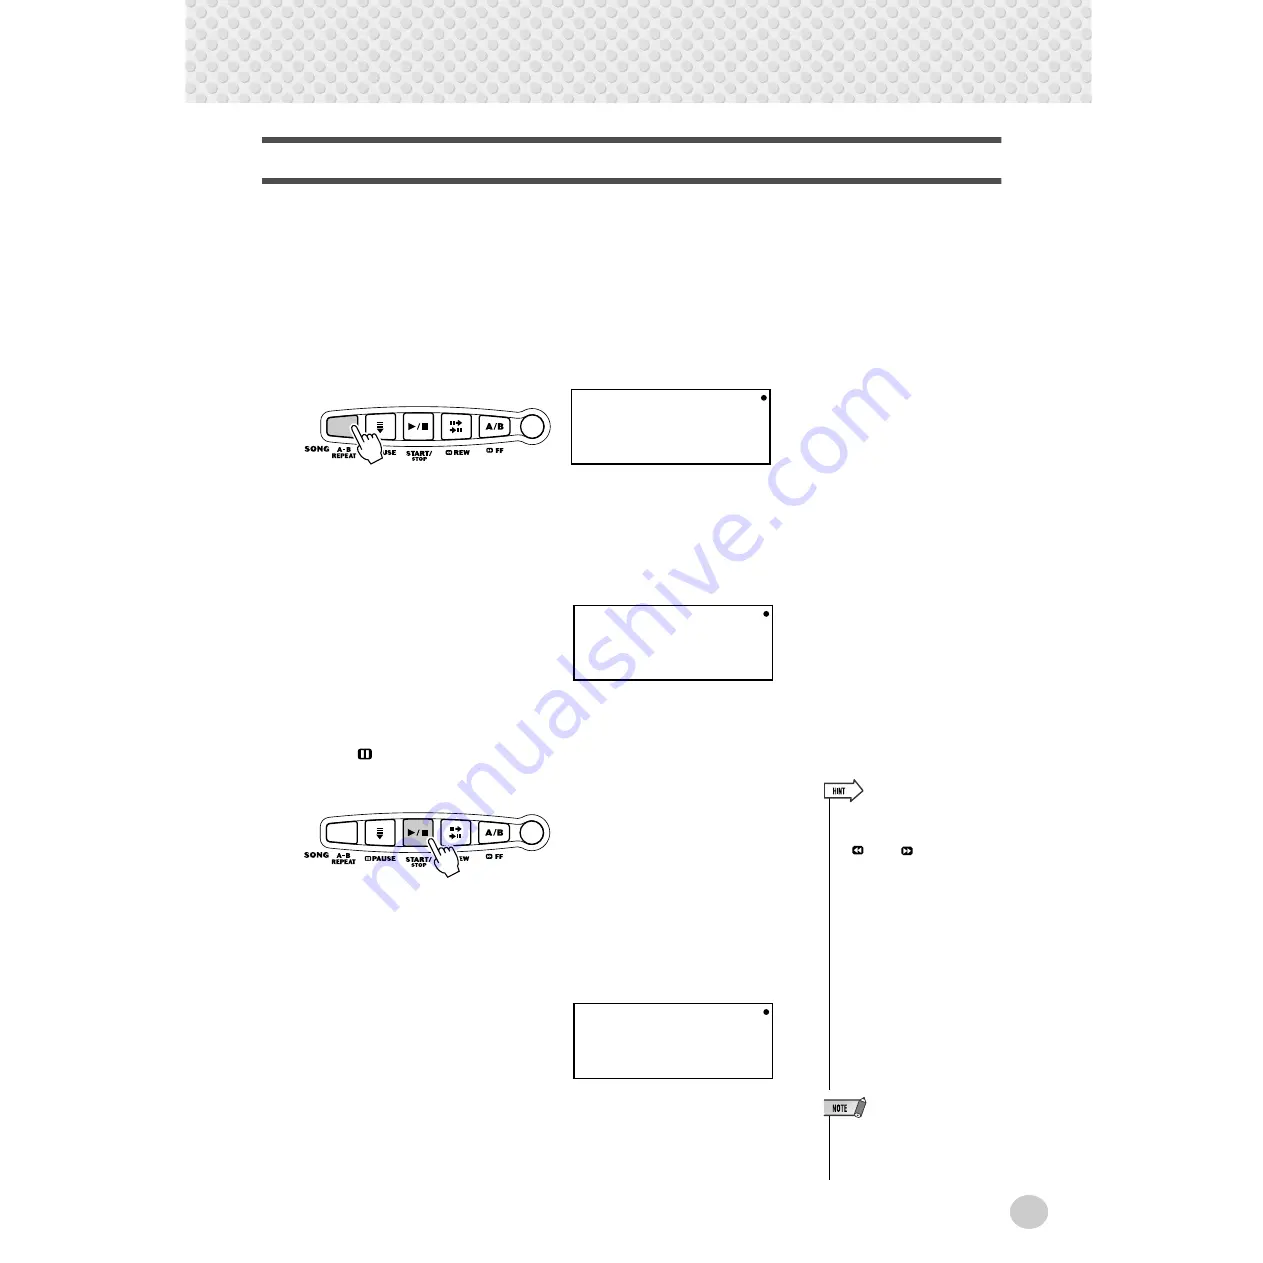
4

Turn off the A-B Repeat function.

Press the [A-B REPEAT] button.  This can be done either when the song is 
stopped or during playback.

A-

Ab

OF

•  You can also set the A-B Repeat 

function while the song is 
stopped.  Simply use the 
[

REW]/[

FF] buttons to 

select the measures for the A 
and B points in the song, then 
start playback.

•  While the song is playing back 

(but before setting the A/B 
points), try slowing down the 
Tempo (page 33).
  This makes it 
easier to accurately set the A and 
B points.  Slowing down the 
Tempo also makes it easier to 
practice the parts you want to 
learn.

•  To set the A point at the begin-

ning of a song, press the [A-B 
REPEAT] button before starting 
song playback.

•  Selecting a different song num-

ber (or changing to the Style 
mode) automatically cancels the 
A-B Repeat function.

Summary of Contents for Portatone EZ-150

Page 1: ......

Page 2: ...TION The name plate is located on the bottom of the product The model number serial number power requirements etc are located on this plate You should record the model number serial number and the date of purchase in the spaces provided below and retain this manual as a permanent record of your purchase Model Serial No Purchase Date SPECIAL MESSAGE SECTION 92 BP bottom 1 IMPORTANT NOTICE DO NOT MO...

Page 3: ...utions listed below to avoid the possibility of physical injury to you or others or damage to the instrument or other property These precautions include but are not limited to the following When removing the electric plug from the instrument or an outlet always hold the plug itself and not the cord Unplug the AC power adaptor when not using the instrument or during electrical storms Do not connect...

Page 4: ...ace vinyl plastic or rubber objects on the instrument since this might discolor the panel or keyboard Do not rest your weight on or place heavy objects on the instrument and do not use excessive force on the buttons switches or connectors Do not operate the instrument for a long period of time at a high or uncomfortable volume level since this can cause permanent hearing loss If you experience any...

Page 5: ... that are playing Dictionary page 43 Dictionary is a built in chord encyclopedia that teaches you how to play specific chords by showing lighting keyboards perfect for when you know the name of a chord and want to quickly learn how to play it Portable Grand page 22 The EZ 150 also has a Portable Grand function for realistic piano performance Pressing the PORTA BLE GRAND button instantly calls up t...

Page 6: ...AMSON MUSlC owner of publication and allied rights throughout the world International Copyright Secured All Rights Reserved Linus And Lucy By Vince Guaraldi Copyright 1965 LEE MENDELSON FILM PRODUCTIONS INC Copyright Renewed International Copyright Secured All Rights Reserved w Four of the demo songs or compositions included in this keyboard are as follows Composition Title An Englishman In New Yo...

Page 7: ...lody Voice Change 32 Changing the Tempo 33 Adjusting the Song Volume 34 Song Controls 34 A B Repeat 35 Song Lesson 36 Using the Lesson Feature 36 Lesson 1 Timing 38 Lesson 2 Waiting 39 Lesson 3 Minus One 39 Lesson 4 Both Hands 40 Grade 41 Talking 42 Turning the Light Guide On and Off 42 Dictionary 43 Selecting and Playing Styles 44 Selecting and Playing a Style 44 Playing the Accompaniment 45 Chan...

Page 8: ... GRAND button This instantly calls up the Grand Piano voice plus a special piano song and style See page 22 0 METRONOME button This turns the metronome on and off See page 22 1 DJ button This instantly calls up a special DJ voice song and style See page 24 2 Numeric keypad ON and OFF buttons These are used for selecting songs voices and styles See page 26 They are also used for entering values and...

Page 9: ...k is stopped it is used to advance to specific measure numbers in the song See page 34 8 TEMPO TAP button This button allows you to tap out the tempo and auto matically start a selected song or style at that tapped speed See page 46 It also is used to call up the Tempo setting letting you set the Tempo with the numeric keypad or buttons See page 33 9 DEMO button This is used to play the Demo songs...

Page 10: ...partment cover e Replace the compartment cover making sure that it locks firmly in place Turning On the Power With the AC power adaptor connected or with batteries installed simply move the STANDBY switch until it is set to the ON position When the instrument is not in use be sure to turn the power off Use ONLY a Yamaha PA 3C or PA 3B AC Power Adaptor or other adaptor specifically rec ommended by ...

Page 11: ...amper pedal on an acoustic piano press and hold down the footswitch as you play the key board to sustain the sound Using the MIDI Terminals The EZ 150 also features MIDI terminals allowing you to interface the EZ 150 with other MIDI instruments and devices For more information see page 54 To prevent damage to the speakers set the volume of the external devices at the minimum setting before con nec...

Page 12: ... ON 14 ATTACK OFF 15 ATTACK ON 16 WAVE OFF 17 WAVE ON 18 PIPE OGAN 19 ACCORDION 20 HARMONICA GUITAR BASS 21 SOFT GUITAR 22 FOLK GUITAR 23 12STRINGS GUITAR 24 JAZZ GUITAR 25 ELECTRIC GUITAR No Voice Name 26 DISTORTION GUITAR 27 WOOD BASS 28 FINGER BASS 29 SLAP BASS STRINGS MALLET 30 STRINGS 31 VIOLIN 32 CELLO 33 HARP 34 SITAR 35 BANJO 36 VIBRAPHONE 37 MARIMBA 38 STEEL DRUMS No Voice Name WIND 39 TR...

Page 13: ...4 63 ELECTRIC ORGAN TRIO 64 VIBRAPHONE DUET 65 TRUMPET DUET 66 HORN DUET 67 CLARINET TRIO 68 FLUTE DUET SPLIT 69 WOOD BASS PIANO 70 STRINGS PIANO 71 FINGER BASS ELECTRIC PIANO 72 HARP VIOLIN No Voice Name 73 FRENCH HORN TRUMPET SUSTAIN 74 SUSTAIN PIANO 75 SUSTAINELECTRIC PIANO 1 76 SUSTAINELECTRIC PIANO 2 77 SUS VIBRAPHONE 78 SUSTAIN STRINGS ECHO 79 ECHO PIANO 80 ECHO ELECTRIC PIANO No Voice Name ...

Page 14: ... of the desired song during playback Playing the Demo songs Demo Cancel function that allows you to disable the Demo feature To use this simultaneously hold down the DEMO button and turn the power on STANDBY ON button While the power is on in this condi tion pressing the DEMO button has no effect To turn Demo Cancel off simply turn the power off and back on again normally 1 or Naturally you can al...

Page 15: ...Wiegenlied F Schubert 40 Wiegenlied J Brahms WORLD 41 Twinkle Twinkle Little Star 42 Grandfather s Clock H C Work 43 Beautiful Dreamer S C Foster 44 Greensleeves 45 Believe Me If All Those En dearing Young Charms 46 Im Mai 47 Home Sweet Home H Bishop 48 Amazing Grace 49 Aura Lee G Poulton 50 My Old Kentucky Home S C Foster 51 Aloha Oe 52 Die Lorelei F Silcher 53 Londonderry Air 54 Auld Lang Syne 5...

Page 16: ...ces appropriate bass chord and rhythm backing Use your right hand to play melodies and you ll sound like an entire band Accompaniment area Left hand Auto accompaniment for example bass guitar drums Right hand Melody For more infomation on playing proper chords for the auto accompa niment see Using Auto Accompaniment Multi Fingering on page 50 and Looking up Chords in the Dictionary on page 43 x Se...

Page 17: ... the notes of the chord according to the Light Guide The Congratulation melody plays when the chord is played properly The keys light to show you how to play the chord You can also play chord inversions as described in the note on page 50 Fingered Chords b To leave the Dictionary function press the Dict button again Want to find out more See page 43 Chord area v Turn the Sync Start function on b P...

Page 18: ...mply press the appropriate button L left or R right The practice steps below apply to either hand Try playing with the Lesson feature following the Light Guides Lesson 1 Timing This lesson step lets you practice just the timing of the notes Lesson 2 Waiting In this lesson step the EZ 150 waits for you to play the correct notes before continuing playback of the song Lesson 3 Minus One This lesson s...

Page 19: ...EMPO TAP button x Use the numeric keypad to set the desired tempo 19 The EZ 150 also has a convenient Tap Tempo function that allows you to tap a new tempo in real time See page 46 This step lets you work on the timing of the notes In Les son 1 the particular note you play on the keyboard is unimportant The EZ 150 checks your timing and how rhythmically tight your playing is Want to find out more ...

Page 20: ...mber in the LED indicates the selected function LIGHT ON OFF MULTI PAD etc when you select each function Use the numeric 0 9 buttons or buttons Function settings and indications See page 42 See page 53 See page 41 See page 42 See page 29 See page 30 See page 34 49 See page 23 o2 Function number For example when o o o o2 2 2 2 MULTI PAD is selected Setting values Decreases the number by one step In...

Page 21: ...the number up or down press and hold the appropriate button 19 If the first digit is 0 ex 07 pressing the 0 button is unnecessary Ex Voice number 19 ACCORDION Press the numeric buttons 1 9 in order Pressing one of the buttons below calls up the appropriate mode Song Style or Voice and the dot in the display indicates the currently selected mode Entering one of the modes Song Style or Voice Style S...

Page 22: ...ovide piano only accompaniment in a variety of music styles Using the Metronome 1 Call up the Tempo setting Press the TEMPO TAP button The tempo value can be adjusted over a range of 10 60 40 240 bpm The relative tempo value is indicated in the display For actual tempo val ues see chart below 2 Change the value Use the numeric keypad to set the desired Tempo value or use the buttons to increase or...

Page 23: ...1 4 Plays only 1 beats all high clicks 2 2 4 3 3 4 4 4 4 5 5 4 6 6 4 7 7 4 8 8 4 9 9 4 0 Plays no 1 beats all low clicks 4 Adjusting the Metronome Volume You can adjust the volume of the Metronome sound independently of the other EZ 150 sounds The volume range is 00 99 1 Select the Metronome Volume function in the Overall menu Press the OVERALL button repeatedly if necessary until o8 appears in th...

Page 24: ...the case of the keyboard the DJ voice is divided into blocks as shown below Each block has a different sound For Lesson 1 any note on the keyboard can be played For the other Lesson steps play the appropriate octave block Once the song starts playing and the DJ teacher says Go play the appro priate block as indicated by the lights on the keyboard When Talking is on the blocks are also announced in...

Page 25: ... of these voices also have spe cial preset characteristics or embellishments The voices are divided into various categories depending on their characteristics or the effects used Selecting and Playing a Voice 1 Press the VOICE button 2 Select the desired voice number Use the numeric keypad The basic categories of voices and their numbers are shown on the panel 01 Voice number ...

Page 26: ...up with the most suitable octave range setting Thus play ing middle C with one voice may sound higher or lower than another voice at the same key Four of the Organ voices are effect pairs Switching between each of the paired voices with the buttons turns the effect of the voice on or off For example for the Vibrato pair 10 and 11 selecting 10 turns the vibrato effect off while selecting 11 turns v...

Page 27: ... last note or highest note played will be used for the har mony effect DJ Voice Chart voices 98 and 99 98 99 U h h H i t O n e T w o T h r e e F o u r O k O f f L e s s o n D j P i n p o n G o o d V e r y G o o d E x c e l l e n t D i c t i o n a r y H a n d C l a p B e l l T r e e O n e M o r e T i m e O h h 2 O h h 1 Y o K u r t H i u h u H u e a T u r n t a b l e S i g n a l R e v e r s e O m e...

Page 28: ...en you select a style or song In other words when One Touch Setting is active selecting a desired style or song also automatically selects the best suited voice and Multi Pad bank 1 Press the VOICE button 2 Select the One Touch Setting voice o o o ot t t t Pressing both and buttons simultaneously calls up One Touch Setting To turn One Touch Setting off select another voice 01 ot ...

Page 29: ... Transpose function in the Overall menu Press the OVERALL button repeatedly if necessary until o5 appears in the display 2 Change the value Use the numeric keypad to set the desired Transpose value 12 12 To transpose the pitch down simultaneously press the button and use the numeric keypad to type in the negative value You can also use the buttons to increase or decrease the value Holding down eit...

Page 30: ...RALL button repeatedly if necessary until o6 appears in the display 2 Change the value Use the numeric keypad to set the desired Tuning value 50 50 To tune the pitch down simultaneously press the button and use the numeric key pad to type in the negative value You can also use the buttons to increase or decrease the value Holding down either button continuously increases or decreases the value o6 ...

Page 31: ...the panel Song numbers can be selected in the same way as with the voices see page 26 You can use the numeric keypad to directly enter the song number or use the buttons to step up and down through the songs 3 Start the selected song Press the START STOP button 4 Stop the song Press the START STOP button 01 Song number 06 You can play along with the song using the currently selected voice or even ...

Page 32: ...wn selection For example if the current voice selected on the panel is piano but the song s melody is being played by a flute voice using Melody Voice Change will change the flute melody voice to piano 1 Select the desired song Press the SONG button then use the numeric keypad or buttons to select the desired song 2 Select the desired voice Press the VOICE button then use the numeric keypad or but...

Page 33: ... 46 Indication Actual value in bpm beats per minute 10 40 20 80 30 120 40 160 50 200 60 240 29 Current Tempo value 24 Resetting the Tempo Value Each song and style has been given a default or standard Tempo setting You can instantly restore this default Tempo setting by press ing both buttons simulta neously when Tempo is selected Also the tempo of a song or style returns to the default setting wh...

Page 34: ...The panel buttons below the display function as song controls o7 Resetting the Song Volume Value If you ve changed the Song Volume setting you can instantly restore the default setting of 110 by pressing both buttons simul taneously when Song Volume is selected This controls the A B Repeat function See page 35 Pressing this button alter nately pauses and resumes song playback Pressing this button ...

Page 35: ...USE and START STOP buttons Stopping playback does not cancel the set A B points or the A B Repeat function 4 Turn off the A B Repeat function Press the A B REPEAT button This can be done either when the song is stopped or during playback A Ab OF You can also set the A B Repeat function while the song is stopped Simply use the REW FF buttons to select the measures for the A and B points in the song...

Page 36: ...he notes any note can be used as long as you play in rhythm Lesson 2 Waiting In this lesson step the EZ 150 waits for you to play the correct notes before continuing playback of the song Lesson 3 Minus One This lesson step plays back the song with one part muted letting you play and master the missing part following the Light Guide yourself in rhythm and at the proper tempo Lesson 4 Both Hands Les...

Page 37: ...start automatically following a lead in count as soon as the Lesson step is selected When the Lesson is finished your performance grade is announced if the Grade function is turned on page 41 After a short pause the Lesson begins again automatically 4 Press the START STOP button to stop the Lesson The EZ 150 exits from the Lesson feature automatically when the START STOP button is pressed Lesson o...

Page 38: ... After the lead in the song starts automatically and the appropriate keys light In Lesson 1 simply play one note repeatedly in time with the music Regarding chords and the use of the left hand the EZ 150 actually has two different types of songs 1 songs with normal left hand chords and 2 songs in which the left hand plays melodic figures in combination with the right In the case of the first type ...

Page 39: ...ter playing them in rhythm Lesson 3 Minus One This lesson step lets you practice one part of the song in rhythm at the proper tempo The EZ 150 plays back the song with one part muted either the left part or the right letting you play and master the missing part yourself according to the Light Guide 1 Select one of the songs 2 Select Lesson 3 Press the L or R button repeatedly if necessary until Le...

Page 40: ...red each hand s part in the previous three lesson steps Practice both hands in time with the rhythm 1 Select one of the songs 2 Select Lesson 4 Press the L and R buttons simultaneously so that Lesson 4 is announced 3 Play both the left and right hand parts with the song After the lead in the song starts automatically and the Light Guide shows you which keys to play In Lesson 4 both parts left and ...

Page 41: ...re assigned depending on your performance OK Good Very Good and Excellent When the Talking function page 42 is on the EZ 150 announces your grade 1 Select the Grade function Press the OVERALL button repeatedly if necessary until o3 appears in the display 2 Set Grade to on or off as desired Use the buttons to set Grade to on or off Grade is automatically set to on as the default setting o3 Grade of...

Page 42: ...nt Dictionary You can switch the Light Guide on or off The Light Guide can be used as a keyboard guide during song playback while you are using the Lesson or the Dictionary function 1 Press the OVERALL button repeatedly if necessary until o1 appears in the display 2 Turn the Light Guide ON or OFF Use the buttons o4 Talking is automatically set to on as the default setting On Talking off Talking on...

Page 43: ... the panel 3 Specify the type of the chord major minor seventh etc Press the key on the keyboard that corresponds to the desired chord type as printed on the panel 4 Play the chord Play the chord by pressing the keys that light in the ACMP area of the key board A congratualtions melody is played when the correct notes are held down Inversions for many of the chords are also recognized To leave the...

Page 44: ...ay Auto accompaniment effec tively splits the keyboard into two areas The upper is used for playing a melody line and the lower labeled ACMP above the keyboard at F 2 is for the auto accompaniment function The EZ 150 also features the convenient Dictionary function Dictionary provides you with a built in chord encyclopedia that teaches you how to play any chord you specify by showing you which key...

Page 45: ...can select either by repeatedly pressing the MAIN AUTO FILL button before press ing the START STOP button Pressing this button alter nately enables and cancels the Sync Start function See page 46 Pressing this button alter nately enables and can cels the bass and chord accompaniment This controls the Intro Ending and Ritardando sections See pages 47 48 Pressing this button alter nately starts and ...

Page 46: ...s automatically at the tempo you tapped You can also change the tempo while the accompaniment is playing by tapping the TEMPO TAP button twice at the desired tempo Using Sync Start The EZ 150 also has a Sync Start function that allows you to start the rhythm accompaniment by simply pressing a key on the keyboard To use Sync Start first press the SYNC START button the Left dot flashes to indicate S...

Page 47: ... INTRO ENDING rit button Finally press the SYNC START button to enable Sync Start and start the Intro section and style by playing any key in the ACMP area of the keyboard To actually start the Intro section press the START STOP button Indicates that Intro is on and will be followed by the Main A section 1A Indicates that Intro will be followed by the Main A section 1A 1A Left dot flashes The ACCO...

Page 48: ...en the Main A and Main B sections automatically playing a fill in pattern to smoothly lead into the next section For example if the Main A section is cur rently playing pressing this button automatically plays a fill in pattern followed by the Main B section You can also select either the Main A or B section to start by pressing the MAIN AUTO FILL button before starting the style To have the Endin...

Page 49: ...ontinuously increases or decreases the value About the Fill in Patterns 1 2 3 4 1 2 3 4 1 2 3 4 1 2 3 3 a fill in pattern plays from here and the Main A or B section begins here If you press the MAIN AUTO FILL button here after beat 4 a fill in pattern plays immediately until the end of the measure and the Main A or B section begins here If you press the MAIN AUTO FILL button before beat 4 beat 1s...

Page 50: ... recognized in the Fingered mode Fingered Chords in the Key of C C Cm C7 Cm7 To play a major chord Press the root note of the chord To play a minor chord Press the root note together with the nearest black key to the left of it To play a seventh chord Press the root note together with the nearest white key to the left of it To play a minor seventh chord Press the root note together with the neares...

Page 51: ...the chord The second note of this chord is four semitones higher than the first and the third is three semitones higher than the second Keeping our root note fixed and changing these notes by a semitone up or down sharp or flat we can create four different chords Keep in mind that we can also change the voicing of a chord for example change the order of the notes called inversions or play the same...

Page 52: ...oint Chords are made up of notes stacked on top of each other and the stacked notes are indicated in the chord name of the chord type as a number the number being the dis tance of the note from the root See the keyboard diagram below For example the minor 6th chord includes the 6th note of the scale the major 7th chord has the 7th note of the scale etc The Intervals of the Scale To better understa...

Page 53: ...e desired bank number 01 10 You can also use the buttons to increase or decrease the value Holding down either button continuously increases or decreases the value For a complete list of the available banks and their contents see page 58 3 Play the Multi Pads Press one of the Pads The phrase plays uninterrupted until it is finished Pressing it repeatedly before the phrase completely plays back cre...

Page 54: ... Used In the simple yet powerful MIDI application example below theYamaha QY70 Music Sequencer is used to record and play back performance data played on the EZ 150 keyboard Before actually recording to the sequencer press the STYLE button once or twice to make sure that the current settings are sent Receives MIDI data from the connected sending device Transmits MIDI data key board performance to ...

Page 55: ...1 WIND 39 38 TRUMPET 1 40 39 TROMBONE 1 41 40 MUTE TRUMPET 1 42 41 FRENCH HORN 1 43 42 BRASS SECTION 1 44 43 ALTO SAX 1 45 44 TENOR SAX 1 46 45 OBOE 1 47 46 CLARINET 1 48 47 FLUTE 1 49 48 PAN FLUTE 1 SYNTHESIZER 50 49 THICK LEAD 2 51 50 SIMPLE LEAD 1 52 51 THICK SAWTOOTH 2 53 52 SIMPLE SAWTOOTH 1 54 53 SYNTH BASS 1 55 54 SYNTH STRINGS 1 56 55 SYNTH BRASS 2 57 56 SLOW STRINGS 1 58 57 CHORUS 1 HARMO...

Page 56: ...olk Guitar 1 26 Jazz Guitar 1 27 Electric Guitar 1 28 12Strings Guitar 2 29 Rich Guitar 2 30 Distortion Guitar 1 32 Wood Bass 1 33 Finger Bass 1 34 Mute Bass 1 36 Slap Bass 1 38 Synth Bass 1 40 Violin 1 42 Cello 1 46 Harp 1 49 Strings 1 51 Synth Strings 1 52 Choir 1 56 Trumpet 1 57 Trombone 1 59 Muted Trumpet 1 60 French Horn 1 61 Brass Section 1 63 Synth Brass 1 65 Alto Sax 1 66 Tenor Sax 1 68 Ob...

Page 57: ...e Drum 2 41 F 1 Floor Tom 42 F 1 1 Hi hat Closed 43 G 1 Electronic Low Tom 44 G 1 1 Hi Hat Pedal 45 A 1 Low Tom 46 A 1 1 Hi Hat Open 47 B 1 Electronic Mid Tom 48 C 2 Mid Tom 49 C 2 Crash Cymbal 50 D 2 High Tom 51 D 2 Ride Cymbal 1 52 E 2 Electronic High Tom 53 F 2 Ride Cymbal Cup 54 F 2 Tambourine 55 G 2 Splash Cymbal 56 G 2 Cowbell 57 A 2 58 A 2 59 B 2 Ride Cymbal 2 60 C 3 Bongo H 61 C 3 Bongo L ...

Page 58: ...tz 48 Fusion 49 Big Band Swing No Style Name 50 Big Band Ballad 51 Jazz Quartet 52 Dixieland COUNTRY WESTERN 53 Bluegrass 54 2 4 Country 55 Country Ballad 56 Country Shuffle BALLROOM 57 Rhumba 58 Tango Continental 59 Jive MARCH WALTZ 60 March 61 6 8 March 62 Light March 63 Crystal March 64 Polka 65 Standard Waltz 66 German Waltz 67 Viennese Waltz 68 Crystal Waltz 69 Orchestra Waltz 1 70 Orchestra ...

Page 59: ......

Page 60: ... Messages x x Altered x Note 0 127 0 127 Number True voice 0 127 Velocity Note ON o 9nH v 1 127 1 o 9nH v 1 127 Note OFF x 9nH v 0 x 9nH v 0 or 8nH After Key s x x Touch Ch s x x Pitch Bend x x 0 32 o 2 o 2 Bank Select LSB MSB 7 o o Volume 10 o o Pan 6 38 x x Data Entry Control 64 o o Sustain 71 74 x x Change 84 o o Portamento Cntrl 96 97 x x RPN Inc Dec 98 99 x x NRPN LSB MSB 100 101 x x RPN LSB ...

Page 61: ...oice list Program change and other like channel messages received will not affect the EZ 150 panel settings or what is being played on the keyboard 4 GM System on F0H 7EH 7FH 09H 01H F7H All data is restored to the default values 5 MIDI does not function transmit receive in the Song mode Prog o 0 127 3 o 0 127 3 Change True 3 System Exclusive o 4 o 4 Song Pos x x Common Song Sel x x Tune x x Syste...

Page 62: ...sing the auto accompani ment Press the STYLE button to enable style operations Not all notes are heard when playing a num ber of notes simultaneously Too many keys are pressed at the same time The EZ 150 is polyphonic up to a maximum of 16 notes Playing keys in the right hand section of the keyboard does not produce any sound When using the Dictionary function page 43 the keys in the right hand se...

Page 63: ...Main A B 48 Melody Voice Change 32 Metronome 23 MIDI 54 MIDI Implementation Chart 60 MIDI about 54 Minus One 36 39 Multi Fingering 50 Multi Pads 53 Music Rest 11 N numeric keypad 26 O One Touch Setting 28 Overall button 23 P PHONES OUTPUT jack 11 Portable Grand 22 R root 43 50 S sections Style 48 Single Finger Chords 50 Song Controls 34 Song Volume 34 Songs selecting and playing 31 Specifications ...

Page 64: ...64 Memo ...

Page 65: ...One Touch Setting 1 style 1 song Multi Pads 4 pads x 10 banks Yamaha Education Suite Dictionary Lesson 1 4 Preset songs 100 songs Amplifier 2 0W 2 0W MIDI IN OUT Auxiliary jacks PHONES OUTPUT DC IN 12V MIDI IN OUT SUSTAIN Speakers 12cm x 2 Power consumption 9W when using PA 3C power adaptor Power supply Adaptor Yamaha PA 3C or PA 3B AC power adaptor Batteries Six D size R20P LR20 or equivalent bat...

Page 66: ... You may also contact Yamaha directly at the address provided below 2 Deliver the unit to be serviced under warranty to the retailer selling the product an authorized service center or toYamaha with an explanation of the problem Please be prepared to provide proof purchase date sales receipt credit card copy etc when requesting service and or parts under warranty 3 Shipping and or insurance costs ...

Page 67: ... A Ctra de la Coruna km 17 200 28230 Las Rozas Madrid Spain Tel 91 639 8888 GREECE Philippos Nakas S A The Music House 147 Skiathou Street 112 55 Athens Greece Tel 01 228 2160 SWEDEN Yamaha Scandinavia AB J A Wettergrens Gata 1 Box 30053 S 400 43 Göteborg Sweden Tel 031 89 34 00 DENMARK YS Copenhagen Liaison Office Generatorvej 8B DK 2730 Herlev Denmark Tel 44 92 49 00 FINLAND F Musiikki Oy Kluuvi...

Page 68: ...strument Division Yamaha Corporation 2003 Yamaha Corporation WA07090 PO 01A0 Printed in China Yamaha PK CLUB Portable Keyboard Home Page English only http www yamahaPKclub com Yamaha Manual Library http www2 yamaha co jp manual english ...

Reviews: