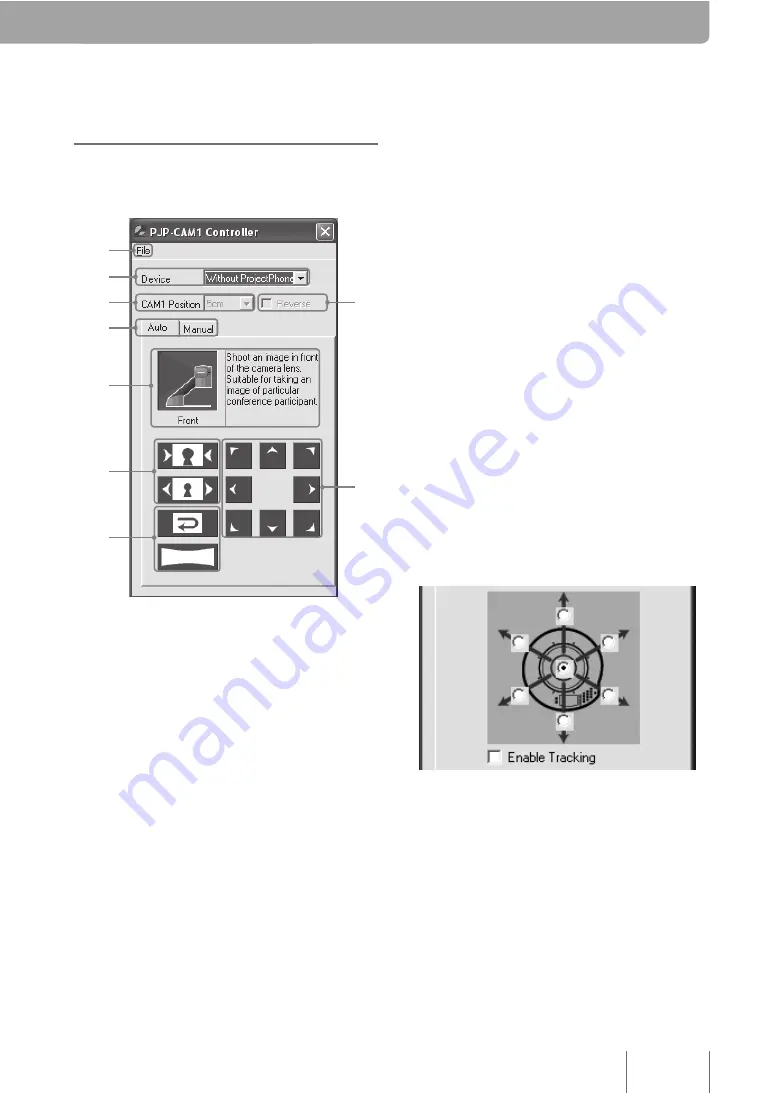
About the “PJP-CAM1
Controller” screen
[File]
Select to display the [File] menu.
“Device”
Select a PJP to be used with this unit. If no PJP will
be used, select “Without ProjectPhone”.
Tip
When using this unit in combination with a PJC, refer to
“ProjectCast Installation Guide”.
“CAM1 Position”
Specify the distance between this unit and PJP (used
in combination) from “5cm”, “25cm”, “50cm”, and
“1m”.
“Reverse”
Check the box if the direction of this unit relative to
the PJP (used in combination) is opposite to the
default.
Shooting Mode tabs
Switch the shooting mode between “Auto” (auto-
switch shooting mode) and “Manual” (manual
shooting mode).
Camera Mode display
Shows the camera mode currently selected. This
function is available only when the “Auto” tab is
selected.
Zoom buttons
Adjust the zoom setting.
Control buttons
Configure the shooting method. The functions of
these buttons change depending on the camera
mode.
Position Adjustment buttons
Adjust the position to be shot for partial view.
When using this unit in combination with a PJP
Orientation Selection radio
button
Select the position (position of each talker or
original position) to be shot.
"
“Enable Tracking”
Check the box to switch the shooting position
automatically in conjunction with the PJP’s tracking
function.
7


