3-46
1
2
3
4
5
6
7
8
9
10
ENGINE
PISTONS, CAMSHAFT, CRANKCASE, AND CRANKSHAFT
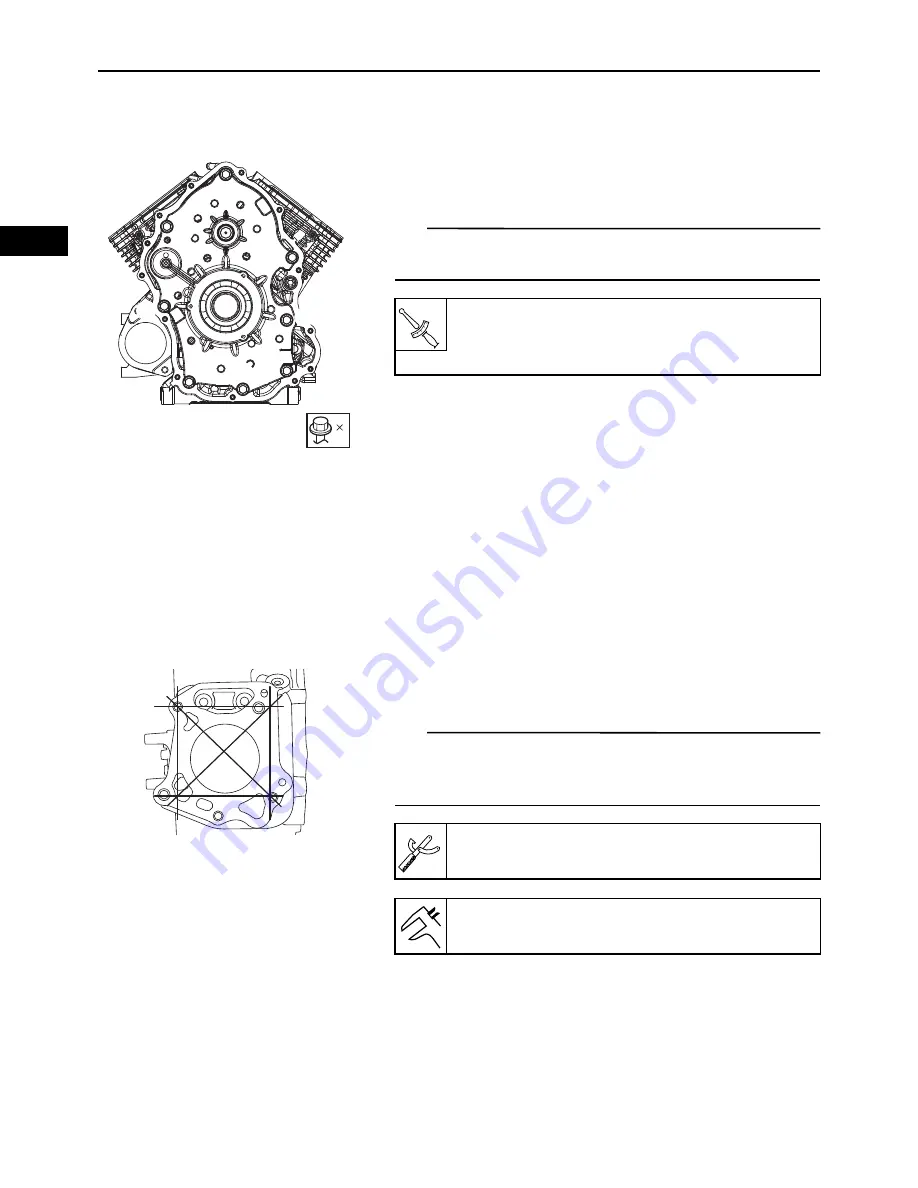
INSTALLING THE CRANKCASE COVER 1
1.
Install:
• Crankcase cover 1
• Crankcase cover 1 bolts “1” to “8”
TIP
Tighten the bolts to the specified torque in two steps and in
order from “1” to “8”.
CHECKING THE CYLINDERS AND PISTONS
The following procedure applies to all of the pistons and
cylinders.
1.
Check:
• Piston wall
• Cylinder wall
Vertical scratches
Replace the cylinder, and
replace the piston and piston rings as a set.
2.
Measure:
• Cylinder warpage
TIP
Measure the warpage on the contact surface of the cylin-
der head at six points using a straight edge and feeler
gauge set.
Out of specification
Replace the crankcase
assembly.
3.
Measure:
• Piston-to-cylinder clearance
▼▼▼▼▼▼▼▼▼▼▼▼▼▼▼▼▼▼▼▼▼▼▼▼▼▼▼▼▼▼▼▼▼▼▼▼▼▼▼▼▼
a. Measure cylinder bore “C” with the cylinder bore
gauge.
1
2
3
4
5
6
7
8
8
Crankcase cover 1 bolt:
1st: 12 N·m (1.2 kgf·m, 8.9 lb·ft)
2nd: 30 N·m (3.0 kgf·m, 22 lb·ft)
T
R
.
.
Feeler gauge set:
YU-26900-9
Warpage limit:
0.05 mm (0.002 in)
Summary of Contents for MX800V
Page 2: ...7UC F8197 E0_Hyoshi indd 3 4 2017 10 27 13 08 23 ...
Page 38: ...2 18 1 2 3 4 5 6 7 8 9 10 PERIODIC CHECKS AND ADJUSTMENTS PERIODIC MAINTENANCE MEMO ...
Page 94: ...3 56 1 2 3 4 5 6 7 8 9 10 ENGINE PISTONS CAMSHAFT CRANKCASE AND CRANKSHAFT MEMO ...
Page 103: ...4 9 1 2 3 4 5 6 7 8 9 10 FUEL INTAKE MANIFOLD MEMO ...
Page 106: ...5 3 1 2 3 4 5 6 7 8 9 10 ELECTRICAL ELECTRICAL COMPONENTS ELECTRICAL COMPONENTS 1 3 4 5 2 2 ...
Page 118: ...5 15 1 2 3 4 5 6 7 8 9 10 ELECTRICAL ELECTRIC STARTING SYSTEM MEMO ...
Page 140: ...7 14 1 2 3 4 5 6 7 8 9 10 SPECIFICATIONS WIRE ROUTING DIAGRAM ...
Page 142: ...7 16 1 2 3 4 5 6 7 8 9 10 SPECIFICATIONS WIRE ROUTING DIAGRAM LEFT SIDE VIEW ...
Page 144: ...7 18 1 2 3 4 5 6 7 8 9 10 SPECIFICATIONS WIRE ROUTING DIAGRAM RIGHT SIDE VIEW ...
Page 146: ...7 20 1 2 3 4 5 6 7 8 9 10 SPECIFICATIONS WIRE ROUTING DIAGRAM ...
Page 148: ...7 22 1 2 3 4 5 6 7 8 9 10 SPECIFICATIONS WIRE ROUTING DIAGRAM ...
Page 150: ...7 24 1 2 3 4 5 6 7 8 9 10 SPECIFICATIONS WIRE ROUTING DIAGRAM REAR SIDE VIEW ...
Page 152: ...7 26 1 2 3 4 5 6 7 8 9 10 SPECIFICATIONS WIRE ROUTING DIAGRAM ...
Page 156: ...MEMO ...
Page 157: ...7UC F8197 E0_Hyoshi indd 3 4 2017 10 27 13 08 23 ...


