


12
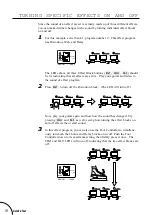
Guided Tour
Guided Tour
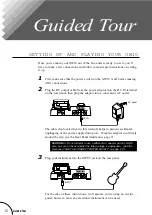
Once you’ve taken your GW10 out of the box and are ready to use it, you’ll
have to make a few connections and follow some simple instructions on setting
it up.
1
First, make sure that the power switch on the GW10 is off before making
ANY connections.
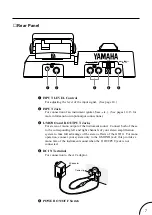
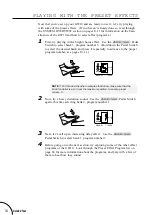
2
Plug the DC output cable from the power adaptor into the DC IN terminal
on the rear panel, then plug the adaptor into a convenient AC outlet.
SETTING UP AND PLAYING YOUR GW10
The cable clip located next to this terminal helps to prevent accidental
unplugging of the power supply during use. Wrap the adaptor cord firmly
around the clip (see the Rear Panel illustration, page 7).
CAUTION!
■
Do not attempt to use a different AC adaptor with the GW10.
Also, be sure to check whether the rated voltage is appropriate. (See the
precaution “USE THE CORRECT POWER SUPPLY” on page 2.)
■
3
Plug your instrument into the INPUT jack on the rear panel.
For the sake of these instructions, we’ll assume you’re using an electric
guitar; however, most any electronic instrument can be used.
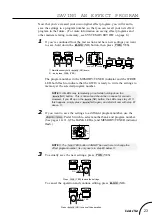
INPUT
DC IN
ON /
OFF
POWER
INPUT
R
L / MONO
LEVEL
OUTPUT
DC IN
ON /
OFF
POWER
INPUT
R
L / MONO
LEVEL
OUTPUT
DC IN
AC outlet


