background image


47


Manual recording


m


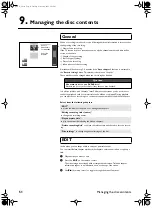
To ensure you don’t accidentally delete a recording you can protect the entire disc. You 
can only ever protect the entire disc. You cannot protect individual recordings.


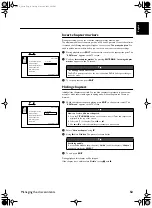
1


Insert the disc to be protected.


2


While the index screen is displayed press 


STOP


 on the remote control. The 

first title is highlighted.


3


Press 


v


. This takes you to the disc info screen.


4


Press the 


u


 button.

Select the “


Protection


” line.

Confirm with 


u


.


5


Select “


Protected


” with the 


w


 button and confirm with 


ENTER/OK


.


6


Press 


t


 and then 


TOP MENU 


to terminate.

The entire disc is now protected.
If an attempt is made to record on a protected disc, “DISC LOCK” will appear on the 
display and “


Disc locked


” will appear on the screen.

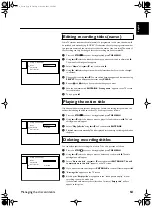
On a recorded DVD+RW disc you can add another recording to an existing title. This 
recording is added to the title as a “chapter”. The existing information will be overwrit-
ten starting from this point. Titles will also be overwritten that follow the current title 
depending on the length of the new recording. The recording type (Quality) will be 
taken from the current title.
To play back this recording, press 


SYSTEM-MENU 


and use the 


u


 button to select the 

“C” (Chapter) symbol. You can also use the 


TITLE/CHAP 


key.

For further information, see “Changing to another title/chapter” in “Additional playback 
features”.


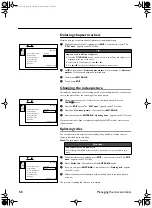
1


In the index display, find the title to which the new recording is to be added.


2


Look at the last minute of the old recording (playback)


3


Press 


PAUSE


 on the remote control at the position where the new recording 

is to go. “


D


” will appear on the screen.


4


To monitor the recording you can press 


MONITOR 


to switch to the internal 

tuner.


Preventing accidental erasing of 
discs


Question


What happens with DVD+R discs?


As long as these discs are not finalised, they can be protected against accidental era-
sure in the same way as DVD+RW discs. 


Lining up recordings within a title 
(assemble cut)


Question


What happens with DVD+R discs?


New recordings on “DVD+R” discs can only be added after existing recordings.
It is not possible to overwrite existing recordings on “DVD+R” discs. 

DRX-2̲G.book Page 47 Tuesday, October 14, 2003 5:02 PM

Summary of Contents for DRX-2

Page 1: ...rder Enregistreur DVD DRX 2 OWNER S MANUAL MODE D EMPLOI BEDIENUNGSANLEITUNG BRUKSANVISNING MANUALE DI ISTRUZIONI MANUAL DE INSTRUCCIONES GEBRUIKSAANWIJZING G DRX 2 G book Page 1 Tuesday October 14 2003 5 02 PM ...

Page 2: ...D Output Power 20 mW DVD writing out of objective 0 8 mW DVD reading 0 3 mW CD reading Beam divergence82 degrees DVD 54 degrees CD CAUTION VISIBLEAND INVISIBLE LASER RADIATION WHEN OPENAVOID EXPOSURE TO BEAM ADVARSEL SYNLIG OG USYNLIG LASERSTRÅLINGVED ÅBNING UNDGÅ UDSÆTTELSE FOR STRÅLING ADVARSEL SYNLIG OG USYNLIG LASERSTRÅLING NÅR DEKSEL ÅPNES UNNGÅ EKSPONERING FOR STRÅLEN VARNING SYNLIG OCH OSYN...

Page 3: ...f the tempera ture inside this unit rises it may cause fire damage to this unit and or personal injury 7 Do not plug in this unit to a wall outlet until all connections are complete 8 Do not operate this unit upside down It may overheat pos sibly causing damage 9 Do not use excessive force on switches knobs and or cords 10 When disconnecting the power cord from the wall outlet grasp the plug do no...

Page 4: ...grammed recording time and an available disc space Simple programming system for DVD recorders Simply enter the programming num ber associated with your television programme You will find this number in your favor ite listings magazine Safe Record Normally a recording is made at the current disc position This is the same as for a video cassette in the middle of the tape for example By holding down...

Page 5: ...n is recorded on the disc This connector is also known as a FireWire or IEEE 1394 This connector is used to transmit wide digital broadband signals that are used for digital video camcorders Using this connector you can so easily capture and save video onto DVD from your digital video camera RGB Component Video Input Using your DVD recorder you can record from an RGB source such as a satellite rec...

Page 6: ...ally Follow TV 27 Automatic TV channel search 28 Adding and clearing TV channels manually 29 Setting the language country 30 Setting the time and date 31 5 On screen information 32 Symbols in the menu bar 32 Field for temporary messages 32 Status field 33 Tuner information box 34 Timer information box 34 6 Playback 35 General notes on playback 35 Inserting a disc 35 Playing a DVD video disc 36 Pla...

Page 7: ...IEW System 59 How to change or delete a programmed recording TIMER 60 Problem solving for programmed recordings 61 11 User preferences 62 Picture settings 62 Sound settings 63 Language settings 63 Additional settings 64 Disc feature menu 65 12 Access control Child Lock 66 Child lock DVD and VCD 66 Parental level control DVD video only 67 Changing the PIN code 68 13 Before you call an engineer 69 A...

Page 8: ...up left right cursor movement ENTER OK Acknowledges menu selection TOP MENU Displays DVD disc menu or Index Picture Screen EDIT Displays Edit menu for DVD RW or DVD R disc SYSTEM MENU Displays recorder system menu bar TITLE CHAP Selects title Selects chapter SUBTITLE Subtitle language selector AUDIO Audio language selector ANGLE Selects DVD camera angle ZOOM Enlarges video image REPEAT Repeats cha...

Page 9: ...ng the DVD recorder will also switch to pause STOP Stops playback recording except with programmed recordings TIMER Hold down button opens and closes the disc tray DIMMER Changes brightness settings of the display TV SHIFT Press and hold while using other buttons to work the TV S S S S REC Direct recording of the currently selected programme REC MODE Switches recording modes AdditionalTV functions...

Page 10: ...HS Hi8 camcorders or SVHS Hi8 video recorders programme number CAM1 Yellow socket VIDEO Video input socket Connection of camcorders or video recorders programme number CAM1 White red socket left AUDIO right Audio input socket left right Connection of camcorders or video recorders programme number CAM1 DV IN i Link DV socket digital video input IEEE 1394 FireWire Connecting a digital camcorder or o...

Page 11: ...rt socket 1 Connection of a TV set RGB output S VIDEO Y C SVideo output Connection of an S Video compatible TV set VIDEO CVBS Video output yellow socket Connecting a TV set with a video input CVBS CompositeVideo AUDIO L R Analogue audio output white red socket Connection of a TV set with audio input sockets or connection of an addi tional device COAXIAL OUTPUT Connection of a digital audio device ...

Page 12: ...en programmed A remote control signal has been received VPS PDC Video programming system programme delivery control A VPS or PDC code will be transmitted for the selected TV pro gram LANG II During playback a HiFi 2 channel tone was detected or a HiFi 2 channel tone was received I or II lights up depending on which sound channel has been selected Messages in the DVD recorder dis play ISTV ON The D...

Page 13: ...one that contains NTSC recordings NTSC DISC A disc with NTSC recordings has been inserted The machine is trying to record a PAL signal Insert a new disc or one that contains PAL recordings RECORDING An illegal action e g F Open Close button was attempted during recording FREETITLE Playback was started for an empty title or the following title is empty DISC LOCK An attempt has been made to record d...

Page 14: ...r is used to change the reflective properties of the recording layer this process can be repeated more than a thousand times What can the DVD R do DVD R write once DVD Unlike a DVD RW disc this disc can only be written once If it is not finalized after a recording further recordings can be added to it Old record ings can be deleted but can no longer be overwritten The deleted titles are marked Del...

Page 15: ...sc DVD R DVD Recordable DVD RW DVD Rewritable These discs can only be played back if the recording was made in video mode and the recording was finalized Audio CD Compact Disc Digital Audio Super Audio CD Only plays the CD layer of a hybrid SACD disc Video CD Format 1 0 1 1 2 0 SuperVideo CD CD R CD Recordable Audio MP3 content CD RW CD Rewritable Audio MP3 content Recordable ReWritable SUPER VIDE...

Page 16: ...ins cable Scart cable AV Euro cable Some malfunctions frozen or distorted picture and broken sound for example are due to dirt on the disc To avoid such problems you should clean your discs regularly 1 Dirty discs should be cleaned with a soft cloth Always wipe from the middle to the edge 2 Do not use any solvents such as benzine thinners commercially available cleaning agents or antistatic sprays...

Page 17: ... the DVD recorder s digital audio outputs to an AV amp with an appropriate surround sound decoder built in See Surround sound connections on page 20 For synchronized recordings to other components connected with digital audio cables the length of each track and track numbers of the recorded materials may become different from the originals Occasionally it does not start recording Connecting your a...

Page 18: ...asy Link and you wish to use a SCART cable Connecting with cable without Easy Link If your TV is not equipped with Easy Link and you wish to use a SCART cable S Video Y C cable Video CVBS cable Connecting your DVD recorder to theTV Note What is a SCART cable The SCART or Euro AV cable serves as the universal connector for picture sound and control signals With this type of connection there is prac...

Page 19: ...d set the date and time manually 1 Check if the time in Time is correct 2 If required change the time with the number buttons 0 9 on your remote con trol 3 Select the next line with v or w 4 Check if the displayed settings for Year Month and Date are correct 5 When all information is correct save by pressing ENTER OK Notes I can see more installation menus on myTV set Not all the necessary data ha...

Page 20: ...er picture quality than composite video so if your TV has an S Video input use it Composite video good picture quality If your TV has neither SCART nor S Video inputs use a composite video connec tion Using a SCART cable without Easy Link Since SCART cables carry video and audio signals only one cable is necessary 1 Connect the supplied SCART cable 3 to the DVD recorder s EXT 1TOTV I O socket 2 Co...

Page 21: ... video signals separate audio connections are necessary 1 Using an S Video cable 4 connect the DVD recorder s S VIDEO output to an S Video input on your TV 2 Using anAUDIO L R cable 5 connect the DVD recorder sAUDIO L R outputs to the analog audio inputs on your TV Connect white to white and red to red Notes My screen is empty ManyTVs are switched by the DVD recorder to the programme number for th...

Page 22: ...cally feeds those signals through to its EXT 1TOTV I O socket so that you can see the picture on your TV This works even when the DVD recorder is turned off When the DVD recorder is on you can use the remote control s TV DVD button to select the device connected to the EXT 2 AUX I O SCART socket TV or DVD playback DVD Connecting aVCR You can connect aVCR to the DVD recorder s EXT 2 AUX I O SCART s...

Page 23: ...ing a composite video cable connect the camcorder s composite video output to the DVD recorder sVIDEO input And using an AUDIO L R cable 5 connect the camcorder s analog audio outputs to the DVD recorder s AUDIO L R inputs Notes Most prerecorded video cassettes and DVDs are copy protected If you try to copy them the message COPY PROT will appear on the DVD recorder s display If the DVD recorder di...

Page 24: ...S Video input on your TV 5 If your AV receiver has no S Video output or your TV has no S Video input con nect a composite video cable 11 from the AV receiver s composite video output to a composite video input on your TV 6 Connect a SCART cable 3 from the DVD recorder s EXT 1 TO TV 1 O SCART socket to a SCART socket on your TV This direct connection to your TV allows you to enjoy DVD playback the ...

Page 25: ...TICAL OUT to a coaxial or optical digital audio input on the AV receiver You can use a composite video cable instead of a dedicated coaxial digital audio cable Surround sound connections Note An unpleasant digital noise may be heard if you select a DVD soundtrack that uses an audio format that is not supported by your AV amp For example you select a DTS soundtrack and your AV amp does not support ...

Page 26: ...iver with a composite video cable connect a composite video cable 13 from the AV receiver s com posite video output to the composite video input on the SCART adapter Connect either the S Video or composite video cables to the SCART adapter not both S Video offers better picture quality 3 Connect anAUDIO L R cable 14 from theAV receiver s analog audio outputs to the left and right audio inputs on t...

Page 27: ...perating manual for your TV Press STANDBY ON The recorder display lights up If you have not yet installed your DVD recorder it will enter Initial Setup mode In this mode you will have to set your personal preferences Power supply Note Always check if the local mains voltage matches the required 220V 240V When the recorder is in the Standby position it is still consuming some power If you wish to d...

Page 28: ... so that the basic settings are stored correctly Once initial installa tion is complete you can use the DVD recorder as normal Question What is an on screen menu The multi language on screen menu takes the mystery out of using your new DVD recorder All settings and or functions are displayed on your TV screen in the rele vant language Question What is an audio language The DVD will play the sound ...

Page 29: ...n cinema format picture with black bars at the top and bottom 4 3 panscan for a full height picture with the sides trimmed 16 9 for a wide screen TV set screen edge ratio 16 9 Question Why do I have to select a country To call up the specific settings for the respective country you must first install the country Problem The DVD recorder cannot find anyTV stations Select channel 1 on the TV set Can...

Page 30: ... to select theTV channel for which you want to use the decoder If necessary use the MONITOR button to switch to the internal tuner 4 Press the SYSTEM MENU button on the remote control The menu bar appears 5 Select symbol with t or u 6 Select Installation using w or v and confirm with u Tip Satellite receiver If you are connecting a satellite receiver please read the section on Using a satellite re...

Page 31: ...g t or u in Programme number select the programme number you want to use for the TV channel e g 01 Question How do I switch the decoder off again Use u to select Off in the Decoder line on the screen Decoder off ManualTV channel search Tip Manual search with EasyLink With Easy Link the DVD recorder will automatically download the TV channels stored on the TV set This is why some lines have no func...

Page 32: ...essage on the screen with ENTER OK TV 01 will appear in the DVD recorder display 8 Select programme number 1 on the TV set Tip How can I change the symbol of aTV channel 1 In TV channel name press u 2 Select the desired symbol position using t or u 3 Change the symbol at the symbol position with w or v 4 Select the next symbol position in the same way 5 Keep pressing u until the cursor disappears ...

Page 33: ... I 3 Press SYSTEM MENU on the remote control The menu bar appears 4 Select symbol with t or u 5 Select Installation using w or v and confirm with u 6 Select Autom search using w or v Problem I cannot switch myTV set to programme number 1 If you have connected additional devices to the EXT 2 AUX I O socket please disconnect these devices Other connected devices may have switched the TV set to the p...

Page 34: ...m with u 6 Using v or w select the TV channel that you want to delete or whose order you want to change 7 Confirm with u 8 Using w or v shift theTV channel to the desired position and press the t button The DVD recorder will insert the TV channel 9 Repeat steps 6 to 8 until you have resorted deleted all the TV channels you want Adding and clearingTV channels manually Tip EasyLink With Easylink you...

Page 35: ... in stereo in addition to the normal audio signal 2 channel sound In most cases this means that an additional language is available If a TV programme is available in say English and German German may be available as the second language To record TV programmes in stereo or 2 channel sound you can select Stereo or the language you want as the default setting This setting does not become active until...

Page 36: ...and confirm with u 5 Check if the time in Time is correct If required change the time with the num ber buttons 0 9 on your remote control 6 Check Year Month and Date in the same way To move between the fields use w or v 7 Check the displayed settings and confirm with ENTER OK Stored will appear briefly on the screen 8 To end press SYSTEM MENU Setting the time and date Problem Time date is displaye...

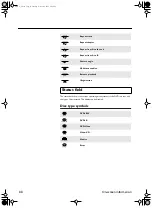
Page 37: ...ing on the disc inserted Menu bar 1 Menu bar 2 While menu bar 1 is being displayed you can go to menu bar 2 by pressing u again The top left corner of the menu line contains a field for temporary messages relating to the various operating modes This information appears briefly on the screen when cer tain disc functions have been activated Symbols in the menu bar User preferences Title track Chapte...

Page 38: ...pe of disc inserted This display can be disabled Disc type symbols Repeat track Repeat chapter Repeat from A to the end Repeat from A to B Camera angle Child lock enabled Resume playback Illegal action Status field DVD RW DVD R DVD Video Video CD No disc Error DRX 2 G book Page 33 Tuesday October 14 2003 5 02 PM ...

Page 39: ...g is scheduled the current time is displayed This box disappears during playback of a disc or after a recording starts Recording Stop Playback Playback Pause Record Pause Search forwards 8x speed Search backwards 8x speed Slow motion Tuner information box Current channel selected input socket No signal TheTV channel is not available the additional device is not con nected or it is switched off Cop...

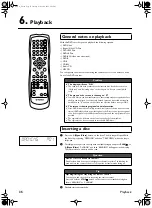
Page 40: ...VD discs can be manufactured so that certain steps are required before the disc can be played or so that only limited operation is possible during play back When an X appears on the screen the selected feature is not possible The screen is showing regional code information Since DVD films are not normally released in all parts of the world at the same time all DVD players have a specific regional ...

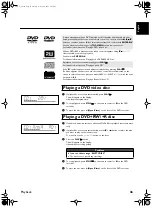
Page 41: ...num bered press a number button on the remote control You can also use the t u v w buttons or number buttons 0 9 to select a menu item and confirm with ENTER OK You can also access the menu usingTOP MENU on the remote control For further information see Playing a DVD video disc When a DVD RW is played back the index overview appears Using w v t y select the title you want to play back Confirm with...

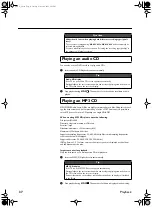
Page 42: ...rtant notes for playback Only the first session of a multi session CD will play back 1 Insert an MP3 CD Playback starts automatically 2 Stop playback using STOP The number of albums is displayed in the display Question What should I note when playing back different recording types quali ties The correct recording quality M1 M2 M2x M3 M4 M6 will automatically be selected during playback For more in...

Page 43: ...he menu option you want PREV t NEXT y or with the number buttons 0 9 If a PBC menu consists of a list of titles you can select a title directly 3 Use RETURN to go back to the previous menu 4 Stop playback using STOP Tip Additional playback features Using t or y select the next or previous title You can also use theTITLE CHAP button to select titles and albums 1 Press theTITLE CHAP button and use t...

Page 44: ...le chapter Tip Use theTITLE CHAP title chapter button 1 PressTITLE CHAP title chapter and then use v or w to select the appropri ate title Make sure the symbol title is selected in the menu bar 2 UseTITLE CHAP to select chapters within a title PressTITLE CHAP and use u to select the symbol chapter Now select the appropriate chapter with v w or digit keys 0 9 Searching a disc Problem No sound The s...

Page 45: ...Confirm with ENTER OK 5 Playback starts at the time you entered Still picture Tip Frame advance via menu bar 1 During a still picture press SYSTEM MENU on the remote control The menu bar will appear at the top of the screen 2 Select the symbol using u or t and confirm with w 3 You can now use the t or u button to go forwards or backwards one frame at a time 4 If necessary switch the menu bar off w...

Page 46: ... a title 1 Press A B at your chosen starting point appears on screen 2 Press A B again at your chosen end point repeat appears on screen and the repeat sequence begins 3 To exit the sequence press A B DVD Discs This shuffles the playing order of chapters within a title if the title has more than one chapter 1 Press SHUFFLE during playback 2 To return to normal playback press SHUFFLE again Video CD...

Page 47: ...n through the enlarged image 1 Press Zoom 2 Press w or v to activate the Zoom function and select the required zoom factor 1 33 or 2 or 4 The recorder will go into pause mode The selected zoom factor appears below the Zoom icon in the system menu bar and Press OK to pan appears below the system menu bar The picture will change accordingly 3 Press ENTER OK to confirm the selection The panning icons...

Page 48: ...will be the one you selected when you first set up the DVD recorder However you can change the subtitle language of the inserted disc at any time The subtitle languages in the menus may differ 1 During playback press SUBTITLE 2 Select the required subtitle language by pressing SUBTITLE repeatedly 3 Playback continues in the new subtitle language Select the audio language Tip You can select an audi...

Page 49: ...ck time from the deleted recording cannot be recovered for further recordings Tip Insert new recordings at the end of all existing recordings Safe Record To add a new recording at the end of the last recording on the disc hold down the REC S button until the message SAFE REC appears on the display For DVD R discs each new recording is always added at the end of all previous recordings as existing ...

Page 50: ...isc A dialog box appears asking you whether you want to delete the contents or eject the disc The disc inserted is a DVD RW but its contents are not DVD video compatible e g a data disc Recordings on this disc can only be made if the entire disc is first deleted with the REC S button The message Too many titles appears on the screen if a record ing is to be made A disc may contain a maximum of 48 ...

Page 51: ...you will add 30 minutes to the recording time Problem The display will read DISC ERR Recording could not be completed correctly because of a disc error Check the disc and clean it if necessary Tip Making recordings on DVD R discs compatible If you want to play back the recording on a DVD player you need to finalise the disc in the DVD recorder You can prepare your DVD for use in a DVD player using...

Page 52: ...nt title depending on the length of the new recording The recording type Quality will be taken from the current title To play back this recording press SYSTEM MENU and use the u button to select the C Chapter symbol You can also use theTITLE CHAP key For further information see Changing to another title chapter in Additional playback features 1 In the index display find the title to which the new ...

Page 53: ...using w or v and confirm with u 5 Select Sat record using w or v 6 Select EXT2 with t or u Selecting the recording type Quality Tip Which recording types can I choose M1 High Quality offers the best picture and sound quality and a recording time of 1 hour M2 This mode offers the best quality audio and standard play close to pre recorded DVD quality video M2x Standard Play plus better than S VHS qu...

Page 54: ...ng from 2 Press REC S with the DVD recorder switched off 3 Stop recording with STOP Tip Switching off Sat Recording To switch off the function select Off using u or t Direct Record Question How does Direct Record work The DVD recorder compares theTV channel selected on the TV set with its stored TV channels via the scart cable If the same TV channel is found it switches the DVD recorder to the cor...

Page 55: ... MENU on the remote control The menu bar appears 3 Select symbol with t or u 4 Select Record settings using w or v and confirm with u 5 Select Direct Record using w or v 6 Select On Direct Record on or Off Direct Record off using t or u 7 Confirm with ENTER OK 8 To end press SYSTEM MENU 9 Switch off with B I DRX 2 G book Page 50 Tuesday October 14 2003 5 02 PM ...

Page 56: ...ters Select from the following chapters In this menu you can adapt a title to suit your particular needs You can insert delete chapter markers hide chapters select a new index or split up a title 1 Play the title you want to edit 2 Press the EDIT on the remote control The video image is overlayed with a transparent edit menu Title and chapter information appear in an information box at the top of ...

Page 57: ...rs on the TV screen 2 Select Current chapter using w 3 Using u select Hidden The picture is shown darker 4 To end press EDIT During playback this chapter will be skipped If the chapter is not visible select Visible in step 3 with u Tip X will appear on the screen This DVD is write protected or the disc is a finalised DVD R Subsequent changes cannot be made Tip How can I select different chapters 1...

Page 58: ...done 1 While the relevant title is playing press EDIT on the remote control The EDIT menu appears on the TV screen 2 Select Divide title and confirm with the ENTER OK button 3 If you are sure press ENTER OK to start the process Dividing title appears on the TV screen 4 Wait until the new title is displayed with an index picture in the index picture overview The process of splitting the title is no...

Page 59: ...ck pressTOP MENU 2 Using v or w select the title you want to play all of and confirm with u The title editing menu will appear 3 Select Play full title using v or w and confirm with ENTER OK 4 Playback starts automatically The title is played in its entirety including the hidden chapters You can delete specific recordings from a disc To do this proceed as follows 1 Press the STOP button or during ...

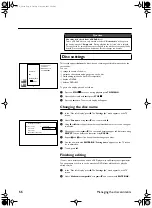
Page 60: ...u have made the changes you want 6 Save the new title with ENTER OK Storing name appears on the TV screen for confirmation 7 To end press t Finishing editing If one or more titles have been edited a DVD player may still display the original titles You can prepare your disc in such a way that a DVD player will be able to play the edited version 1 In the Disc info display press u The Settings for me...

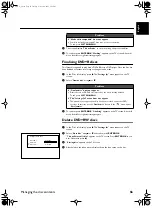
Page 61: ... for menu appears on the TV screen 2 Select Erase disc using v or w and confirm with ENTER OK This will erase all titles appears on the TV screen Press ENTER OK to con firm Otherwise press t 3 Erasing disc appears on the TV screen 4 After deletion the index picture display shows the free space on the disc Problem Make edits compatible does not appear Your disc is already compatible There is no nee...

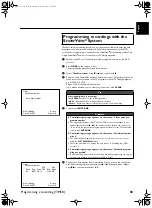
Page 62: ...DC 20 14 theVPS PDC time 20 14 must be entered exactly to the minute during programming If you want to programme a time that is different from theVPS or PDC time you must switch offVPS or PDC Only one TV program of a TV channel can be controlled using VPS PDC at a time If you want to record two or more TV programmes on a TV channel using VPS PDC you will need to programme these as two separate rec...

Page 63: ...ing recordings with the SHOWVIEW System Tip Selecting daily weekly recordings Using SELECT select from the following options Mo Fr Repeated daily recordings Monday to Friday Weekly Repeated weekly recordings every week on the same day Problem The following message appears on the screen Please enter pro gramme number The programme number of the TV channel has not yet been assigned to the SHOWVIEW n...

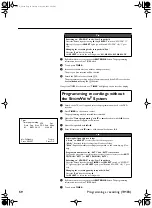
Page 64: ... in the Start input field Select the Start input field using u Using SELECT switch on VPS PDC lights up If you press SELECT again you will switch VPS PDC off goes out Changing the recording mode in input field End Select the End input field using u Use SELECT to select the recording mode M1 M2 M2x M3 M4 M6 FR Programming recordings without the SHOWVIEW System Tip Selecting daily weekly recordings ...

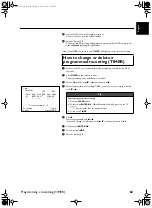
Page 65: ...sing w or v and confirm with u 4 Select the programmed recording TIMER you want to check change or delete with w or v 5 Press u Select the input field with t or u If required change the information with v w or the number buttons 0 9 6 Confirm with ENTER OK 7 To end pressTIMER 8 Switch off with B I How to change or delete a programmed recording TIMER Tip Delete programmed recording 1 Press the CLEA...

Page 66: ... appears briefly on the screen A write protected disc has been inserted Undo the write protection see Pre venting accidental erasing of discs in Manual recording or insert a different disc Error message Memory full If this error message appears after pressingTIMER then all TIMER blocks are already programmed No more recordings can be programmed Press the u button If you want to clear or check a pr...

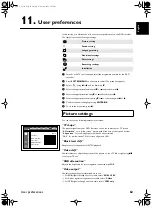
Page 67: ...screen 4 3 letterbox for a wide screen picture with black bars at the top and bottom 4 3 panscan for a full height picture with the sides trimmed 16 9 for a wide screen TV set screen edge ratio 16 9 Black level shift Adapts the colour dynamics for NTSC playback Video shift Use this feature to adjust the position of the picture on yourTV left or right using t u to suit your TV set RGB attenuation A...

Page 68: ... AUDIO L R you can select from the following settings Stereo For devices without DolbySurround use this setting if the DVD recorder is only connected to a stereo TV set Surround Dolby Digital and MPEG 2 multi channel are mixed down to a DOLBY surround compatible two channel output signal For devices with Dolby Surround Pro Logic decoder Night mode Night mode optimises the sound for playback at low...

Page 69: ...mmed TIMER recordings will still take place In addition you can present the most important features of the DVD recorder in scroll ing text in the display demo Low power If the DVD Recorder is switched off button B I the clock display is also switched off Normal If the DVD Recorder is switched off button B I the clock display is visible Demo mode If the DVD recorder is switched off with the B I but...

Page 70: ...ired PBC This line appears only if aVCD is loaded This function lets you activate or deactivate the PBC menu Playback Control for video CDs See Playing a Super Video CD Finalise disc This feature allows you to finalise DVD R discs If the disc has already been finalised this line will appear darker Adapt disc format If a DVD RW has been recorded in a computer drive or in another DVD recorder the in...

Page 71: ...ng B I 3 Press SYSTEM MENU The menu bar appears 4 Select the icon using t or u 5 Select Disc features using w or v and confirm with u 6 Confirm Access control using u 7 Enter a 4 digit code of your choice If the code is new you may have to enter the code a second time as confirmation 8 Select Child lock using v or w and confirm with u 9 Select the Ç icon using w or v 0 Confirm with ENTER OK A Quit...

Page 72: ...g Activating deactivating parental level control 1 Switch on the TV set If required select the programme number for the DVD recorder 2 Switch on the DVD recorder using B I 3 Press SYSTEM MENU The menu bar appears 4 Select the icon using t or u 5 Select Disc features using w or v and confirm with u 6 Confirm Access control using u 7 Enter a 4 digit code of your choice If the code is new you may hav...

Page 73: ...s t and then SYSTEM MENU 1 Switch on the TV set If required select the programme number for the DVD recorder 2 Switch on the DVD recorder using B I 3 Press SYSTEM MENU The menu bar appears 4 Select the icon using t or u 5 Select Disc features using w or v and confirm with u 6 Confirm Access control using u 7 Enter your four digit PIN code If the code is new you may have to enter the code a second ...

Page 74: ...can reset your DVD recorder to the default factory set tings Resetting the machine to the default factory settings Important All the information stored TV channels time and date TIMER will be lost 1 Disconnect from the mains power supply 2 Press and hold down the B I button on the device and reconnect to the mains power supply 3 Release the B I button when IS TV ON appears on the display All the i...

Page 75: ...DVD R has been inserted Change disc VPS PDC switched on but VPS PDCtime wrong Enter VPS PDC time exactly to the minute Check the aerial The wrongTV channel was decoded entered after you programmed a recording using SHOWVIEW System 1 Enter the SHOWVIEW programming number of the TV channel you want 2 Confirm with ENTER OK 3 Check the programme number channel name in the Prog input field 4 If this do...

Page 76: ...sult repeat the procedure using the number button 3 on the remote control 4 You can restore the disc to its original condition by pressing 1 Warning There is a risk that you can no longer play the disc on other DVD players after this procedure Therefore apply this function with particular care Other disc errors If it is impossible to play back a disc you can try and repair it for new recordings us...

Page 77: ...remote control you can re programme your remote control Below you will find a list of all available remote control codes for vari ous TV brands The following procedure re programmes your remote control 1 Look up the set up code for your TV set in the code list in the following page 2 Press and hold the t and u simultaneously for at least 3 seconds 3 Release both keys 4 Enter within 30 seconds the ...

Page 78: ... 1079 MTC 1003 1005 1009 1010 1046 Multitech 1019 1023 NAD 1017 1021 NEC 1003 1005 1009 1079 Nikko 1005 1012 1021 NTC 1012 Onwa 1023 Optimus 1016 1019 1025 Optonica 1013 1018 Orion 1022 1024 1028 Panasonic 1007 1025 1060 1077 1079 Penney 1003 1004 1005 1006 1007 1009 1010 1017 1021 1036 1046 1060 1063 1064 1066 1076 Philco 1000 1003 1005 1014 1028 1049 1057 1058 1059 1059 1077 1079 Philips 1000 10...

Page 79: ... into 75 Ohm RGB Output 0 7Vpp into 75 Ohm Audio format Compressed Digital Playback Recording Dolby Digital Multi channel 2 channel AC 3 16 bit fs 48 kHz DTS Multi channel MPEG1 2 channel SPdif PCM 2 channel 2 channel 16 20 24 bit 16 bit fs 48 kHz fs 48 kHz Audio Performance DA Converter 24 bit AD Converter 16 bit DVD fs 96 kHz 4 Hz 44 kHz fs 48 kHz 4 Hz 22 kHz Video CD fs 44 1 kHz 4 Hz 20 kHz Aud...

Reviews: