25
C
Confirm & Start the Format
Operation
Use the TEMPO [
▲
] (YES) and [
▼
] (NO) buttons to confirm and con-
tinue or cancel the operation. “YES” if you intend to execute the format
operation or “NO” if you wish to cancel the operation. This step is neces-
sary because formatting completely erases any data that is already on the
disk — make sure that the disk you’re about to format does not contain any
important data!
Formatting will begin the instant you select “YES”. The number of each
“track” on the disk will be shown on the display as the format process con-
tinues (“F80” through “F 0”). When formatting is complete “End” will ap-
pear briefly then the display will revert to the normal song number display.
F80
F 0
Z
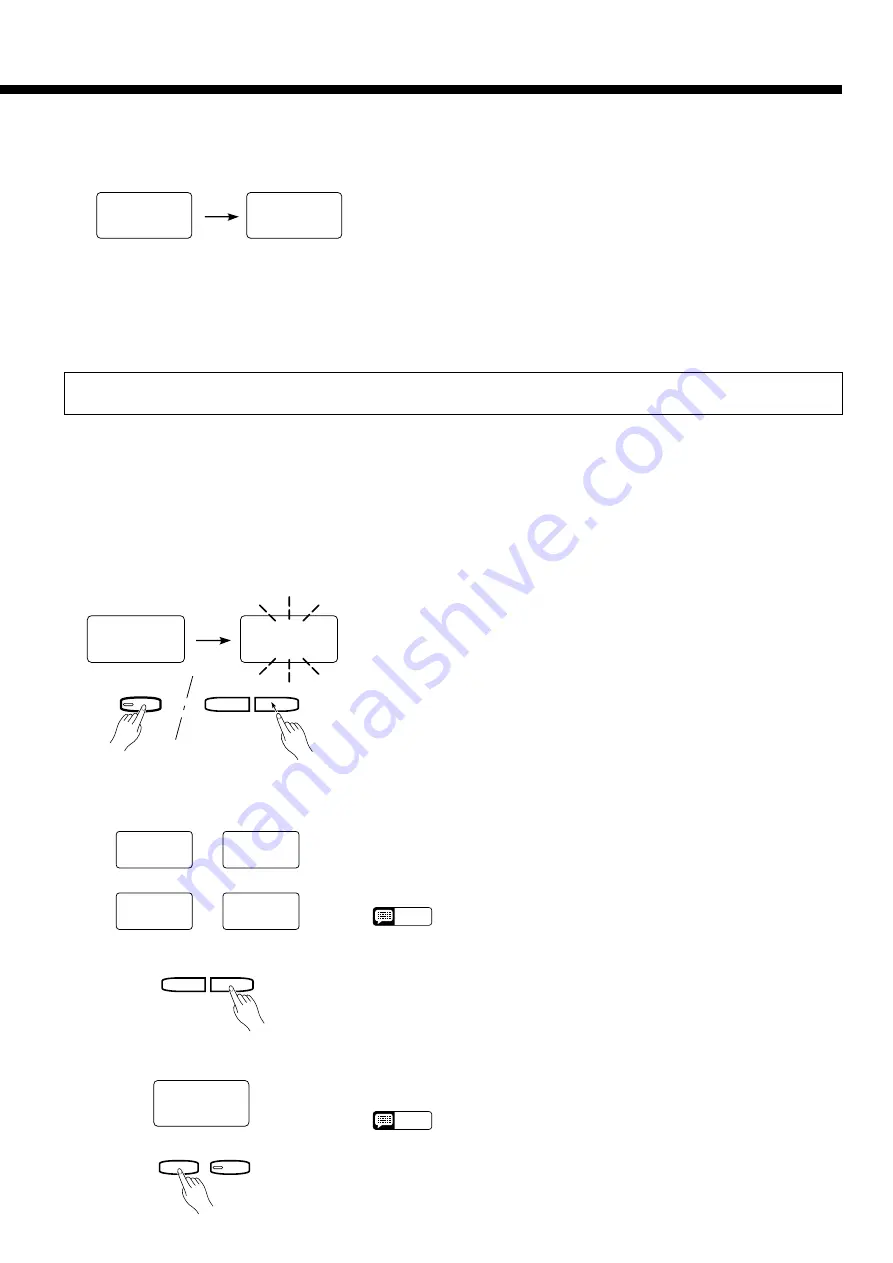
Insert a Disk & Select the
Source Song
Insert the disk containing the song you want to copy, and use the SONG
[
r
] and [
f
] buttons to select the number of the song you wish to copy.
Hold the [MIDI/TRANSPOSE] button and press the SONG [
r
] or
[
f
] button as many times as necessary until “cPy” appears on the display
— then release the [MIDI/TRANSPOSE] button when “c_ _” appears
flashing on the display (“c_ _” will not appear if the selected song number
contains no data).
Use the TEMPO [
▲
] and [
▼
] buttons to select the song number you
wish to copy to (i.e. the destination song number — “c 1” through “c60”). If
you select a song number that already contains data, that data will be
overwritten by the new song data. If you select a song number greater than
“c60” a bar will appear above the “c” in the song number, indicating that
the copy will be made to a different disk.
NOTE
• You can cancel the copy function before actually starting the copy opera-
tion (next step) by pressing either the SONG [
r
] or [
f
] button.
Press the [PLAY] button to begin the actual copy operation. “cPy” will
appear on the display during the copy operation, then the destination song
number will appear when the copy operation has finished.
NOTE
• “n y” will flash on the display when you attempt to start copying if you
have selected a destination song number that already contains data.
Press the TEMPO [
s
] (YES) button if it is OK to go ahead with the copy
operation and erase the existing data in the destination song. Press
TEMPO [
t
] to cancel the copy operation.
X
Select the Song Copy
Function
SONG
f
r
MIDI/
TRANSPOSE
cpY
c__
C
Select the Destination
Song
c 1
c60
~
% 1
%60
~
TEMPO
▲
▼
Copy to same disk
Copy to different disk
Utility 5: Song Copy
Recorder song data — including any existing individual key tuning data — can be “backed up” by copying to a new song
number or a different disk, as follows:
V
Start Copying
PLAY
REC
cPY


