16
RM-CR Installation Manual
[Installation]
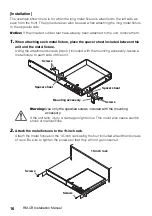
The example shown here is for when the long metal fixture is attached to the left side as
seen from the front. The procedure can also be used when attaching the long metal fixture
to the opposite side.
Notice:
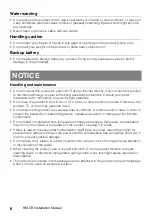
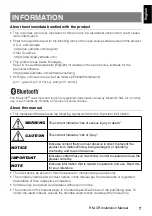
If the included rubber feet have already been attached to the unit, remove them.
1.
When attaching each metal fixture, place the spacer sheet included between this
unit and the metal fixture.
Using the attachment screws (4 pcs.) included with the mounting accessory, fasten a
metal fixture to each side of this unit.
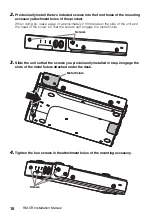
2.
Attach the metal fixtures to the 19-inch rack.
Attach the metal fixtures to the 19-inch rack using the four included attachment screws
of rack. Be sure to tighten the screws so that they will not get loosened.
Warning:
Use only the specified screws included with the mounting
accessory.
If the unit falls, injury or damage might occur. This could also cause electric
shock or malfunctions.
Screws
Screws
Spacer sheet
Mounting accessory
Spacer sheet
19-inch rack
Screws
Screws
Summary of Contents for ADECIA RM-CR
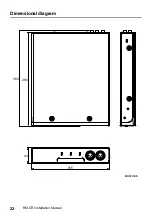
Page 22: ...22 RM CR Installation Manual Dimensional diagram 264 260 44 215 Unit mm ...
Page 42: ...42 RM CR Installationshandbuch Maßbild 264 260 44 215 Einheit mm ...
Page 62: ...62 Manuel d installation du RM CR Schéma dimensionnel 264 260 44 215 Unité mm ...
Page 82: ...82 Manual de instalación del RM CR Diagrama de dimensiones 264 260 44 215 Unidad mm ...
Page 102: ...102 RM CR Manual de Instalação Diagrama dimensional 264 260 44 215 Unidade mm ...
Page 122: ...122 Manuale di installazione RM CR Diagramma dimensioni 264 260 44 215 Unità mm ...
Page 142: ...142 Руководство по установке RM CR Схема размеров 264 260 44 215 Единица измерения мм ...
Page 162: ...162 RM CR 安装说明书 尺寸图 264 260 44 215 单位 mm ...
Page 168: ...168 RM CR 설치설명서 해당 무선 설 비는 운용 중 전파혼신 가능성이 있음 ...
Page 182: ...182 RM CR 설치설명서 치수도 264 260 44 215 단위 mm ...

