background image

11

12


警 告

注 意


Before Use

Before Use

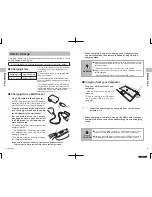
How to Charge

WARNING

CAUTION

* May cause electric shock, short circuit, or fire hazard.

* May cause electric shock, short circuit, or fire hazard.

Always use the supplied AC adapter with this device and always 

plug the adapter cord directly into the wall socket (do not use 

extension cords).

Always check that the charging terminal is clean and not wet 

before charging.

Charging Time

Approx. 3 hours Approx. 3.5 hours

Operating Time

* The time indicated at left is when the device 

is charged at an ambient temperature of 

around 25°C.
* Operating time shown is immediately after 

being fully charged.
* Actual charging time will differ depending 

upon the remaining battery and the charging 

environment.
* The 2 white lamps indicating a full charge 

may remain on for only a few minutes if it is 

the first time the device has been charged, or 

if the battery has not been charged for an 

extended period of time.  

Charging the battery is necessary before first using the device, or if the 

battery charge is running low.

Do not use the device until fully charged the first time you charge the battery.

Charging Time

Charging from a Wall Socket

1

2
3

Plug USB cable into the AC adapter.

(NOTE: Skip this step if your AC adapter 

has a wired-in cable.) 

Charging will not 

start if the cable is not firmly plugged in. 

Plug the other end of the cable firmly 

into the charger stand and then plug 

the AC adapter into a wall socket.
Set the main unit on the charger 

stand and be sure to press down until 

the EMS Mode / Level lamps on the 

main unit turn red. 

* Please wipe off any water or dirt on the 

charging terminal.
* The EMS Mode / Level indicator lamps 

will sequentially flash red while the 

battery is charging.
* The indicator lamps will turn off when 

the charging is complete.

● 

Be sure to press down where pictured above (just beneath the  

     Ya-Man logo) to firmly set the main unit on the charger stand.

4

When charging is complete, unplug the AC adapter from 

the wall socket and then remove the adapter plug from the 

charging stand.


Charging from your Computer

4

2~3

1

Follow the same steps as charging from a wall socket 

(refer to p.11).

Plug your USB cable into your 

computer.

* Make sure your computer is 

turned on.
* Be sure to plug the USB cable 

into a proper USB port on your 

computer.

When charging is complete, unplug the USB cable from your 

computer and then remove the adapter plug from the charging 

stand.


Any loss of program or data, or potential damage to your 

computer due to USB connection is not covered by warranty.

Charging may take longer if there are other USB connections to 

the computer or the USB port cannot supply enough power.

Summary of Contents for GR-16

Page 1: ...Safety Precautions section for important information Before using this product please read these instructions carefully GR 16 Tornado EMS Roller Safety Precautions 1 Product Description 8 Before Use...

Page 2: ...edical electronic equipment such as a pacemaker oxygenator electrocardiograph etc This symbol shows you what you must be careful with This symbol shows you what you must do This symbol shows you what...

Page 3: ...any smoke unusual noise or odor Use only the supplied AC adapter and plug it directly into the wall socket Do not use an extension cord as this may cause an electrical shock hazard short circuit or f...

Page 4: ...evel while under water you may feel stonger EMS stimulation when used outside of the water During use apply gently and be careful not to get your skin caught in the rollers The rollers pinch and relea...

Page 5: ...ding on the region and the type of accommodation Always be sure to check for compatibility before using the device For information about plug adapters consult a travel agency or a consumer electronics...

Page 6: ...that allows it to stimulate deep facial expression muscles and core muscles The Tornado EMS Roller is designed for use on either the face or body by employing separate EMS modes Each mode has 5 adjus...

Page 7: ...ur AC adapter has a wired in cable Charging will not start if the cable is not firmly plugged in Plug the other end of the cable firmly into the charger stand and then plug the AC adapter into a wall...

Page 8: ...ss the Level button Select an EMS level that feels comfortable This symbol indicates a flashing lamp Always start with Level 1 Micro current will only work when using Face Mode Level 1 Micro current c...

Page 9: ...phase Do not press too hard on the skin particularly over areas where the skin is easily pinched such as the neck and upper arms Pressing too hard may harm your skin EMS Treatment Eye Treatment Micro...

Page 10: ...e skin to locate EMS points Stop and hold where you feel the EMS stimulation and press lightly Do not press too hard Select Face Mode when using on the face and select Body1 or Body2 mode when using o...

Page 11: ...S level that feels comfortable Start from the Achilles tendon and roll to the back of the knee Adjust the angle of the grip which feels most comfortable EMS Treatment Select Body Mode 1 or Body Mode 2...

Page 12: ...ollers or around the charging terminal Do not use any detergents or solvents Wipe off with dry towel or tissue any lubricant that oozes from the base of the rollers Never leave the device wet as this...

Page 13: ...ion of the rollers will be weak if the skin is wet In this case press the rollers as needed to get sufficient treatment Avoid use in hot springs or baths having bath salts as this may cause a malfunct...

Reviews: