3
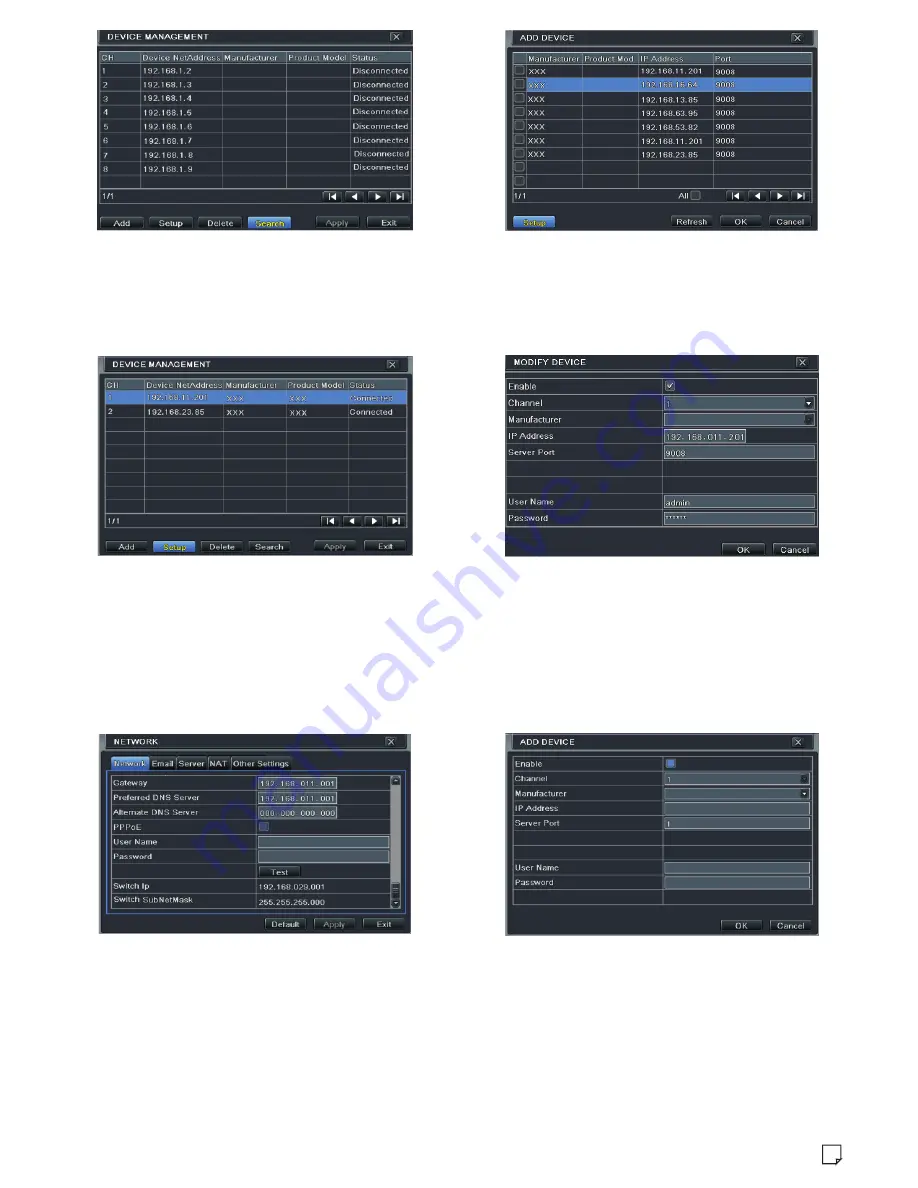
(Fig 2)
(Fig 3)
③
Checkmark the device you want to add and then click “OK” button to return to the previous interface to apply the settings.
“Connected” status means connecting the device successfully and you will see the live image. You may select the added device and
click “Setup” button to modify channel, IP address as shown in Fig 5 .
(Fig 4)
(Fig 5)
(Fig 6)
(Fig 7)
►
WAN
①
Set the network of the NVR. Go to Main Menu
→
Setup
→
Network
→
Network as shown in Fig 6. Input static IP address or enable PPPoE
and then input the user name and password received from your ISP.
②
Go to Main Menu
→
IP Camera tab. Click “Add” button to add the IP cameras as shown in Fig 7. Checkmark “Enable” checkbox, select
channel, manufacturer and input IP address, server port, username and password of the IP camera. Then save the settings. The IP camera
must be connected over WAN. And here the IP address of the IP camera must be a WAN IP address.
7. NAT
►
NAT Settings
①
The
NVR
shall
be
powered
on
and
connected
to
the
network
.


