background image


25


eXtrending your Vision 

User Manual 

Step 5. Configuring Tuner A and Tuner B (ET7500 includes a Plug&Play Tuner B Slot) 


A.


DVB-S/S2 Configuration Mode 

Using LEFT/RIGHT key, you can choose one of the following Configuration Modes: 

● 

Not configured. 

● 

Simple 

● 

Loop-through to: mode to make the TUNER 1 be externally connected to the TUNER 2. 

● 

Equal to: mode to use the same configuration as that of Tuner B. 

● 

Advanced: for an advanced user configuration, where you can setup Unicable LNB, C-band, motor, and 

other settings. 

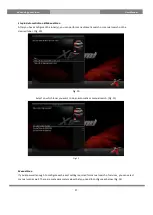
We recommend using the “Simple” configuration mode with DiSEqC A / B or Single mode according to your 

satellite system. Port A and Port B are set to Automatic so that the DVB-S2 tuner can automatically find a lock 

on the corresponding satellite signal furnished. (Fig. 7) 


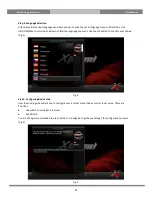
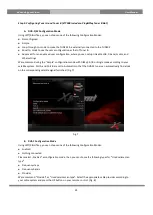
Fig. 7 


B.


DVB-C Configuration Mode 

Using LEFT/RIGHT key, you can choose one of the following Configuration Modes: 

● 

Enabled 

● 

Nothing connected 

Please select „Enabled“ as configuration mode, then you can choose the following types for 

"

Used serivce scan 

type

● 

Frequency steps 

● 

Frequency bands 

● 

Provider 

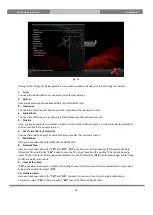
We recommend "Provider" as "Used service scan type". Select the appropriate cable provider according to 

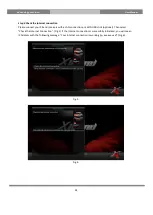
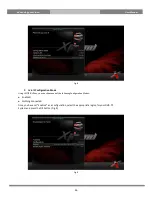
your cable system and press the OK button on your remote control. (Fig. 8) 

Summary of Contents for ET7500

Page 1: ...you can also use as an USB port You can experience unlimited possibilities with the new Xtrend receivers The ET7500 and ET7000 allow you to experience various features such as web browser media playe...

Page 2: ...Terrestrial connection 17 2 Connecting the TV and VCR 18 I Replacing Tuner For ET7500 20 J Turn on Xtrend ET7000 ET7500 22 1 Choose Video input selection 22 2 Language Selection 23 3 Configuring Basic...

Page 3: ...roduct Please do not clean the product with wet cloth which may cause a short circuit No wet objects should be placed near the product 4 Ventilation Allow a sufficient space between the product and ot...

Page 4: ...s still running This may result in damage to the HDD and thus the system The company shall not be liable for any corruption of data on the HDD caused by careless use or misuse of users 11 Battery Ther...

Page 5: ...wer supply for external eSATA hard drives 1 x Common Interface 1 x Smartcard Reader ET7000 2 x Smartcard Reader ET7500 Power Touch button with 2 LED ET7500 User friendly Linux Menu system Various Chan...

Page 6: ...port SMART CARD 1 port 2 port CI SLOT X 1 port BUTTON 1 port 1 port Touch 2led IR 1 port 1 port REAR PANEL I O PORTS Power Adapter 12V 2A Adapter 12V 2A CI SLOT 1 port X RCA AV Out CVBS CVBS Audio R...

Page 7: ...7 eXtrending your Vision User Manual D Packaging Contents ET7000 Please check all package contents before using your product STB Remote Control Batteries User Manual DC Power Adapter...

Page 8: ...r Vision User Manual Packaging Contents ET7500 Or Please check all package contents before using your product STB Remote Control Batteries User Manual DC Power Adapter Sata Cable HDD bracket installed...

Page 9: ...escriptions Front Panel ET7000 1 Power Sets your Xtrend box into standby mode 2 2 LED Red LED will be displayed when booting Green LED will be displayed during operation 3 Smartcard reader slot Insert...

Page 10: ...ons Front Panel ET7500 1 Power Sets your Xtrend box into standby mode 2 Display Displays the current menu information 12 character dot matrix VFD 3 USB Connect a USB storage device 4 CI Module slot In...

Page 11: ...ff 3 Power Input Connect DC Power Adapter 4 TUNER DVB S S2 integrated 5 Composite CVBS L R Video Audio connection via RCA 6 S PDIF Digital Output 7 e SATAp Connect external E SATA device or USB storag...

Page 12: ...DVB S S2 integrated 3 Ethernet Port Connect LAN connection 10 100 Mbit 4 HDMI out HDMI output to connect to your Television 5 e SATAp Connect external E SATA device or USB storage device 6 Composite C...

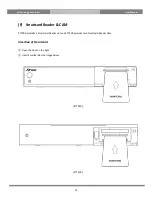
Page 13: ...n User Manual F Smartcard Reader CAM ET7000 provides a Smartcard Reader slot and ET7500 provides two Smartcard Reader slots Insertion of Smartcard Open the door on the right Insert Smartcard as the im...

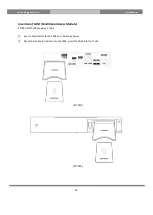
Page 14: ...ser Manual Insertion of CAM Conditional Access Module ET7000 ET7500 provide a CI slot Insert a Smartcard into the CAM as in the image below Once the Smartcard inserted into the CAM insert the CAM into...

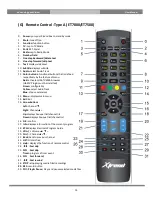
Page 15: ...wser HbbTV Plugin must be installed Green configurable Yellow select Audio Track Blue choose extensions 13 Menu displays main menu 14 Exit Exit 15 Arrow buttons Left Channel Right Channel Up displays...

Page 16: ...vent 15 TEXT displays videotext 16 TV Zap to TV mode 17 F2 Assign a key function of your own 18 List Displays the list stored on HDD if any 19 PIP Activates Picture in Picture mode if this feature is...

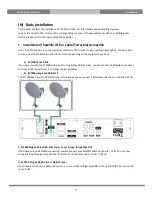
Page 17: ...quipment you have A ET7500 Tuner A B If you have received the ET7500 with a built in Plug Play DVB S2 tuner you can connect 2x Satellite connections to Tuner B RF IN and Tuner A RF IN as the image bel...

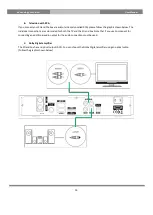
Page 18: ...ion User Manual 2 Connecting the TV and VCR STB provides a variety of audio video connection methods A Connecting TV via HDMI Cable Connect your ET7500 ET7000 s HDMI output with a HDMI Cable to your T...

Page 19: ...below The individual connections are color coded for both the TV and the Xtrend box Note that if you use Component for connecting an additional audio output for the audio connection must be used C Dol...

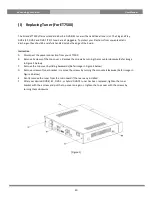
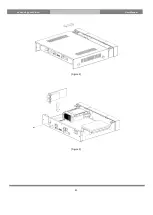
Page 20: ...r ET7500 B Remove 5 screws of the top cover Remove the screws by turning them counterclockwise Refer image in Figure 1 below C Remove the top cover by sliding backwards Refer image in Figure 2 below D...

Page 21: ...21 eXtrending your Vision User Manual Figure 2 Figure 3...

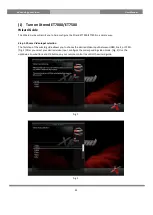
Page 22: ...n a simple way Step 1 Choose Video input selection The first step of the wizard guide allows you to choose the desired Video input between HDMI Scart or YPbPr Fig 1 After you select your desired video...

Page 23: ...to find the language you want Use the OK button to confirm your choice Fig 3 Fig 3 Step 3 Configuring Basic Setup Now the wizard guide will ask you to configure your internet connection as well as tu...

Page 24: ...Xtrend receivers with a LAN connection or a WiFi USB stick optional Then select Check the Internet Connection Fig 5 If the Internet connection is successfully initialized you will see an IP Address wi...

Page 25: ...d using the Simple configuration mode with DiSEqC A B or Single mode according to your satellite system Port A and Port B are set to Automatic so that the DVB S2 tuner can automatically find a lock on...

Page 26: ...onfiguration Mode Using LEFT RIGHT key you can choose one of the following Configuration Modes Enabled Nothing connected Once you have set Enabled as a configuration select the appropriate region for...

Page 27: ...manual search on the desired tuner Fig 10 Fig 10 Select on which tuner you want to do an automatic or manual search Fig 11 Fig 11 Manual Scan If you know well enough to configure each exact setting r...

Page 28: ...n You need to enter the exact FEC value of the transponder that you want to scan 7 Modulation Here you have two options for QPSK SD and 8PSK HD 8 Network Scan Here you have two options for YES and NO...

Page 29: ...or manual search your Xtrend box is now ready for use Press OK to continue Fig 13 Fig 13 K System Configuration Network Setup Menu Setup System Network The ET7000 ET7500 is equipped with a standard 1...

Page 30: ...P YES is used to use DHCP Dynamic Host Configuration Protocol If you set this option at YES it will automatically detect the correct IP address NO is used when you want to use a certain fixed IP addre...

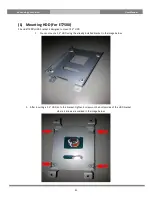
Page 31: ...500 s HDD bracket is designed to mount 2 5 HDD 1 You can mount a 2 5 HDD using the already installed bracket in the image below 2 After inserting a 2 5 HDD on to the bracket tighten 4 screws on the bo...

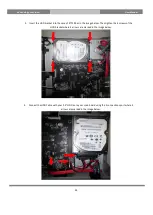
Page 32: ...the case of ET7500 as in the image below Then tighten the 4 screws of the HDD bracket where 4 arrows are marked in the image below 4 Connect the HDD Cable with your 2 5 HDD on to your main board using...

Page 33: ...nd install more Plugins please go to the Plugin Browser and press the green button on your remote control You will be able to see a list of available plugins and you can choose which plugins you want...

Page 34: ...To protect your rights we need to make restrictions that forbid anyone to deny you these rights or to ask you to surrender the rights These restrictions translate to certain responsibilities for you...

Page 35: ...d copy and distribute such modifications or work under the terms of Section 1 above provided that you also meet all of these conditions a You must cause the modified files to carry prominent notices s...

Page 36: ...tributed need not include anything that is normally distributed in either source or binary form with the major components compiler kernel and so on of the operating system on which the executable runs...

Page 37: ...hly clear what is believed to be a consequence of the rest of this License 8 If the distribution and or use of the Program is restricted in certain countries either by patents or by copyrighted interf...

Page 38: ...ON 12 IN NO EVENT UNLESS REQUIRED BY APPLICABLE LAW OR AGREED TO IN WRITING WILL ANY COPYRIGHT HOLDER OR ANY OTHER PARTY WHO MAY MODIFY AND OR REDISTRIBUTE THE PROGRAM AS PERMITTED ABOVE BE LIABLE TO...

Reviews: