


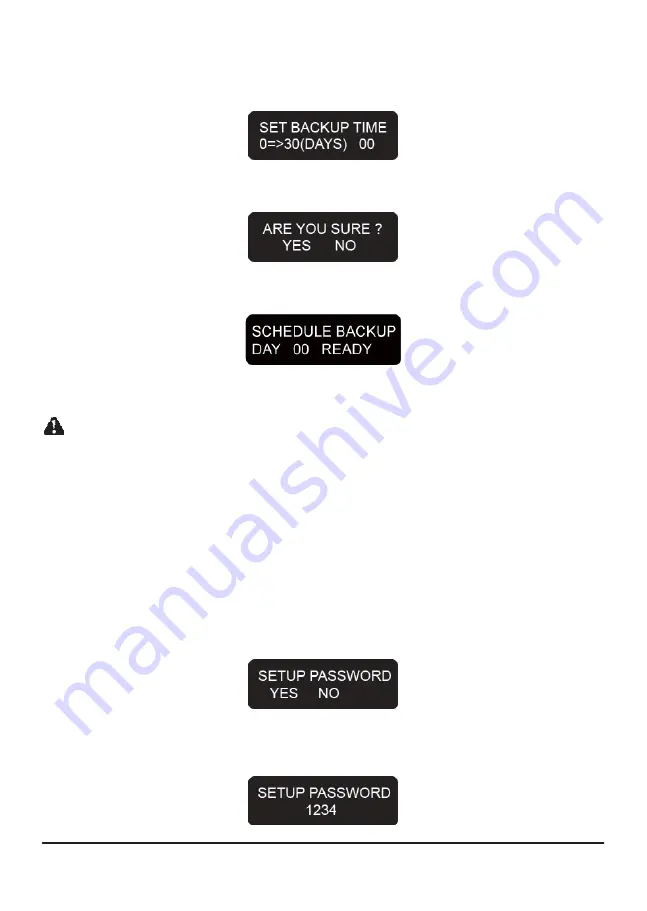
Step 2 After pressing the “ENT” button the display will show “SCHEDULE BACKUP TIME 0=>30
(DAYS) 00)”. Use the “
▼
” or “
▲
” buttons to adjust to the number of days between backups.
Once the backup time has been set please press the “ENT” button.
Step 3 System will now ask you to confirm the settings. Press the “ENT” button to confirm.
Step 4 The system will now show that the settings have been recorded.
If DAY is set to “00” then the device will operate in RAID 1 mode with constant mirroring at all times.
Note : 1. If Schedule Backup is used, since hard disk data is not backed up simultaneously, if a hard disk malfunctions then all new
data since the last backup will be lost. Before using this function, we recommend that you consider carefully the use of
RAID 1 Mode or Schedule Backup as well as the backup interval length.
2. Scheduled Backup does not store data from other hard disks to the RAID. It only copies all data from the RAID’s primary
disk to the secondary disk.
3. To cancel the Schedule Backup function, set the days to “00”. The system will revert to the RAID 1 mode.
3.3
Change Password Setting
To prevent unauthorized system settings, the XL-RAID-SATA-USB incorporates a password feature to
help administrators protect their data. Be sure to record the new password somewhere safe after
making a change. Losing the password will cause a great inconvenience to the user.
Step 1 Log into the system then use “
▼
” or “
▲
” with the LCD display to scroll through the options until
“SETUP PASSWORD YES NO” appears. (Default system password: 0000)
Step 2 After pressing the “ENT” button please use the “
▼
” or “
▲
” buttons to adjust and set the 1st, 2nd,
3rd and 4th digit of the password.
14
Instructions
Summary of Contents for XL-RAID-SATA-USB
Page 1: ...XL RAID SATA USB Data Backup System User s Guide ...
Page 4: ......
Page 9: ...7 Product Outline ...
Page 20: ......


