


NAS SYSTEM
Installation and Configuration Manual
98
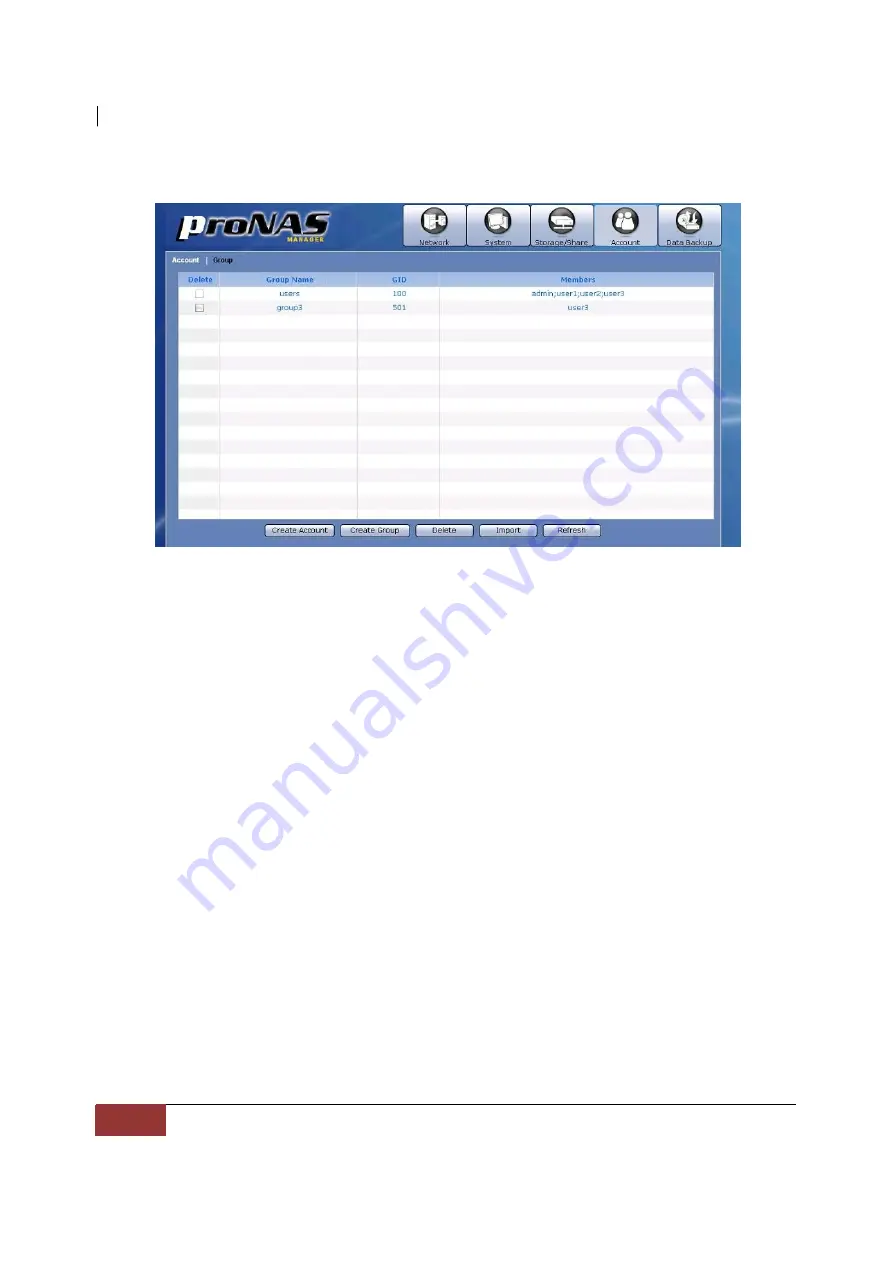
3.4.2 Group
Group Information and Options:
Delete
– Used to option to delete the selected group. After checking this option,
click the “Delete” button.
Group Name
– Shows the group account name.
GID
– Shows the group ID number.
Members
– Shows the group’s user account members.
Create Account
– Use this button to create a user account.
Create Group
– Use this button to create a group account.
Delete
– Use this button to delete the selected user account or group account.
Import
– Use this option to import large number of accounts instead of adding an
account one by one. The administrator can type multiple user accounts in the
Import Account input box.
Refresh
– Use this button to update the information displayed in the Account and
Group list.


