Page 5 to 6
Module Programming
TWO Valid Keys Required to program
Max 5 second intervals between each step. If 5 seconds is exceeded, vehicle will exit “on board”
programming and you must restart.
1)
Insert 1st valid Ign. key & turn to “ON” position until security light turns off. Remove 1st valid key. Within 5 secs.
2)
Insert 2nd valid Ign. key & turn to “ON” position until security light turns off. Remove 2nd valid key. Within 5 secs.
3) - Automatic vehicle:
Press & hold the programming button and then remote start the vehicle with the transmitter.
(keep holding the programming button)
- Manual vehicle:
Press & hold the programming button and then ap12v to the vehicle’s ignition wire with
a jumper wire. (keep holding the programming button)
4)
Green LED comes ON for 3 seconds and shuts off.
5)
Release the programming button & remove the jumper wire if applicable.
TESTING:
Wait (2) minutes after programming then start engine by valid ignition key.
Stop engine & remove key then remote start.
TROUBLESHOOTING:
A)
If LED stays on solid or flashes rapidly, reverse the TX and RX wire connections.
B)
If module fails to program or module was previously used on another vehicle then RESET the Module.
Max 5 second intervals between each step. If 5 seconds is exceeded, vehicle will exit “on board
programming and you must restart.
1)
Insert 1st valid Ign. key & turn to “ON” position until security light turns off. Remove 1st valid key. Within 5 secs.
2)
Insert 2nd valid Ign. key & turn to “ON” position until security light turns off. Remove 2nd valid key. Within 5 secs.
3)
Remote start the car with the transmitter.
4)
Green LED comes ON for 3 seconds and shuts off. Release the programming button.
TESTING:
Wait (2) minutes after programming then start engine by valid ign. key. Stop engine & remove key then remote start.
TROUBLESHOOTING:
A)
If LED stays on solid or flashes rapidly, reverse the TX and RX wire connections.
B)
If module fails to program or module was previously used on another vehicle then RESET the Module.
Reset Module
-
Disconnect the module from any power source.
-
Press and HOLD the integrated programming button.
-
onnect the module to the power source
-
Wait until the orange LED turns ON (should be 3 seconds)
-
Release the integrated programming button.
-
Reset is done.
While holding integrated programming button, c
Please Note:
Jumper
position
When a CANMAX400 is used in D2D with either Viper
™
, Clifford
™
or Python
™
,
the jumpers on the remote starter
MUST
be placed in the
Horizontal
position.
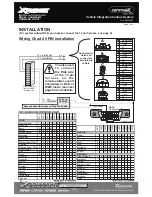
INSTALLATION GUIDE
MODEL: CANMAX400
FIRMWARE: FORD1
Rev.: 20091005
Vehicle Integration Canbus System
© 2009 Directed Electronics. All rights reserved.
Can Low: Fils torsadé Blanc
Can High: Fils torsadé Blanc/Orange
(Kick Pad Chauffeur mais pas sûre)
2
0
0
9
2
0
0
8
2
0
0
7
2
0
0
6
2
0
0
5
2
0
0
4
CHRYSLER
300/300C
K
M
M
M
¤
¤
¤
¤
¤
¤
¤
¤
¤
¤
¤
¤
D
¤
¤
¤
D
D
¤
Aspen
M
M
¤
¤
¤
¤
¤
¤
¤
¤
¤
¤
¤
¤
D
¤
¤
¤
D
D
¤
PT Cruiser
M
M
M
¤
¤
¤
¤
¤
¤
¤
¤
¤
¤
¤
D
¤
¤
¤
D
D
¤
Sebring Convertible
M
¤
¤
¤
¤
¤
¤
¤
¤
¤
¤
¤
¤
D
¤
¤
¤
D
D
¤
Sebring Sedan
M
M
¤
¤
¤
¤
¤
¤
¤
¤
¤
¤
¤
¤
D
¤
¤
¤
D
D
¤
DODGE
Avenger
M
¤
¤
¤
¤
¤
¤
¤
¤
¤
¤
¤
¤
D
¤
¤
¤
D
D
¤
Caliber
M
M
¤
¤
¤
¤
¤
¤
¤
¤
¤
¤
¤
¤
D
¤
¤
¤
D
D
¤
Charger
K
M
M
¤
¤
¤
¤
¤
¤
¤
¤
¤
¤
¤
¤
D
¤
¤
¤
D
D
¤
Dakota
M
M
M
M
¤
¤
¤
¤
¤
¤
¤
¤
¤
¤
D
¤
¤
¤
D
D
¤
Durango
M
M
M
M
M
¤
¤
¤
¤
¤
¤
¤
¤
¤
¤
¤
D
¤
¤
¤
D
D
¤
Magnum
K
M
M
M
¤
¤
¤
¤
¤
¤
¤
¤
¤
¤
¤
D
¤
¤
¤
D
D
¤
RAM
M
M
M
¤
¤
¤
¤
¤
¤
¤
¤
¤
¤
D
¤
¤
¤
D
D
¤
JEEP
Commander
K
M
M
¤
¤
¤
¤
¤
¤
¤
¤
¤
¤
¤
¤
D
¤
¤
¤
D
D
¤
Compass
M
M
¤
¤
¤
¤
¤
¤
¤
¤
¤
¤
¤
¤
D
¤
¤
¤
D
D
¤
Grand Cherokee
K
M
M
M
¤
¤
¤
¤
¤
¤
¤
¤
¤
¤
¤
D
¤
¤
¤
D
D
¤
Patriot
M
M
¤
¤
¤
¤
¤
¤
¤
¤
¤
¤
¤
¤
D
¤
¤
¤
D
D
¤
R
S
-
2
n
d
S
ta
rt
W
ir
e
A
c
ti
v
a
ti
o
n
(M
u
x
)
F
O
B
A
la
rm
(A
d
d
-O
n
)
A
rm
/D
is
a
rm
S
S
-
E
n
tr
y
S
ta
tu
s
D
ri
v
e
rs
D
o
o
r
P
in
S
S
-
E
n
tr
y
S
ta
tu
s
T
ru
n
k
/H
a
tc
h
P
in
S
S
-
E
n
tr
y
S
ta
tu
s
A
L
L
D
o
o
r
P
in
s
D
L
-
D
o
o
r
L
o
c
k
C
o
n
tr
o
l
P
K
-
B
y
p
a
s
s
T
ra
n
s
p
o
n
d
e
r
R
F
:
N
K
R
*(
S
e
e
N
o
te
)
P
K
-B
y
p
a
s
s
T
ra
n
s
p
o
n
d
e
r
R
F
:1
K
e
y
R
e
q
'd
R
S
-
B
ra
k
e
S
ta
tu
s
R
S
-
Ig
n
it
io
n
S
ta
tu
s
R
S
-
T
a
c
h
O
u
tp
u
t
M
C
-
K
e
y
s
e
n
s
e
S
ta
tu
s
M
C
-
R
A
P
S
h
u
t
O
ff
D
L
-
D
o
o
r
U
n
lo
c
k
A
L
L
d
o
o
rs
S
S
-
E
n
tr
y
S
ta
tu
s
F
ro
n
t
D
o
o
r
P
in
s
Vehicle Years & Installation Type*
D
L
-
T
ru
n
k
/
H
a
tc
h
R
e
le
a
s
e
D
L
-
D
is
a
rm
F
a
c
to
ry
S
e
c
u
ri
ty
D
L
-
A
rm
F
a
c
to
ry
S
e
c
u
ri
ty
D
L
-
D
o
o
r
U
n
lo
c
k
D
ri
v
e
r
P
ri
o
ri
ty


