


ENG
18
HRS 8525
Engl
ish
Initial Installation
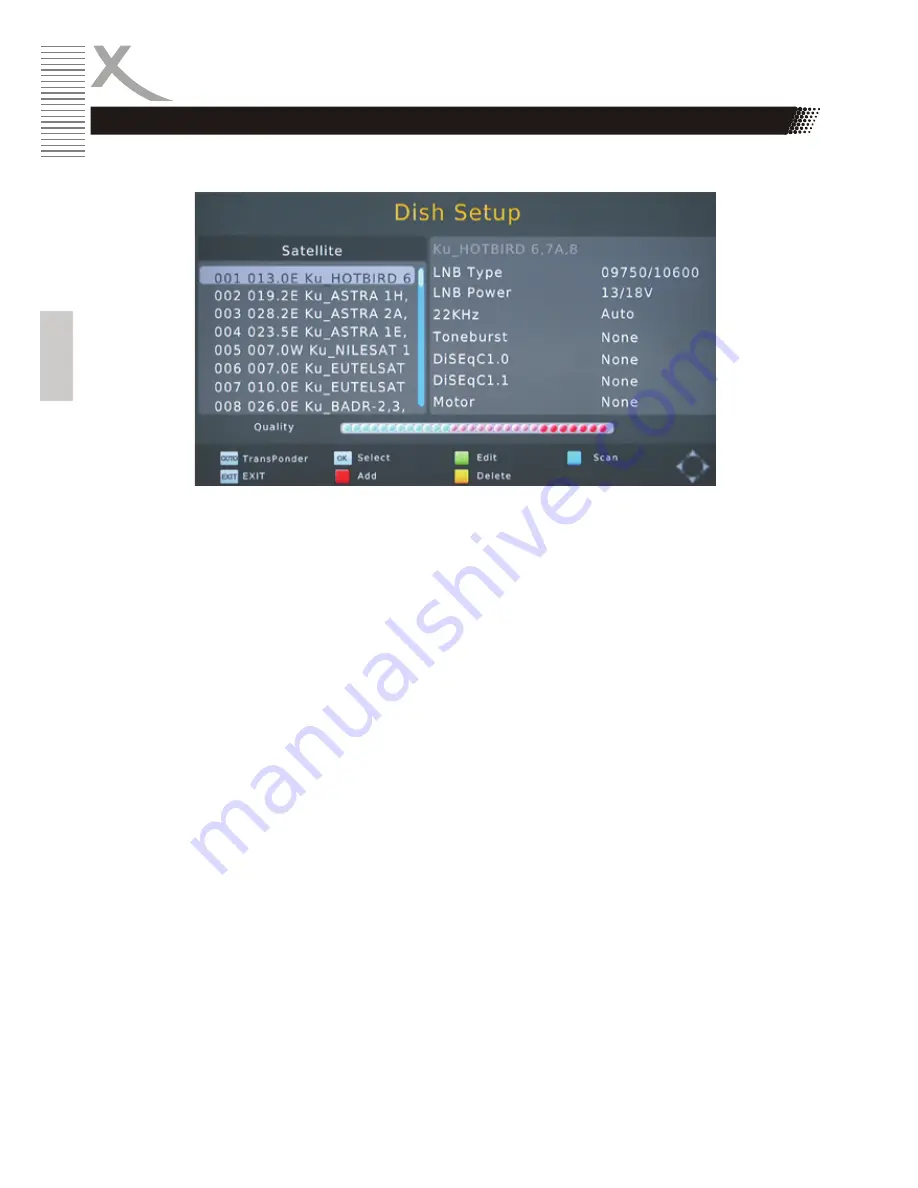
On the left side of the screen there is a list of satellites for which HRS8525 is pre programmed.
Settings of the chosen satellite is displayed on the right side.
Process:
•
Select the first satellite to be set up with CH+/CH-
•
Press the OK button. The chosen satellite is marked with a hook, comfirming this satellite will
be considered in the coming channel scan.
•
Press the button
VOL+
to access to right side.
•
Select the option with
CH+/-
and change the parameter with
VOL+/-
•
Press
Menu
after defining all parameters for this satellite to get back to the left side.
•
If your satellite system can receive signals from a number of satellites, select a further
satellite with
CH+/-.
Press OK and define the parameter on the right side.
•
Repeat this procedure for all satellites availabe for your receiver.
Notes:
•
After a correct setting, an approximate value of the signal quality will be shown on the lower
part of the menu.
•
If a satellite is missing on the list, press the
RED
button. A dialogue winter appears, input the
value for Longitude, East/West and frequency, and choose “Blind Scan” in the coming
channel scan. If you add a satellite to the list, there will be no display of the signal quality for
this satellite, in spite of correct setting. Signal quality could only be displayed for satellites
saved with pre installed transponder list.
•
Press GOTO to display the Transponder of the chosen satellite. Add new transponder with
the
RED
button and mark the transponder for channel scan with
OK
.
Dish Setup-Procedure
Summary of Contents for HRS 8525
Page 1: ...Bedienungsanleitung DE User Manual ENG HRS 8525 ...
Page 2: ......
Page 40: ......
Page 41: ...User Manual ENG HRS 8525 ...


