


2019-06-19
Copyright © 2019 XMOS Ltd, All rights reserved XM-013899-PC
VOCALFUSION DEV KIT - USER GUIDE
8
4. RECORDING THE CAPTURED AUDIO
Make sure the XVF3510 kit and speakers remain static during testing. If they are moved to new positions, the
adaptive algorithms will require a few seconds to adjust to the new audio environment.
1. Open a music player on the host PC (or RPi) and play a stereo music file.
Ensure that the default sound output device matches your evaluation setup. You should hear this music
through the powered speakers. Adjust the volume using either the music player or the speakers.
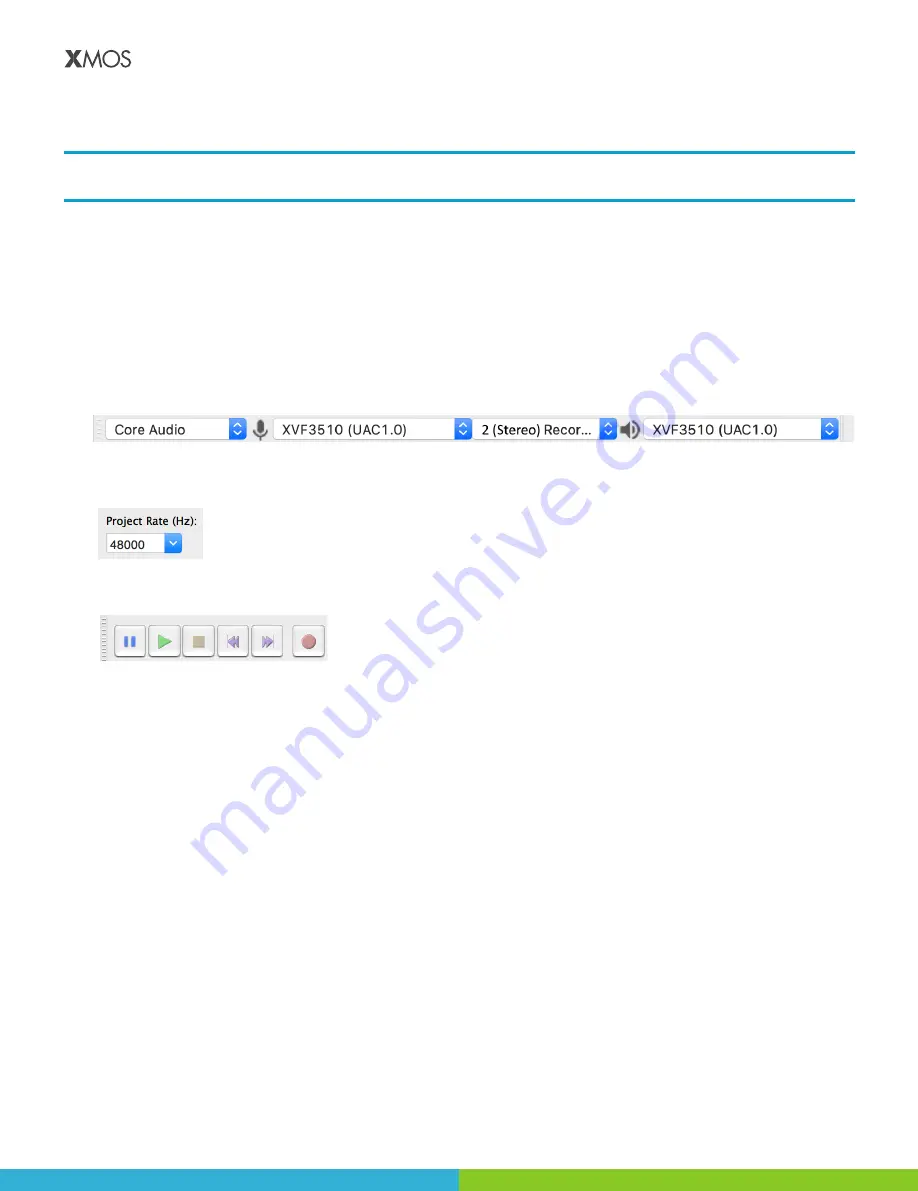
2. Open Audacity and configure it to communicate with the VocalFusion Dev Kit.
•
USB Adaptive: Input Device: XVF3510 (UAC1.0) Adaptive
•
I2S: Input Device: i2s_48k
3.
Make sure that the number of recording channels is set to
2 (Stereo)
in the Device Toolbar.
4. Set the Project Rate to 48000 Hz using the Audacity Selection Toolbar at the bottom of the screen.
5. Click the Record button (or press r) to start capturing the audio streamed from the XVF3510 device.
6. Start talking over the music content. Move around the room and continue talking.
Stop the music player.
7. Stop Audacity recording, click on the Stop button (or press space).
Audacity records a single audio channel streamed from the XVF3510 Kit which includes any extracted voice
signal. To listen to the recorded voice you need to split the processed audio into separate tracks
8. Click the dropdown menu next to Audio Track and select
Split Stereo To Mono
.


