36
ML40x Getting Started Tutorial
UG083 (v5.0) June 30, 2006
ML40x Demonstrations in Platform Flash
R
4.
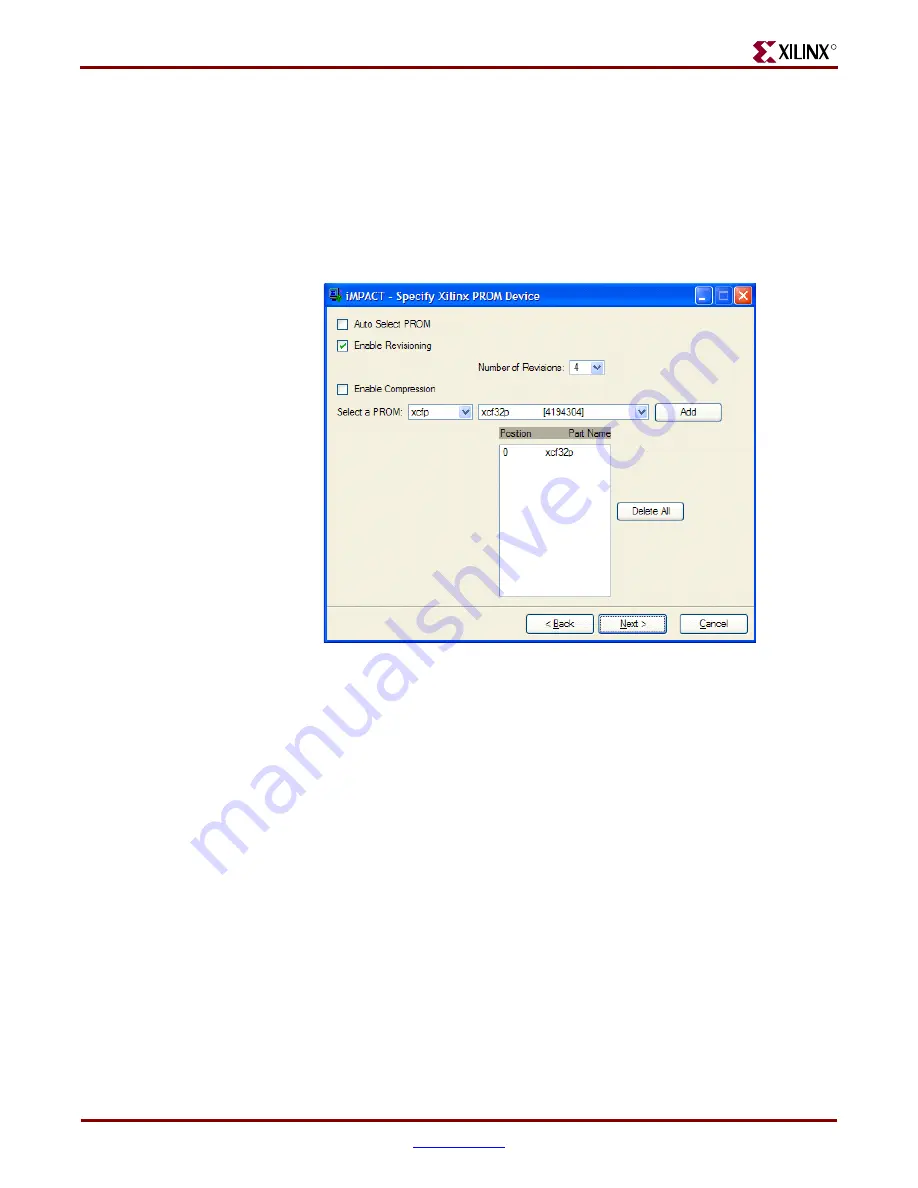
Under Specify Xilinx PROM Device (see
♦
Check the
Enable Revisioning
box
♦
From the Number of Revisions drop-down box, choose
4
♦
From the Select a PROM drop-down boxes, choose
xcfp
and
xcf32p
, then click
Add
Note:
The ML402 board supports only two revisions due to the larger bitstream size.
♦
Click
Next
5.
Under File Generation Summary, click
Finish
6.
Under
Add Device
→
Start adding device file to Revision: 0
, click
OK
7.
Under Add Device File, click
Add File
, then browse for
hello_char_lcd_hw0.bit
in your <
LAB_DIR
> directory, and click
Open
8.
Under
Add Device
→
Would you like to add…to Revision:0?
, click
No
9.
Under Add Device File, click
Add File
, then browse for
hello_char_lcd_hw1.bit
in your <
LAB_DIR
> directory, and click
Open
10. Under
Add Device
→
Would you like to add…to Revision:1?
, click
No
Note:
For the ML402 board, skip Steps 11-14 and go directly to Step 15.
11. Under Add Device File, click
Add File
, then browse for
hello_char_lcd_hw2.bit
in your <
LAB_DIR
> directory, and click
Open
12. Under
Add Device
→
Would you like to add…to Revision:2?
, click
No
13. Under Add Device File, click
Add File
, then browse for
hello_char_lcd_hw3.bit
in your <
LAB_DIR
> directory, and click
Open
14. Under
Add Device
→
Would you like to add…to Revision:3?
, click
No
15. Under
Add Device
→
You have completed … entry … Click 'OK' to continue
, click
OK
Figure 11:
Specify Xilinx PROM Device
UG0
8
3_16_022406


