background image

XIEGU

 Product Maintenance Manual                                                                   G90/G90S Portable Short-Wave Transceiver


XIEGU All Rights Reserved                                              Version No.: 1.0 2022-07                                                     Page 

42


of


48 


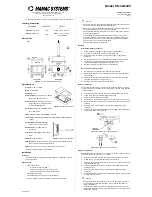
Fault phenomenon: the power of the whole section is small (only ≤ 10W)


Maintenance methods:


  Fault cause 1: this fault is generally caused by the reverse 

welding of the primary and secondary coils of the input 

transformer.


Transformer primary (near RD06 end): 2T


Transformer secondary (near RD16 end): 6T


  Fault cause 2: two feedback resistors are faultily welded or 

desoldered.


Feedback resistor


Secondary


Primary


Input transformer


Feedback resistor


Summary of Contents for G90

Page 1: ...Document No Short Wave Transceiver Series Maintenance Manual XIEGU Classification Level Confidential G90 G90S Version First Edition Private and Confidential Revision 0 Revision Date July 27 2022...

Page 2: ...XIEGU Product Maintenance Manual G90 G90S Portable Short Wave Transceiver XIEGU All Rights Reserved Version No 1 0 2022 07 Page 2 of 48 Contents...

Page 3: ...Device G90 G90S is a short wave transceiver with ZIF zero IF structure built in automatic antenna tuner and a transmitting power of 20W The block diagram of each part of the whole device is as follows...

Page 4: ...XIEGU Product Maintenance Manual G90 G90S Portable Short Wave Transceiver XIEGU All Rights Reserved Version No 1 0 2022 07 Page 4 of 48 Display unit...

Page 5: ...nd accurately grasp its signal flow 2 Be familiar with the status of each working voltage and be able to measure it accurately 3 Be able to operate the radio proficiently and combine various operation...

Page 6: ...oting methods Check according to the signal flow direction Check step by step along the signal flow to find abnormalities Judge based on voltage current According to the measured voltage or current qu...

Page 7: ...the whole device Therefore the maintenance method of the same fault on the single board and the whole device will be explained at the same time II Board Level Maintenance 2 1 Display Fault phenomenon...

Page 8: ...Method Display Checkpoint Blank display Check whether the FPC pedestal is faultily welded A Check whether there is any false welding at the MCU pins B This fault is mostly caused by the false welding...

Page 9: ...ther the pedestal is faultily welded D Fault Phenomenon Maintenance Method Display Checkpoint High current and hot MCU Check whether the voltage is 3 3V C If the voltage at point C 3 3V the LDO regula...

Page 10: ...ance Method Display Checking Area The hand microphone does not respond Check whether the components in this area are faultily welded E Check whether the elastic contacts in the RJ45 pedestal are in go...

Page 11: ...ntenance Method Display Checkpoint No communication between the device head and the host Check whether the MCU pins are faultily welded and whether the chip is damaged B Check whether the ESD diode is...

Page 12: ...er the other three pins of the encoder are short circuited by lap welding of adjacent pins Some of these fault points are very subtle such as PCB disconnection or rubbing of the solder mask on the PCB...

Page 13: ...GAI03 and the current version G90 SSIGBD V2 1 1 The old version is the same as the current version in terms of principle with only part of circuit units having been changed This manual is to explain i...

Page 14: ...er supply Q 3 3 Baseband unit power supply S 3 3 MCU power supply T 9 Public 9V power supply U 9T Transmitting 9V power supply V 9R Receiving 9V power supply W 5 Public 9V power supply 9T is only avai...

Page 15: ...Small signal board Checkpoint Inability to burn or start up the application 1 Check whether the 3 3V power supply is normal A1 2 Check whether the main MCU pins are faultily welded A2 3 Check whether...

Page 16: ...tion of local oscillator and the test data shall be roughly as follows Checkpoint Frequency MHz Amplitude Vpp Name A1 26 000 3 6 TXCO reference clock A2 14 27 5 9 Local oscillator output The upper end...

Page 17: ...fault in the IPX signal line for receiving or there may be a short circuit in the outlet socket for received signal of the base board Treatment Check whether the socket for receiving signal is short...

Page 18: ...ignal amplitude of checkpoints A3 A6 A7 A4 is normal in turn Area A6 collects the input of each segment of BPF Area A7 collects the output of each segment of BPF When PRE is turned on the measured dat...

Page 19: ...of components IC3 Check whether there is false welding of components IC4 Check whether there is false welding of components A10 Check whether the two diodes are broken down A11 According to previous...

Page 20: ...tting Parameters Parameter 1 Parameter 2 Parameter 3 Signal Source Frequency 14 271MHz Amplitude 20dBm Oscilloscope Time base 50ns Y axis 100mV X10 gear After PRE is turned on the measured data at eac...

Page 21: ...the mainboard of the new version G90 SSIGBD V2 1 1 the fault is mainly caused by the damage of radio frequency switch AS179 or the abnormal control level of AS179 Check whether the control level can n...

Page 22: ...nd signal of circuit Q If the amplitude difference between the two checkpoints exceeds 10mV it means that the baseband signal is unbalanced and further inspection is required as follows Fault Phenomen...

Page 23: ...be as follows The working voltage of IQ amplifier should be 5V Checkpoint Frequency Amplitude mVpp Name PIN1 1kHz 350 Baseband signal of circuit I PIN7 1kHz 350 Baseband signal of circuit Q A18 1kHz 3...

Page 24: ...power and the maintenance method is as follows Instrument settings Switch the test switch to transmission state set the radio station to USB mode set the power to 20W and unplug the TX small signal ca...

Page 25: ...0 2022 07 Page 25 of 48 Fault phenomenon There is a bulge in the center of the spectrum display area Maintenance methods Fault cause 1 IQ signal is unbalanced The maintenance method is the same as tha...

Page 26: ...aintenance Method Small signal board Voltage V Earphones switch silently Checkpoint A26 horn state 0 Checkpoint A26 earphone state 3 3 2 Check the welding of the following points Fault Phenomenon Main...

Page 27: ...rameter 3 Oscilloscope Time base 1ms Y axis 100mV X10 gear Under the receiving state the condition of checkpoint A32 measured is as follows Checkpoint Voltage V Name A32 0 94 Operational amplifier ref...

Page 28: ...1MHz Amplitude 40dBm Oscilloscope Time base 1ms Y axis 200mV X10 gear After PRE is turned on the measured data at each checkpoint shall be as follows Checkpoint Voltage V Name A34 8 9 Audio power ampl...

Page 29: ...Name A36 1 1kHz 200 Audio signal voltage A36 2 1kHz 200 Audio signal voltage 3 Measure whether the two welding points of A36 are connected to the lower ends of the two inductors of A37 with the on of...

Page 30: ...Page 30 of 48 Fault phenomenon Transmit when the machine is turned on accompanied by a long prompt tone Maintenance methods Fault cause CW pedestal is partially short circuited Check whether the pins...

Page 31: ...line input Maintenance methods Check the welding of the following points Fault Phenomenon Maintenance Method Small signal board Checkpoint The line input has no power Check whether there is any false...

Page 32: ...wave band voltage output Maintenance methods Check the welding of the following checkpoints Fault Phenomenon Maintenance Method Small signal board Checkpoint There is no wave band voltage output Chec...

Page 33: ...serve whether the pins of the power input transformer are welded reversely The output of the transformer should be the same winding corresponding to the welding input and cannot be connected in revers...

Page 34: ...nents in each point Fault Phenomenon Maintenance Method Small signal board Checkpoint There is no wave band voltage output Check whether there is any false welding B1 B2 B3 B4 2 Check whether componen...

Page 35: ...ircuits 1 Disconnect the transmitting small signal line 2 Press release the hand microphone PTT button and the measurement data of each checkpoint shall be as follows Checkpoint Voltage V Name B5 9T T...

Page 36: ...henomenon low startup current Maintenance methods 1 Check the model of the two regulators to prevent wrong loading of materials 2 Check the voltage at each point Checkpoint Voltage V Name B7 9 Interna...

Page 37: ...ro 3 First turn up potentiometers B10 and B11 by 650mA respectively and observe whether the change of current is linear during adjustment 4 Then adjust potentiometer B9 to increase the current by 350m...

Page 38: ...than the above standard voltage it indicates that there is a problem with the power tube grid power supply or there is a short circuit in the power tube grid 3 1 Power off the whole device and unplug...

Page 39: ...transmitting starts the power supply exceeds 10A Maintenance methods Power off the whole device and check whether the winding of the output transformer is short circuited with the copper tube of the...

Page 40: ...small signal line connect the test hand microphone and switch the test tooling to the transmitting state Checkpoint Frequency MHz Amplitude Vpp Name B18 14 27 0 62 Power amplifier input signal B19 14...

Page 41: ...following situations Comprehensive Situation Fault Point B23 has signal No signal behind input terminal B25 has no signal Low or high current Input terminal relay is broken B23 has signal There is vol...

Page 42: ...is small only 10W Maintenance methods Fault cause 1 this fault is generally caused by the reverse welding of the primary and secondary coils of the input transformer Transformer primary near RD06 end...

Page 43: ...usted to the minimum Maintenance methods Power out of control this fault is generally caused by the false welding of standing wave bridge unit or FPC socket unit Check the welding condition The standi...

Page 44: ...e is controlled by the control chip ULN2803 output 2 Voltage of output control pin corresponding to ULN2803 Pin voltage corresponding to each band output of ULN2803 Selected Voltage Unselected Voltage...

Page 45: ...lt Phenomenon Maintenance Method Base board Checkpoint Multi frequency range adhesion Check whether there is any pin connected to tin B27 Check whether there is any pin connected to tin B28 All 0402 p...

Page 46: ...adjust Maintenance methods 1 Check whether all chips relays and coils in the antenna tuner unit are faultily welded 2 Confirm whether the magnetic ring and number of turns of the antenna tuner coil a...

Page 47: ...G90 G90S Portable Short Wave Transceiver XIEGU All Rights Reserved Version No 1 0 2022 07 Page 47 of 48 Revision Record Prepared Revised by Revision Content Version No Date Yan Huan Preparation for t...

Page 48: ...XIEGU Product Maintenance Manual G90 G90S Portable Short Wave Transceiver XIEGU All Rights Reserved Version No 1 0 2022 07 Page 48 of 48 Temporarily ended...

Reviews: