iD4 Series User Manual
Rev.1.0
15
3.3 Peripherals Connection
3.3.1 Interface Cable Connection
1.The standard for the printer’s interface cable shows as follows:
- USB A-Type cable
- USB B-Type cable
- RS-232C cable
- RJ45 cable
2.Based on your own need, follow the instructions to connect the cable.
1) Make sure the printer’s power is off.
2) Please plug in the cables.
-Insert the USB A-Type cable into the USB(type A) interface.
-Insert the USB B-Type cable into the USB(type B) interface.
-Insert the RS-232C cable into the serial interface.
-Insert the RJ45 cable into the ethernet interface.
3.3.2 Bluetooth Connection
PDA with Bluetooth interface, laptop and other information terminals can drive the printer. Instructions show as
follows:
1. Power on the printer.
2. Primary device searches for outer Bluetooth devices.
3. If there are other Bluetooth devices, select printer’s name.
4. Finish pairing.
If you need more detailed information of pairing methods, please refer to the instructions of Bluetooth device.
After pairing, primary devices with virtual Bluetooth interface (smart phone, tablet, pocket PC, palm, notebook)
can drive the printer iD4P or iD4S to print labels through virtual Bluetooth interface.
Note: The original code is 0000.
Summary of Contents for iD4P
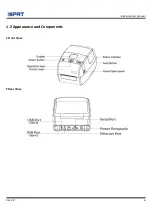
Page 9: ...iD4 Series User Manual Rev 1 0 6 1 2 Appearance and Components Front View Rear View...
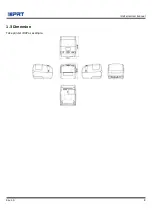
Page 11: ...iD4 Series User Manual Rev 1 0 8 1 3 Dimension Take printer iD4P as example...
Page 20: ...iD4 Series User Manual Rev 1 0 17 Figure 2 Left...
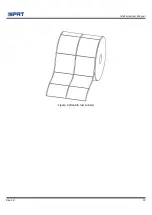
Page 22: ...iD4 Series User Manual Rev 1 0 19 Figure 4 Double row Labels...
Page 23: ...iD4 Series User Manual Rev 1 0 20 Figure 5 Left...
Page 26: ...iD4 Series User Manual Rev 1 0 23 Figure 8 aimed at blackmark s position...
Page 39: ...iD4 Series User Manual Rev 1 0 36 Ethernet Port PIN SIGNAL NAME 1 TX 2 TX 3 RX 4 5 6 RX 7 8...
Page 45: ...iD4 Series User Manual Rev 1 0 42 3 Click Get Status and printer status will show in the above...
Page 49: ...iD4 Series User Manual Rev 1 0 46 7 Click Ethernet then click Get to gain the relevant values...
Page 50: ...iD4 Series User Manual Rev 1 0 47 8 Click WIFI then set up the name password and so on...
Page 54: ...iD4 Series User Manual Rev 1 0 51 2 Click About showing the basic information of this utility...
Page 62: ...iD4 Series User Manual Rev 1 0 59 2 According to different needs set up the page...
Page 63: ...iD4 Series User Manual Rev 1 0 60 Click Stock Name and choose the paper type...
Page 66: ...iD4 Series User Manual Rev 1 0 63...
Page 67: ...iD4 Series User Manual Rev 1 0 64 Click Preset Name and back to the default settings...
Page 68: ...iD4 Series User Manual Rev 1 0 65 Click Manage and change the settings...
Page 69: ...iD4 Series User Manual Rev 1 0 66 3 Click Graphics and edit the pictures...
Page 70: ...iD4 Series User Manual Rev 1 0 67 4 Click Stock...
Page 71: ...iD4 Series User Manual Rev 1 0 68 Set up the print method...
Page 72: ...iD4 Series User Manual Rev 1 0 69 Set up the media type...
Page 73: ...iD4 Series User Manual Rev 1 0 70 Click Feed Mode Mode and choose the method of media handing...
Page 76: ...iD4 Series User Manual Rev 1 0 73 3 Click Ports and choose the port needed...
Page 84: ...iD4 Series User Manual Rev 1 0 81 3 Choose Blank Template then click Next...
Page 87: ...iD4 Series User Manual Rev 1 0 84 6 Edit the side edges then click Next...
Page 88: ...iD4 Series User Manual Rev 1 0 85 7 Choose the item shape then click Next...
Page 89: ...iD4 Series User Manual Rev 1 0 86 8 Edit the template size then click Next...
Page 93: ...iD4 Series User Manual Rev 1 0 90 3 Click the blank showing the code...
Page 95: ...iD4 Series User Manual Rev 1 0 92 5 Click the icon of character then enter the text...
Page 96: ...iD4 Series User Manual Rev 1 0 93 6 Click the icon of picture then edit the pictures...

