Xerox WORKCENTRE 5735 Getting Started Manual Download Page 20

Sending a Fax from the PC

WorkCentre™ 5735/5740/5745/5755/5765/5775/5790
Getting Started

26

Sending a Fax from the PC

1.

Ensure that the correct Xerox print driver has been installed on your PC and the Fax from PC option 
is available. To install the print drivers refer to the 

System Administrator Guide

.

2.

Open the document to be faxed. Click 

File > Print 

and select the Xerox device from the list of 

printers displayed.

3.

Select the 

Properties

 button to display the print driver printing preferences.
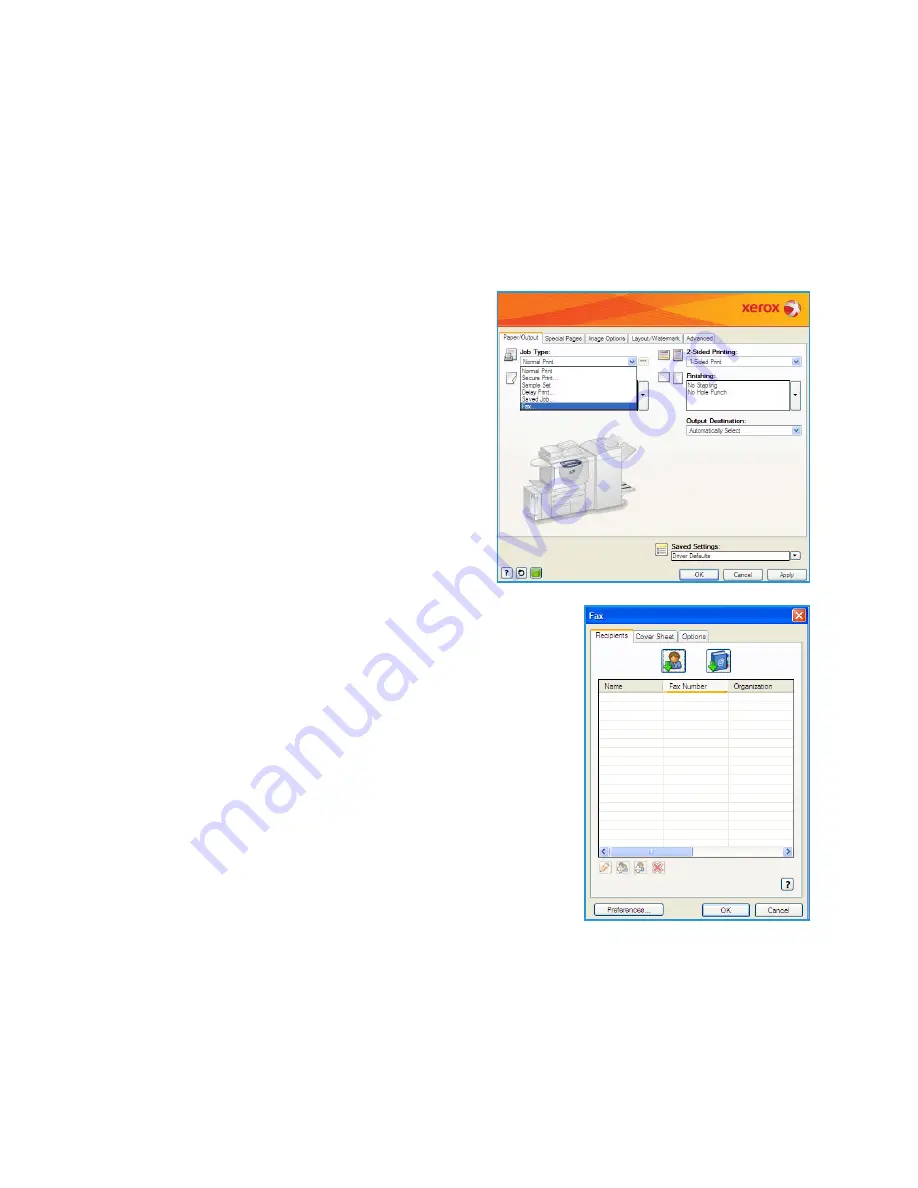
4.

Select 

Fax 

as the 

Job Type 

on the 

Paper/Output


screen of the print driver.

The 

Fax 

screen will automatically open. This screen 

displays the recipients for the current fax. You can 
now 

Add Fax Recipients

 or 

Add From Phonebook

.

5.

To add a new recipient select the 

Add Recipient

 button.

6.

Input the name and fax number of the recipient. Complete the 
additional information.

Select the 

Save to Personal Phonebook 

option if you want to 

add the recipient to your Personal Phonebook.

The Fax window has various tabs that contain options and 
properties.

Use  the 

Cover Sheet 

tab to add a covering letter to your 

fax.

Use  the 

Options

 tab to enable a confirmation sheet, 

choose a specific send speed or select the resolution for 
the fax. You can also select the 

Send Time

 option to enter a 

specific time to transmit the fax.

7.

Choose the options required for your fax job and click 

OK

 to 

send the document. Your fax will be submitted to the device job 
list ready to be transmitted.

For information about additional 

Fax from PC 

features, refer to 

Fax from PC Options 

on page 111 of 

Fax

.

Summary of Contents for WORKCENTRE 5735

Page 1: ...Version 2 0 December 2010 Xerox WorkCentre 5735 5740 5745 5755 5765 5775 5790 Getting Started...

Page 2: ...ot be reproduced in any form without permission of Xerox Corporation XEROX and XEROX and Design are trademarks of Xerox Corporation in the United States and or other countries Changes are periodically...

Page 3: ...17 Energy Saver 18 Loading Paper 19 Loading Documents 20 Making Copies 21 Printing a Document 22 Sending a Fax 23 Server Fax 24 Internet Fax 25 Sending a Fax from the PC 26 Workflow Scanning 27 Sendin...

Page 4: ...Device Overview on page 11 All features and functions described within the User Guide relate to a fully configured WorkCentre and may not be available on your device If you require further information...

Page 5: ...city paper trays Trays 3 and 4 are dedicated trays used for 8 5x11 or A4 size media Offset Catch Tray Delivers output collated or uncollated Each set or stack will be offset from the previous to enabl...

Page 6: ...high capacity paper trays Paper Tray 5 high capacity platform feed paper tray Paper Tray 6 Post Process Inserter optional insert tray which can be fitted with the High Volume Finisher Envelope Tray t...

Page 7: ...rd Security kit provides additional security features such as image overwrite options Xerox Secure Access provides a card reading device to restrict access to the device Color Scanner used to scan in...

Page 8: ...Basic Office Finisher stacks collates staples and offsets your output Office Finisher stacks collates staples and offsets your output Hole punch kits are also available for this finisher High Volume...

Page 9: ...to scan in color factory fit Color Scanning Enablement kit a pin code is provided which enables color scanning capabilities Network Accounting enables the tracking of device usage for Print Copy and...

Page 10: ...us Use to check the device status the billing meters the status of consumables or print the user documentation and reports Use this button also when accessing the Tools mode Stop Stops the job in prog...

Page 11: ...propriate to its configuration If Quick Restart is selected and confirmed the device will restart Any copy jobs in the job list will be deleted print jobs in the job list are recovered If Power Down i...

Page 12: ...anel The Power Down options are displayed 2 Select Energy Saver The device will immediately enter Low Power mode If Sleep mode has been configured the device will then enter Sleep mode after a specifi...

Page 13: ...osition for the paper size Adjust each guide by squeezing the clamp mechanism and sliding the guide to just touch the edge of the media If loading the Bypass Tray locate the media against the front of...

Page 14: ...tray Adjust the guide to just touch the documents Or 2 Lift up the document feeder Place the document face down onto the document glass and register it to the arrow at the top right rear corner Close...

Page 15: ...inals from the document feeder or document glass when scanning has completed Note The Copy job enters the job list ready for printing 7 Select Job Status to view the job list and check the status of y...

Page 16: ...t the image quality The Layout Watermark tab has various options to add watermarks to pages change image orientation landscape or portrait and enable booklet and multi up printing The Advanced tab con...

Page 17: ...x address book Select an entry from the Address Book to add to the Recipient list Continue adding recipients as required and select Close to return to the previous screen 5 If required select Add to a...

Page 18: ...select an entry from the Fax Directory to add to the Recipient list 5 Select Add to add the number to the Recipient list 6 Select the required features for your fax job using the touch screen 7 Press...

Page 19: ...All the recipients are displayed in the Recipient list If an address book has been setup enter the name of the recipient and select Search A list of matching recipients is displayed Select the E mail...

Page 20: ...Add Fax Recipients or Add From Phonebook 5 To add a new recipient select the Add Recipient button 6 Input the name and fax number of the recipient Complete the additional information Select the Save t...

Page 21: ...to the settings in the template 5 Select the required features for your scanning job using the touch screen If required modify the template settings from the options on the Workflow Scanning Advanced...

Page 22: ...s to the Recipient list Continue adding E mail addresses until all the recipients have been added to the list then select Close All the recipients are displayed in the Recipient list Note If E mail en...

Page 23: ...job list and check the status of your job For information about additional E mail features refer to Sending an E mail on page 171 of E mail Output Color is used to replicate the original colors or to...

Page 24: ...ayed 4 Program the required job features 5 Select the Job Assembly tab and then Save Job for Reprint 6 Select the option required Copy Save is used to store the job and print a copy of the job Save On...

Page 25: ...o print and then store the selected job with the new settings Save is used to save the selected job without printing The job will be saved in place of the original job with any new settings selected I...

Page 26: ...ser Name If a password is required select the Next button and use the keyboard to enter your Password Select the Enter button 3 If an accounting system is in use on the device you may also need to ent...

Page 27: ...es Powerful documentation features for example Booklet Creation Special Pages Build Job and Annotations To maximize job productivity use the Job Status button to access the Active jobs list and manage...

Page 28: ...n a message actually instructs you to do so To replace a Customer Replaceable Unit follow the instructions on the touch screen or use the instructions provided with the consumable Staple Cartridges an...

Page 29: ...document feeder is not overloaded a maximum of 75 documents 35 model or 100 documents other models can be loaded Ensure that the edge guides are adjusted to touch the sides of the originals The devic...

Page 30: ...instructions displayed on the screen to remove the jammed paper 2 Ensure that all jam clearance handles and levers are returned to their correct positions The red flashes behind the jam clearance hand...

Page 31: ...d by the documentation that is supplied with the device User Guide the user guide is divided into several sections and provides instructions and information about all the features on the device How To...

Page 32: ...ontents of the Internet Services site Click Help to take you to the Xerox online support web site Note To find out the IP Address of your device print a configuration report For instructions refer to...

Reviews: