


Machine Parts and Connection Ports
Xerox Phaser 3320DN/3320DNI
System Administrator Guide
13
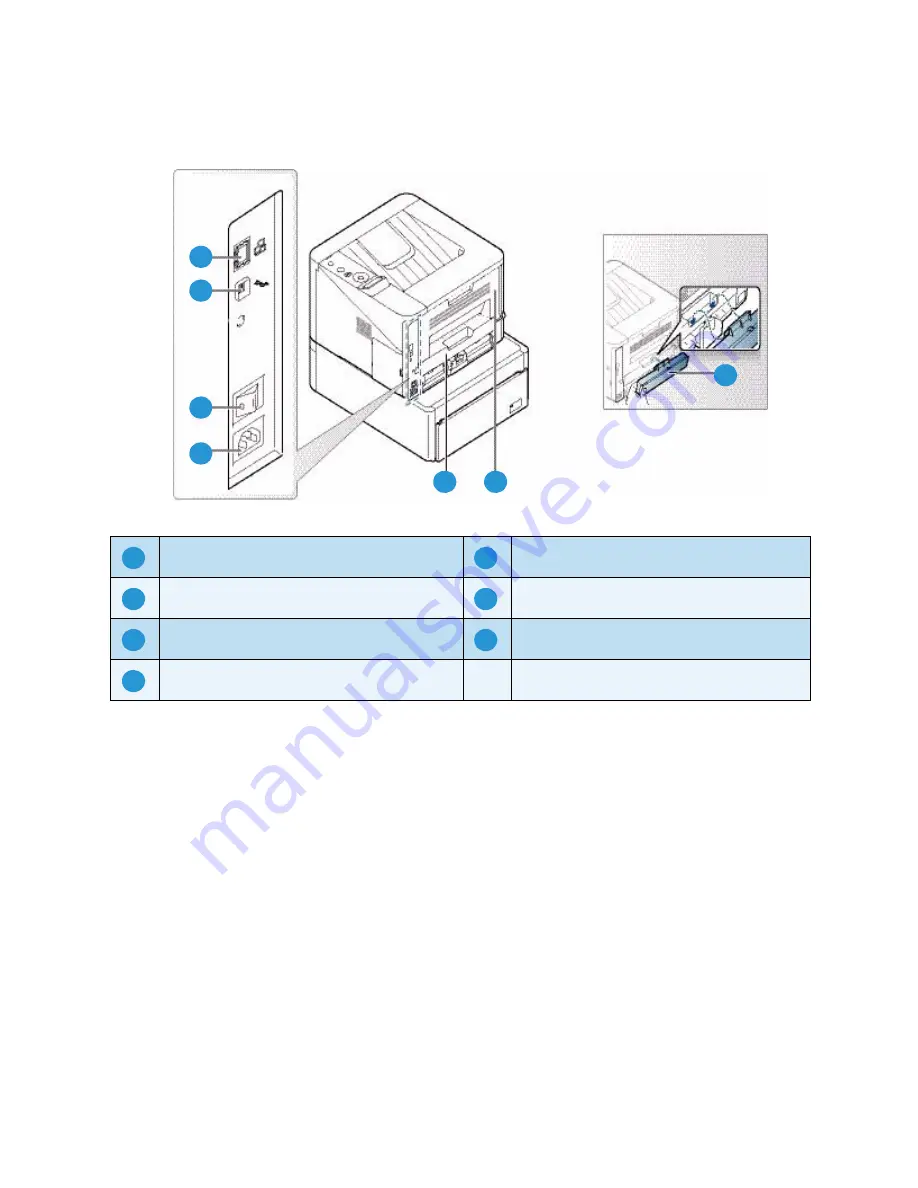
Rear View
Initial Connection
The
On/Off switch
, the
power outlet
and the
Network Port
are at the rear of the machine. Follow these
steps to physically connect your machine to the network:
1.
Connect the Power Cord to the machine and a suitable power supply outlet. The power cord must
be plugged into a grounded power socket.
2.
Connect the Network Cable if required. The Phaser 3320DNI will also connect to a wireless
network, if available, when powered on.
Note:
If you choose a wireless connection for your Phaser 3320DNI printer, you cannot use a
wired connection at the same time.
Network Port
Duplex Unit
USB Port
Rear Door
Power Switch
Paper Tray Rear Cover
Power Receptacle
1
2
3
4
5
6
7
1
5
2
6
3
7
4
Summary of Contents for Phaser 3320DN
Page 1: ...Version 1 0 February 2012 Xerox Phaser 3320DN 3320DNI System Administrator Guide...
Page 6: ...Xerox Phaser 3320DN 3320DNI System Administrator Guide 6...
Page 22: ...CentreWare Internet Services Xerox Phaser 3320DN 3320DNI System Administrator Guide 22...
Page 78: ...Display Network Settings Xerox Phaser 3320DN 3320DNI System Administrator Guide 78...
Page 106: ...Connectivity Xerox Phaser 3320DN 3320DNI System Administrator Guide 106...
Page 108: ...Xerox Phaser 3320DN 3320DNI System Administrator Guide 108...
Page 112: ...Xerox Phaser 3320DN 3320DNI System Administrator Guide 112...


