background image


Index


10 


Print Provider Guide


Pricing 


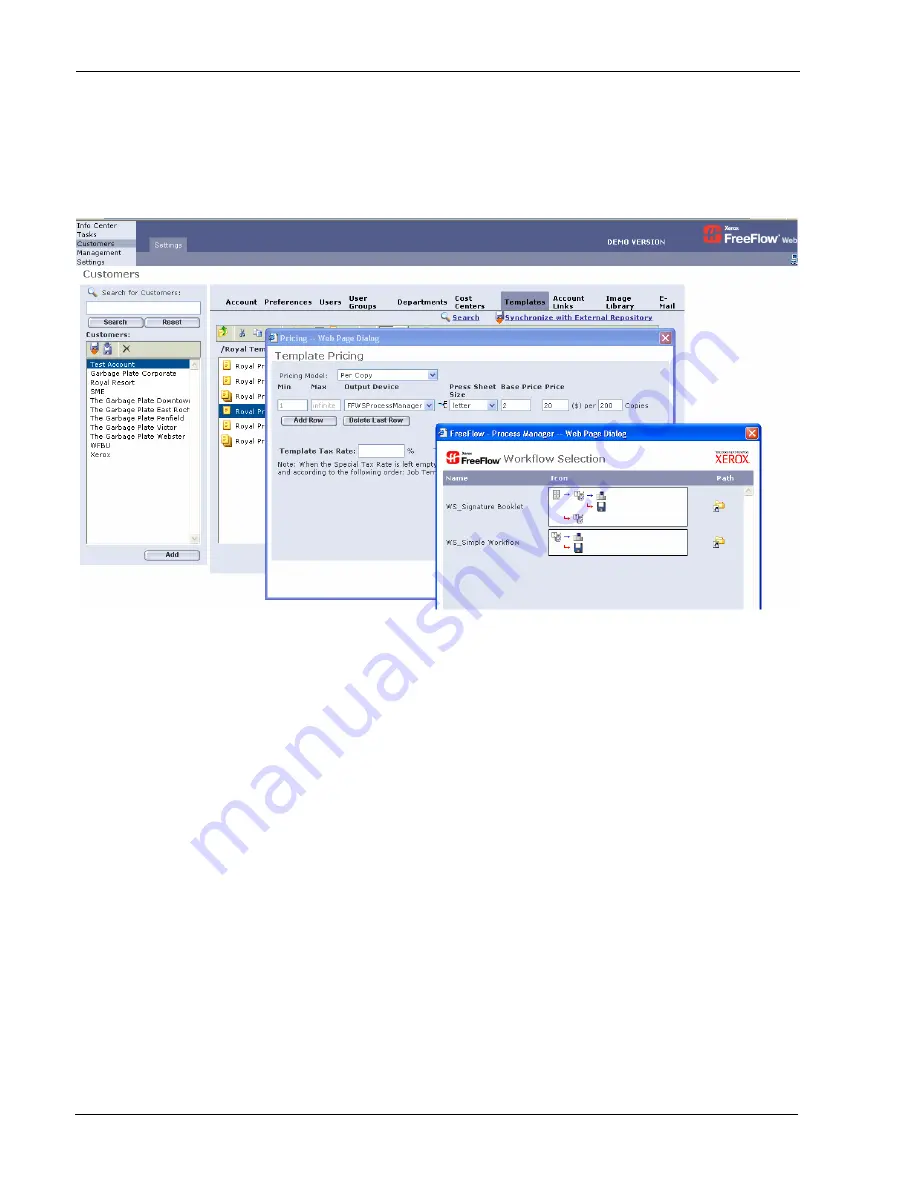
Figure 6: Set Pricing at a Template Level 


Pricing can be pre-set at either a Customer/Template Level or Job Type/Job Subtype 
1


Select


either


Templates


from


Customers


/


Settings


or


Job


Subtype


from


Management


/


Job


Type


Library


and


select


Pricing


2


Select


the


Add


Row


button,


select


Per


Copy


for


Pricing


Model,


and


enter


appropriate


prices


3


Select


the


Xerox


FreeFlow


Printer


from


the


Output


Device


drop


down


menu.


This


was


the


output


device


previously


set

up.


4


Select


the


Printer


Name


from


the


Printer


Selection


dialog


5


Select


OK


Note:


any


order


for


the


specific


customer


template


of


a


NewJob


or


Template


created


with


this


Job


Type


will


automatically


have


this


device


selection


designated


in


the


Tasks/Production/Job


Info/Device


Summary of Contents for FreeFlow 701P45570

Page 1: ...Quick Print Integration for FreeFlow Web Services Version 5 0 July 2006 701P45570...

Page 2: ...LTD all rights reserved Hummingbird NFS Solo is a registered trademark of Hummingbird Communications Ltd Imaging Technology provided under license by Accusoft Corporation ImageGear 1996 2005 by AccuSo...

Page 3: ...Printer in FreeFlow Printer Administration 1 Refer to the Xerox FreeFlow Printer Operator and Administrator Guide to carry out these steps Before you start create the Printer s in Printer Administrato...

Page 4: ...name will appear 6 Press Permissions button and make sure that everyone has Full Control 7 Press OK to save changes The Folder properties window regains the focus 8 Press OK to save changes 9 Open My...

Page 5: ...evices tab 11 Select Add in Output Devices pane 12 In the Add Device dialog Enter Device Name Device Group select Digital and Machine Type select Xerox FreeFlow Printer 13 Select OK 14 Optional change...

Page 6: ...e supports multi queue system checkbox 4 Select Folder Type Network 5 Select Application Xerox FreeFlow Printer this could be the only selection 6 Type the shared Cold Folder directory name in Folder...

Page 7: ...reeFlow Printer Administration to carry out the following steps 1 Select Device supports multi queue system link 2 Select Get Printers button The printers previously set up will display 3 Select Selec...

Page 8: ...ess this folder to complete the production print 5 The approval is successful when the icon appears in the Status column 6 A message will be shown to the user saying that the files are stored in the p...

Page 9: ...ory or catalog ready job 1 Select Tasks Production menu Choose Job in Approval queue 2 Press on Approve button 3 The approval is successful when the icon appears in the Status column Jobs that fail in...

Page 10: ...2 Select the Add Row button select Per Copy for Pricing Model and enter appropriate prices 3 Select the Xerox FreeFlow Printer from the Output Device drop down menu This was the output device previous...

Page 11: ...roduction job ticket produced by an order from the FreeFlow Web Services the device settings alert message will occur This can be corrected at the QuickPrint interface Select OK and attend to this at...

Page 12: ......

Reviews: